> For the complete documentation index, see [llms.txt](https://hlddocs.lookingglassfactory.com/llms.txt). Markdown versions of documentation pages are available by appending `.md` to page URLs; this page is available as [Markdown](https://hlddocs.lookingglassfactory.com/apps-and-tools/hld-author.md).

# HLD Author

[**Access HLD Author here**](https://hldauthor.lookingglassfactory.com/)

{% hint style="info" %}
This web version of HLD Author has replaced our desktop app version. For the previous version, see [here](/apps-and-tools/hld-author/hld-author-desktop-legacy.md)
{% endhint %}

HLD Author is a web app for preparing content for Looking Glass Hololuminescent Displays. Use it to import source media, frame it on a 9:16 canvas, and export an MP4 for the Demo Media Player, BrightSign, or standard video playback.

This guide walks through the basic workflow:

* Open HLD Author in Chrome
* Import videos, images, or 3D media
* Edit the content (chroma key, add a shadow, etc.)
* Export the right MP4 for your playback destination

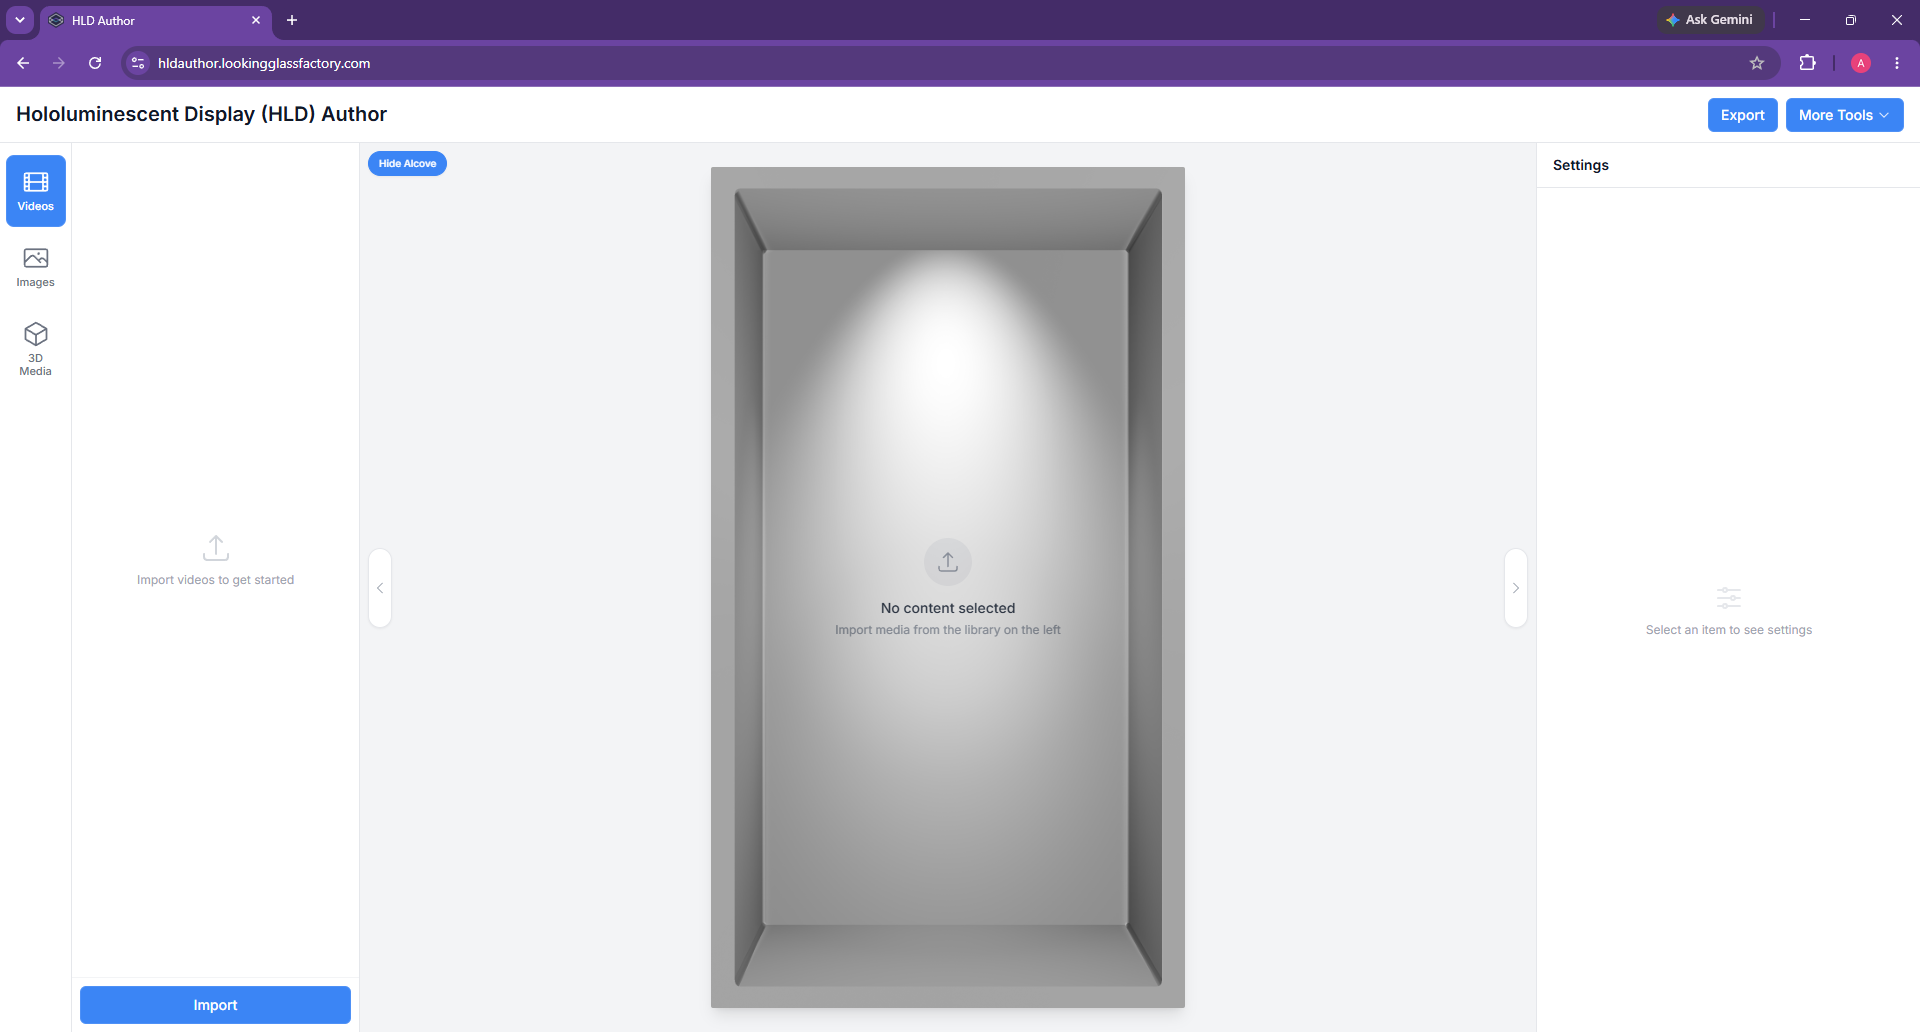
<figure><img src="/files/d55uZZWJS3FeybX9oPBF" alt=""><figcaption><p>The main HLD Author workspace</p></figcaption></figure>

<figure><img src="/files/c9iOfQCNhVrT1i8EbZYP" alt=""><figcaption></figcaption></figure>

## What you'll need

* Chrome 130 or newer, required for HLD (HEVC) exports and recommended for WebGPU support
* Source media to import
* A playback destination, such as the included Demo Media Player, a BrightSign player, or another standard video player

Supported source media:

| Media type | Supported formats             |
| ---------- | ----------------------------- |
| Videos     | MP4, MOV, WEBM                |
| Images     | JPG/JPEG, PNG, WEBP, GIF, SVG |
| 3D Media   | GLB, GLTF, PLY, OBJ, STL, FBX |

{% hint style="info" %}
HLD Author chooses the video codec from the output target you select during export. HLD 16", HLD 27", and HLD 86" Demo Media Player outputs use rotated HEVC, while musubi, BrightSign, and General outputs use portrait H.264.
{% endhint %}

<figure><img src="/files/c9iOfQCNhVrT1i8EbZYP" alt=""><figcaption></figcaption></figure>

## Open HLD Author

Open [HLD Author](https://hldauthor.lookingglassfactory.com/) in Chrome 130 or newer.

The main workspace includes:

* **Videos**, **Images**, and **3D Media** tabs in the left media library
* A 9:16 canvas in the center
* A **Show Alcove** or **Hide Alcove** button for the alcove framing reference
* A contextual **Settings** panel on the right with different options to edit imported media
* **Export** button in the top toolbar to export for different target deployment platforms
* **More Tools** button in the top toolbar to access other content creation resources

<figure><img src="/files/c9iOfQCNhVrT1i8EbZYP" alt=""><figcaption></figcaption></figure>

## Import your source media

1. Choose the tab that matches your source: **Videos**, **Images**, or **3D Media**.
2. Click **Import**.
3. Select one or more supported files from your computer.
4. Select an imported thumbnail to load it onto the canvas.

GLB/GLTF and FBX files can include animation clips, which appear in the Settings panel when available.

{% hint style="info" %}
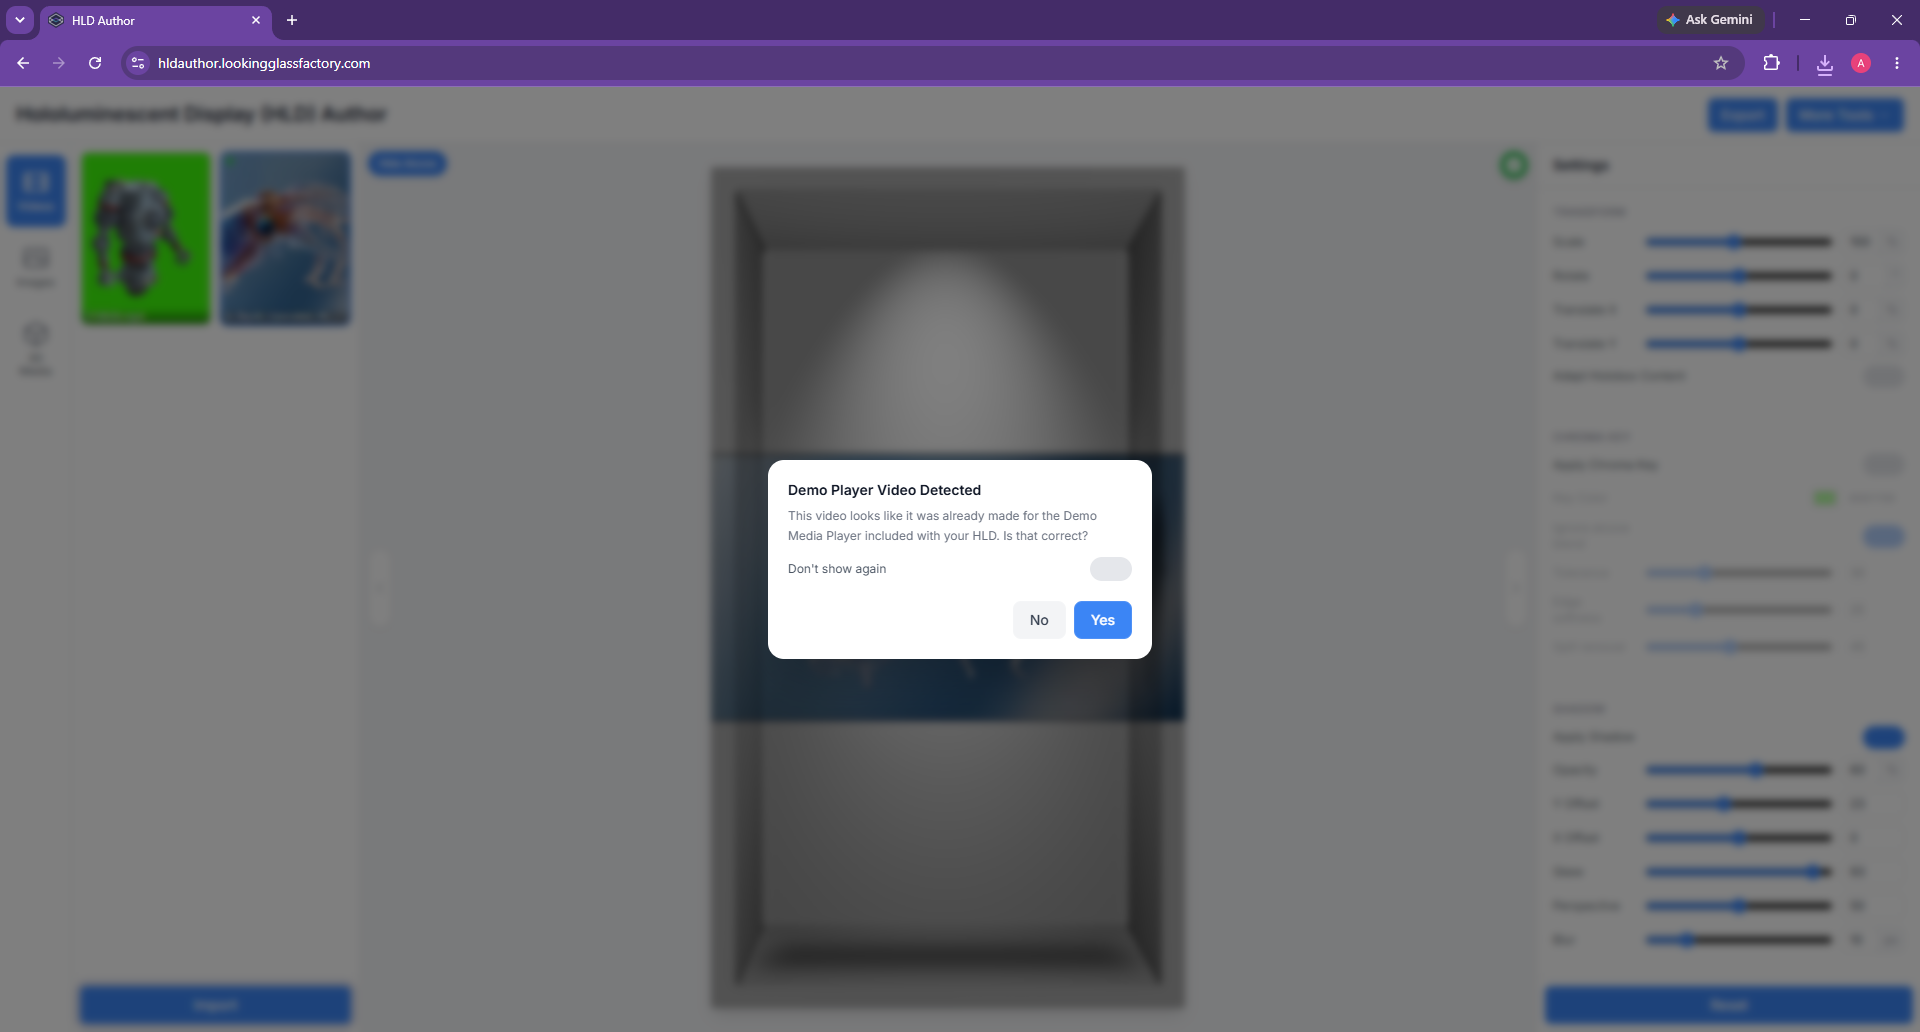
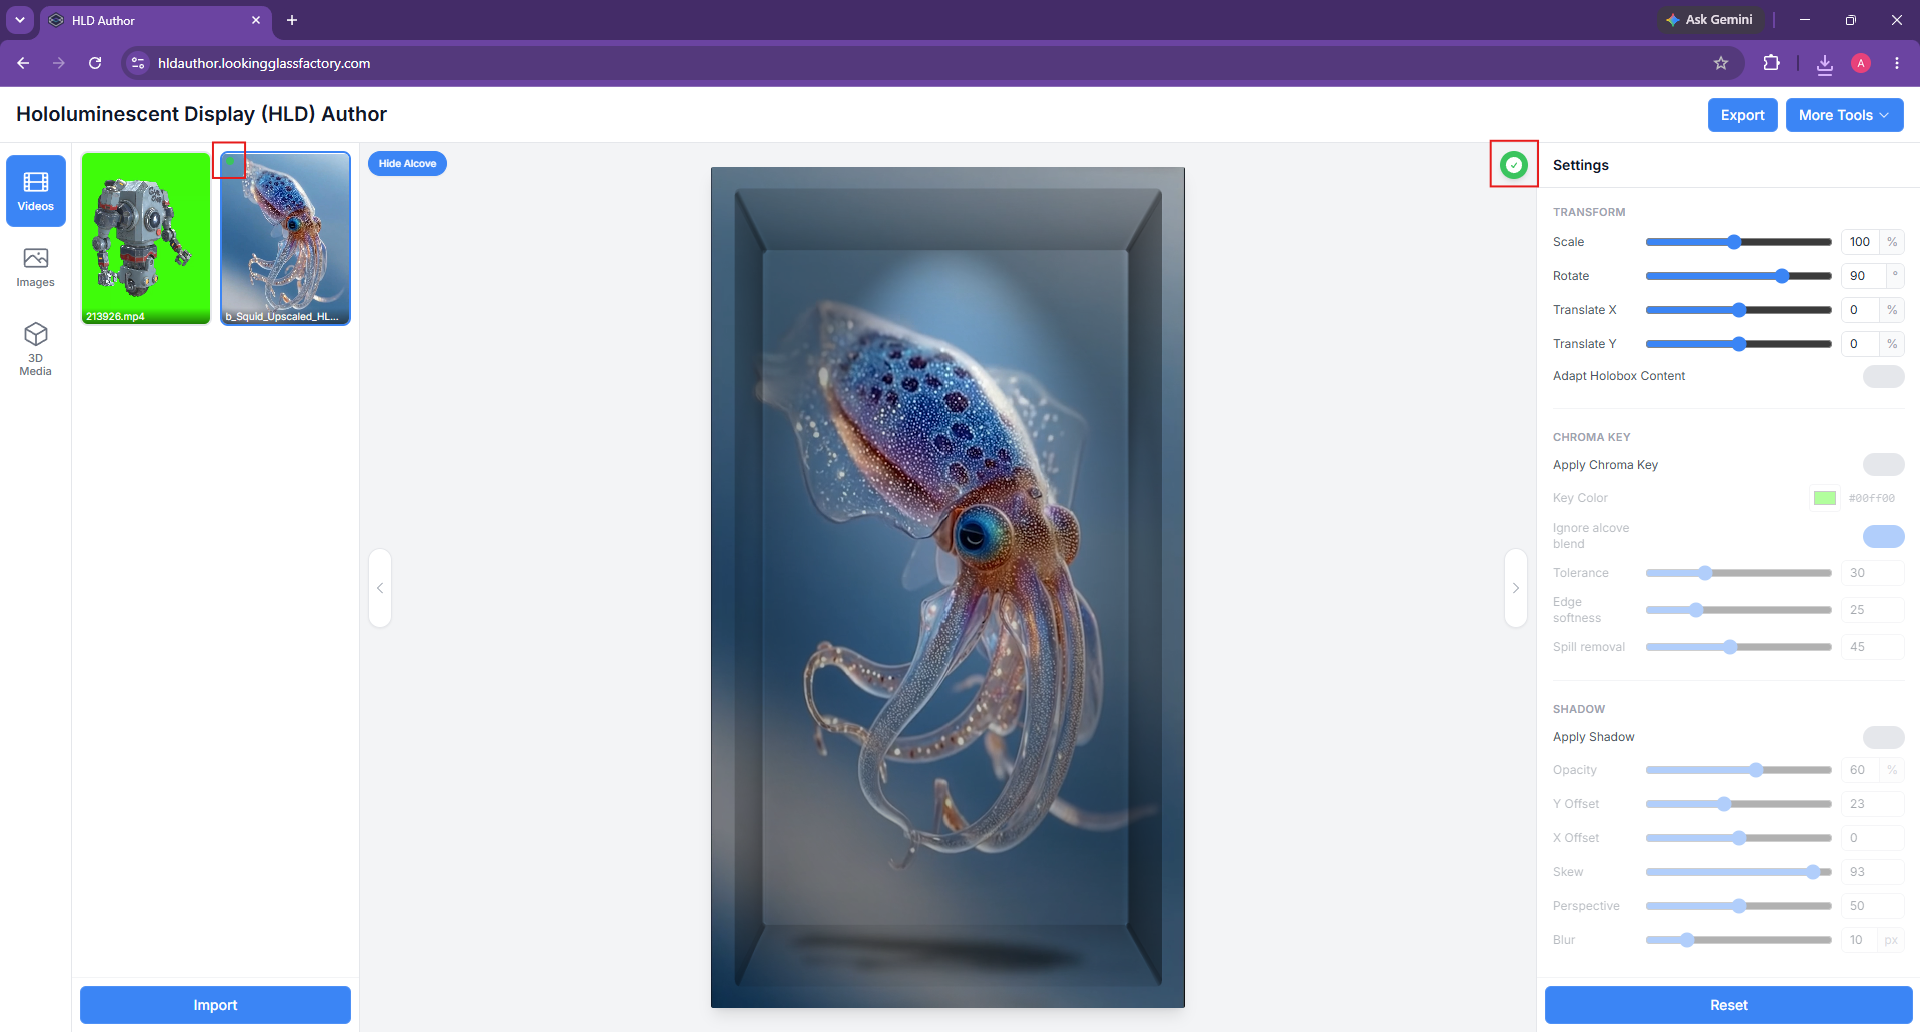
If an imported video already looks prepared for the Demo Media Player or musubi, HLD Author may ask whether that was intentional. If you choose **Yes**, the app can adjust rotation and shadow behavior so the file is handled as already prepared media.
{% endhint %}

<figure><img src="/files/NDcstdcALzKilBWDNWQe" alt=""><figcaption><p>Confirm whether a detected video was intentionally prepared for the Demo Media Player</p></figcaption></figure>

<figure><img src="/files/Q78jgT8j5aVyQ1hFkVyo" alt=""><figcaption><p>HLD-ready video shown with its rotation and shadow adjustments</p></figcaption></figure>

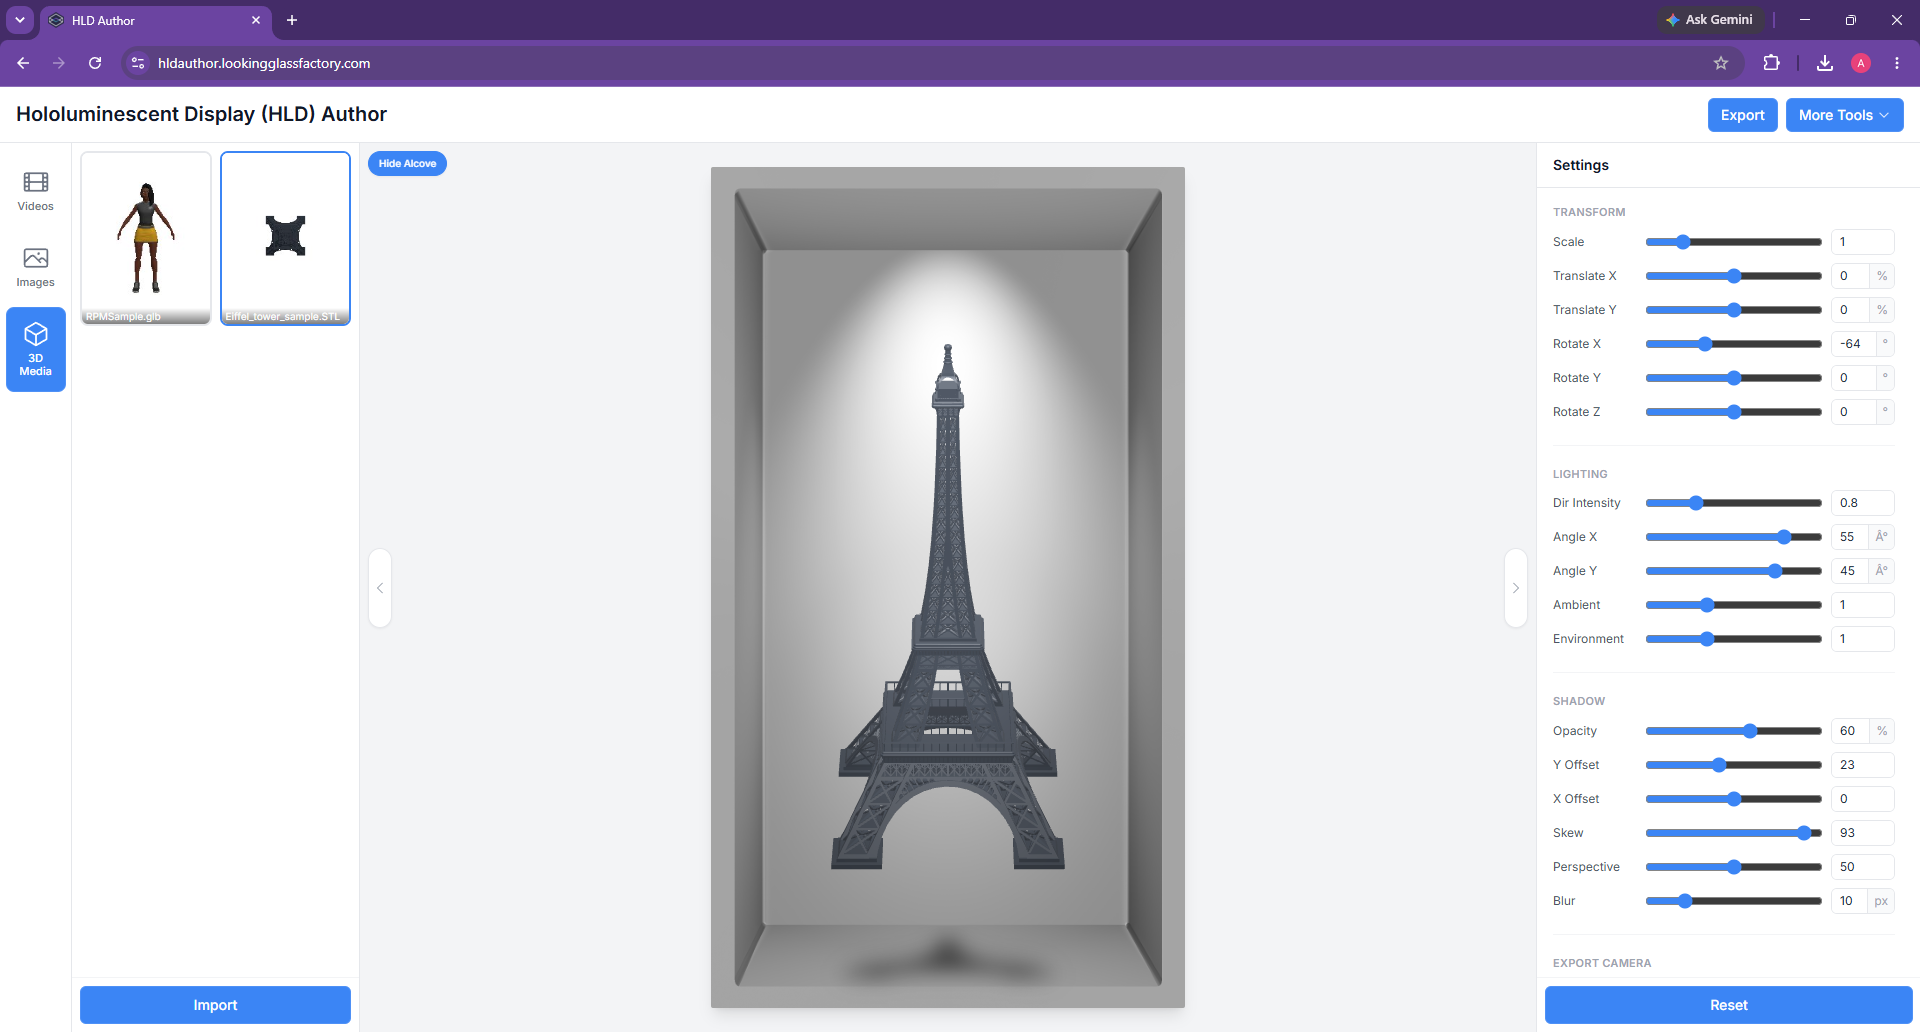
For OBJ files, material libraries and textures are not imported yet, so OBJ assets will render with the default material.

<figure><img src="/files/c9iOfQCNhVrT1i8EbZYP" alt=""><figcaption></figcaption></figure>

## Canvas and settings

Use the canvas to check framing before export. The alcove reference overlay is only a design guide in the app; it is not encoded into your exported video.

1. Click **Hide Alcove** if you want to review the source media without the alcove reference.
2. Click **Show Alcove** to bring the framing guide back.
3. Use the chevrons beside the canvas to collapse or expand the media library and Settings panel.
4. Use **Reset** if you want to return the selected item to its default settings.

### Video settings

Use **Transform** to adjust scale, rotation, and X/Y position.

#### Adapt hologram box content

Some videos are created for hologram box setups and have content that extends to the edge of the video frame, violating the HLD's outside bezel design. Turn on **Adapt Holobox Content** to scale that source slightly and fill the exposed frame with colors sampled from the source edges. This preserves the subject's proportions while preventing the content from covering the bezel. The adjustment is included in the export.

Turning on **Adapt Holobox Content** also turns off the generated shadow, since this type of source usually includes its own scene and grounding. Use **Sample depth** to change how far into the source HLD Author samples the edge colors. If the fill picks up a bright object or creates a visible band, try a shallower sample or reposition the source.

#### Chroma key

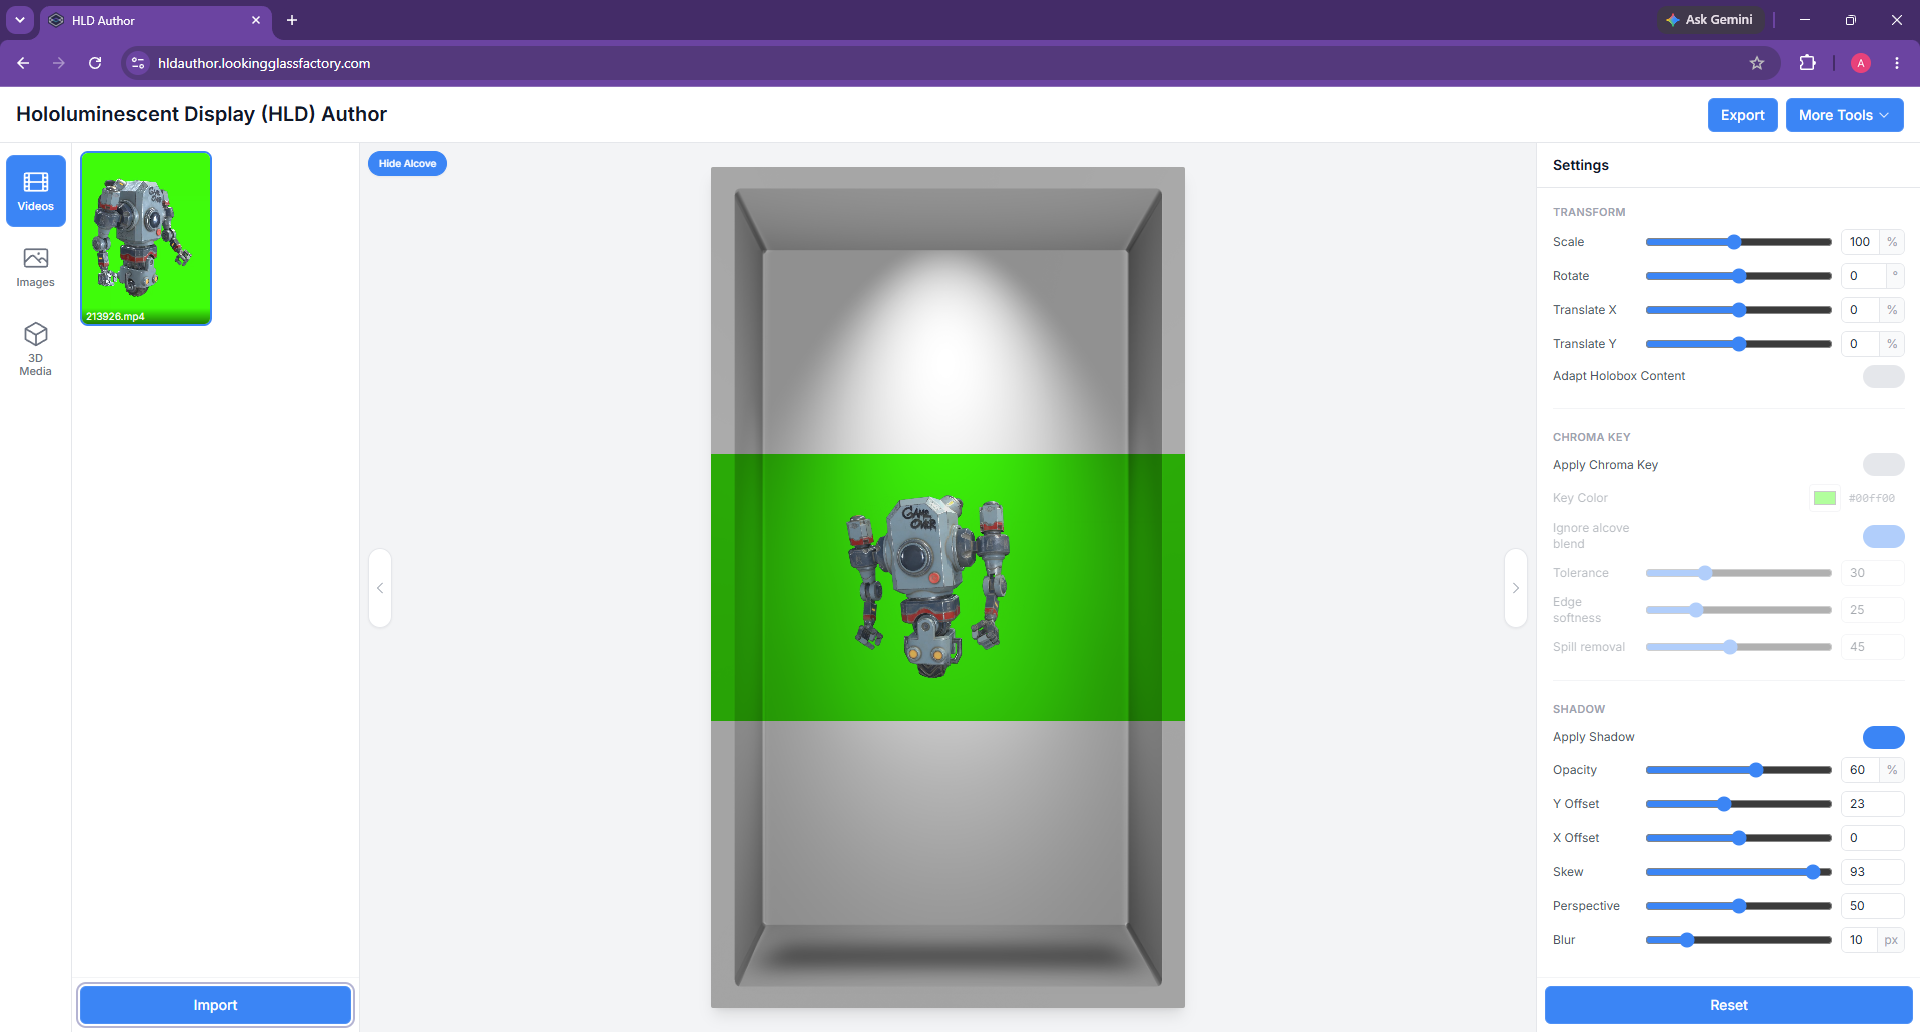
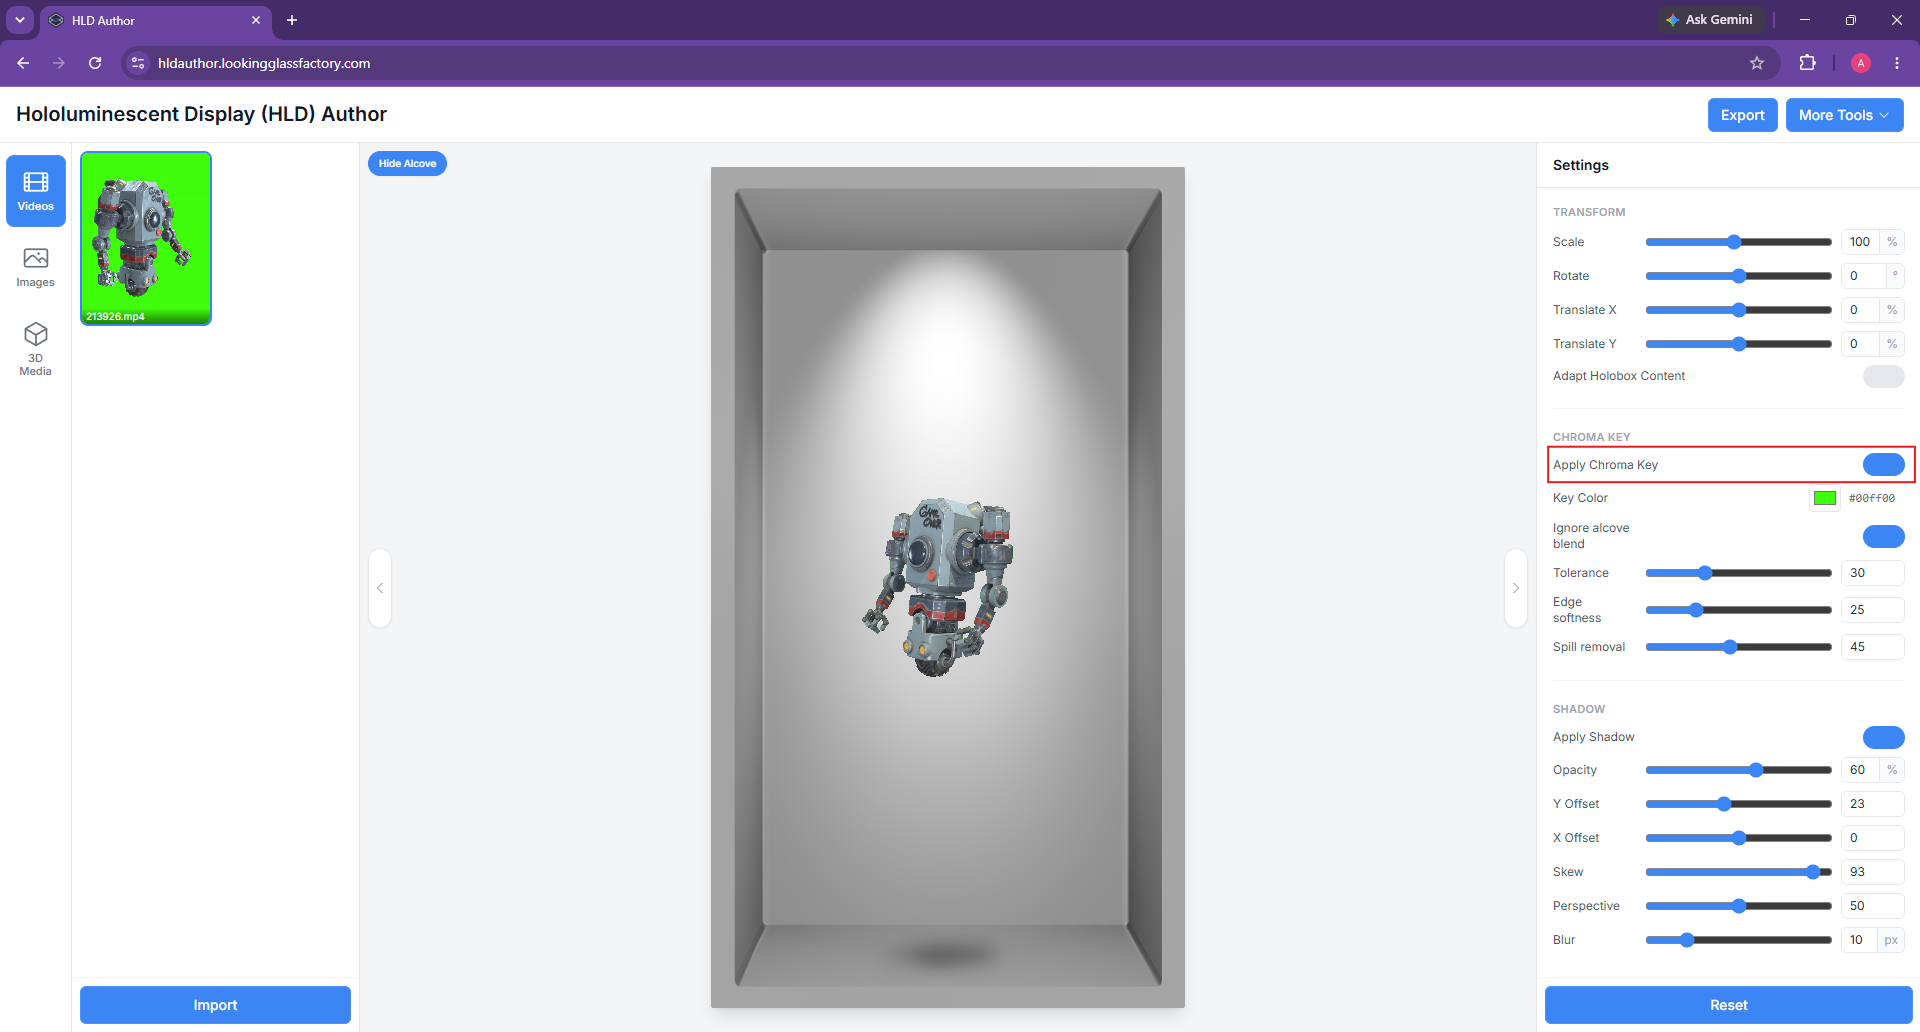
Turn on **Apply Chroma Key** to remove a solid-color background from a video or image. Set the key color with the swatch or color picker, then tune **Tolerance**, **Edge softness**, and **Spill removal** until the background disappears without eroding the subject. **Ignore alcove blend** lets the color picker sample the source color without the alcove overlay changing it.

<figure><img src="/files/UAJI4cTuicx80ikox683" alt=""><figcaption><p>A video before chroma key is applied</p></figcaption></figure>

<figure><img src="/files/kjXcde8M3dxcFKVWMYfc" alt=""><figcaption><p>The same video with its keyed background removed</p></figcaption></figure>

Use **Shadow** to add or remove a grounding shadow and adjust its opacity, position, shape, and blur.

### Image settings

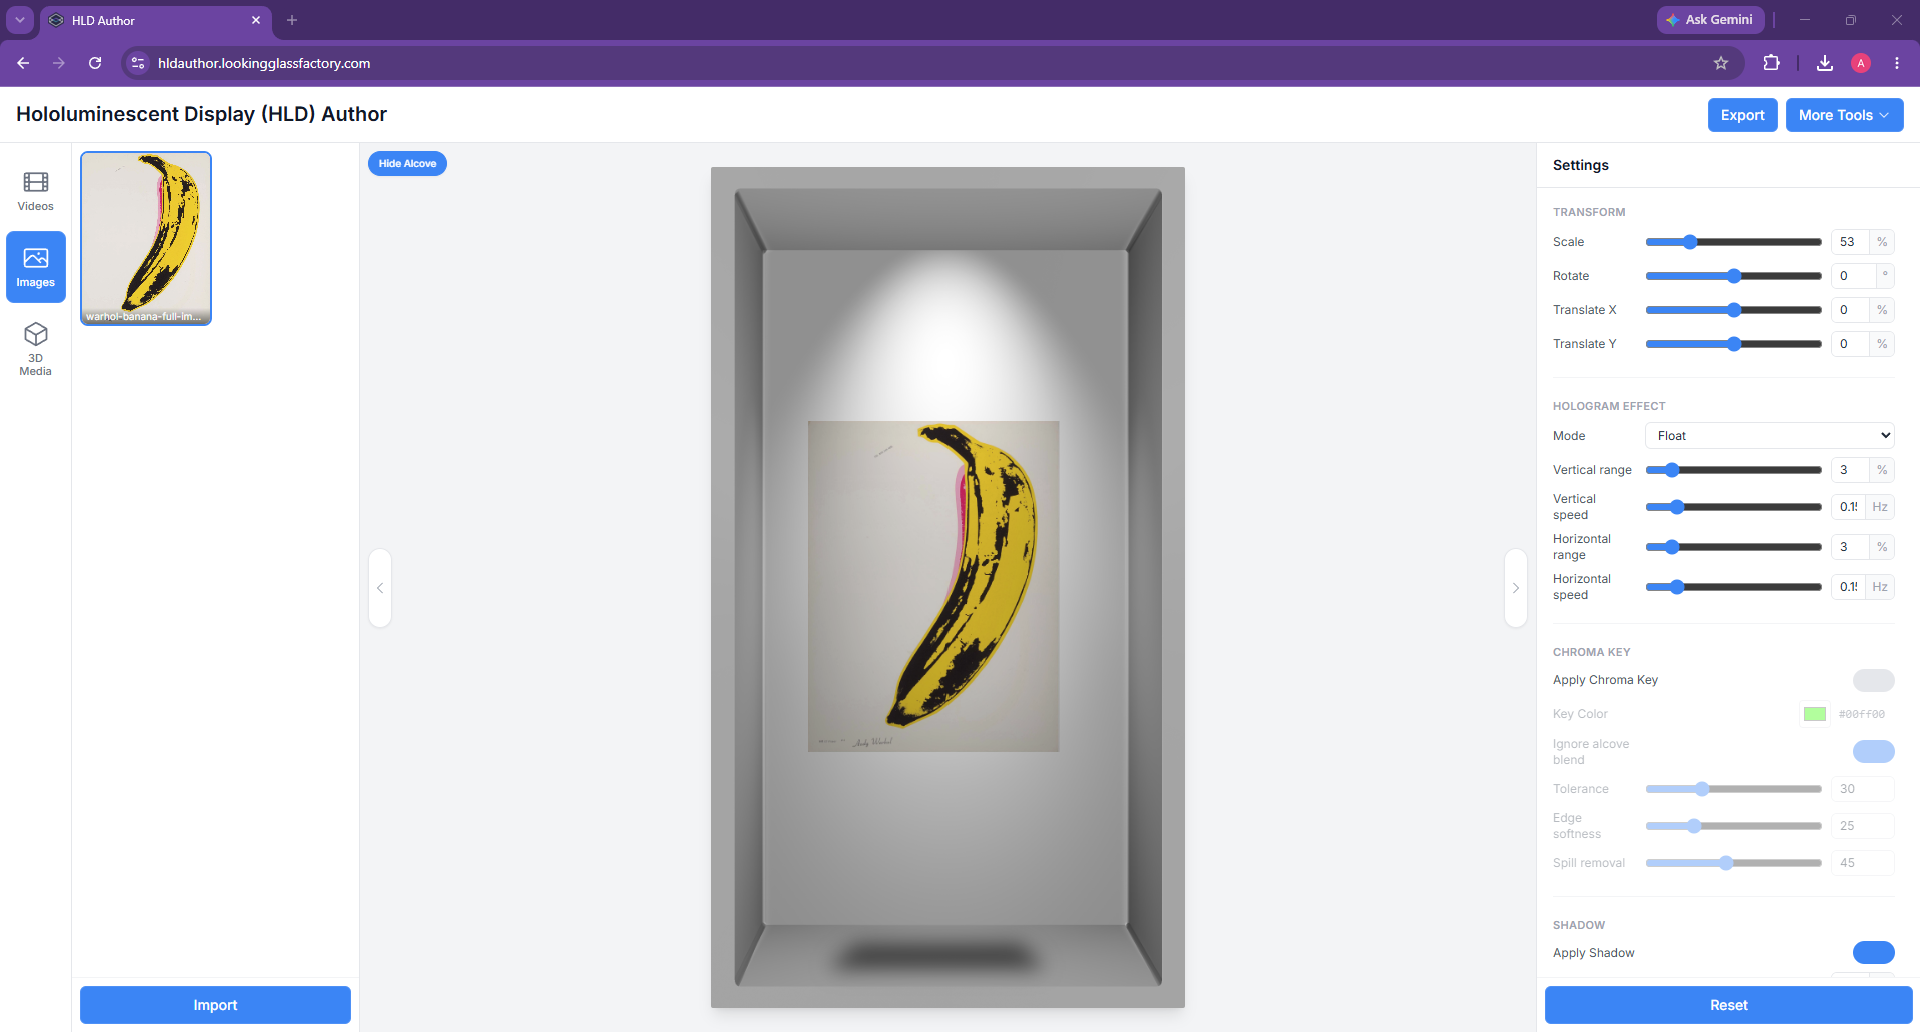
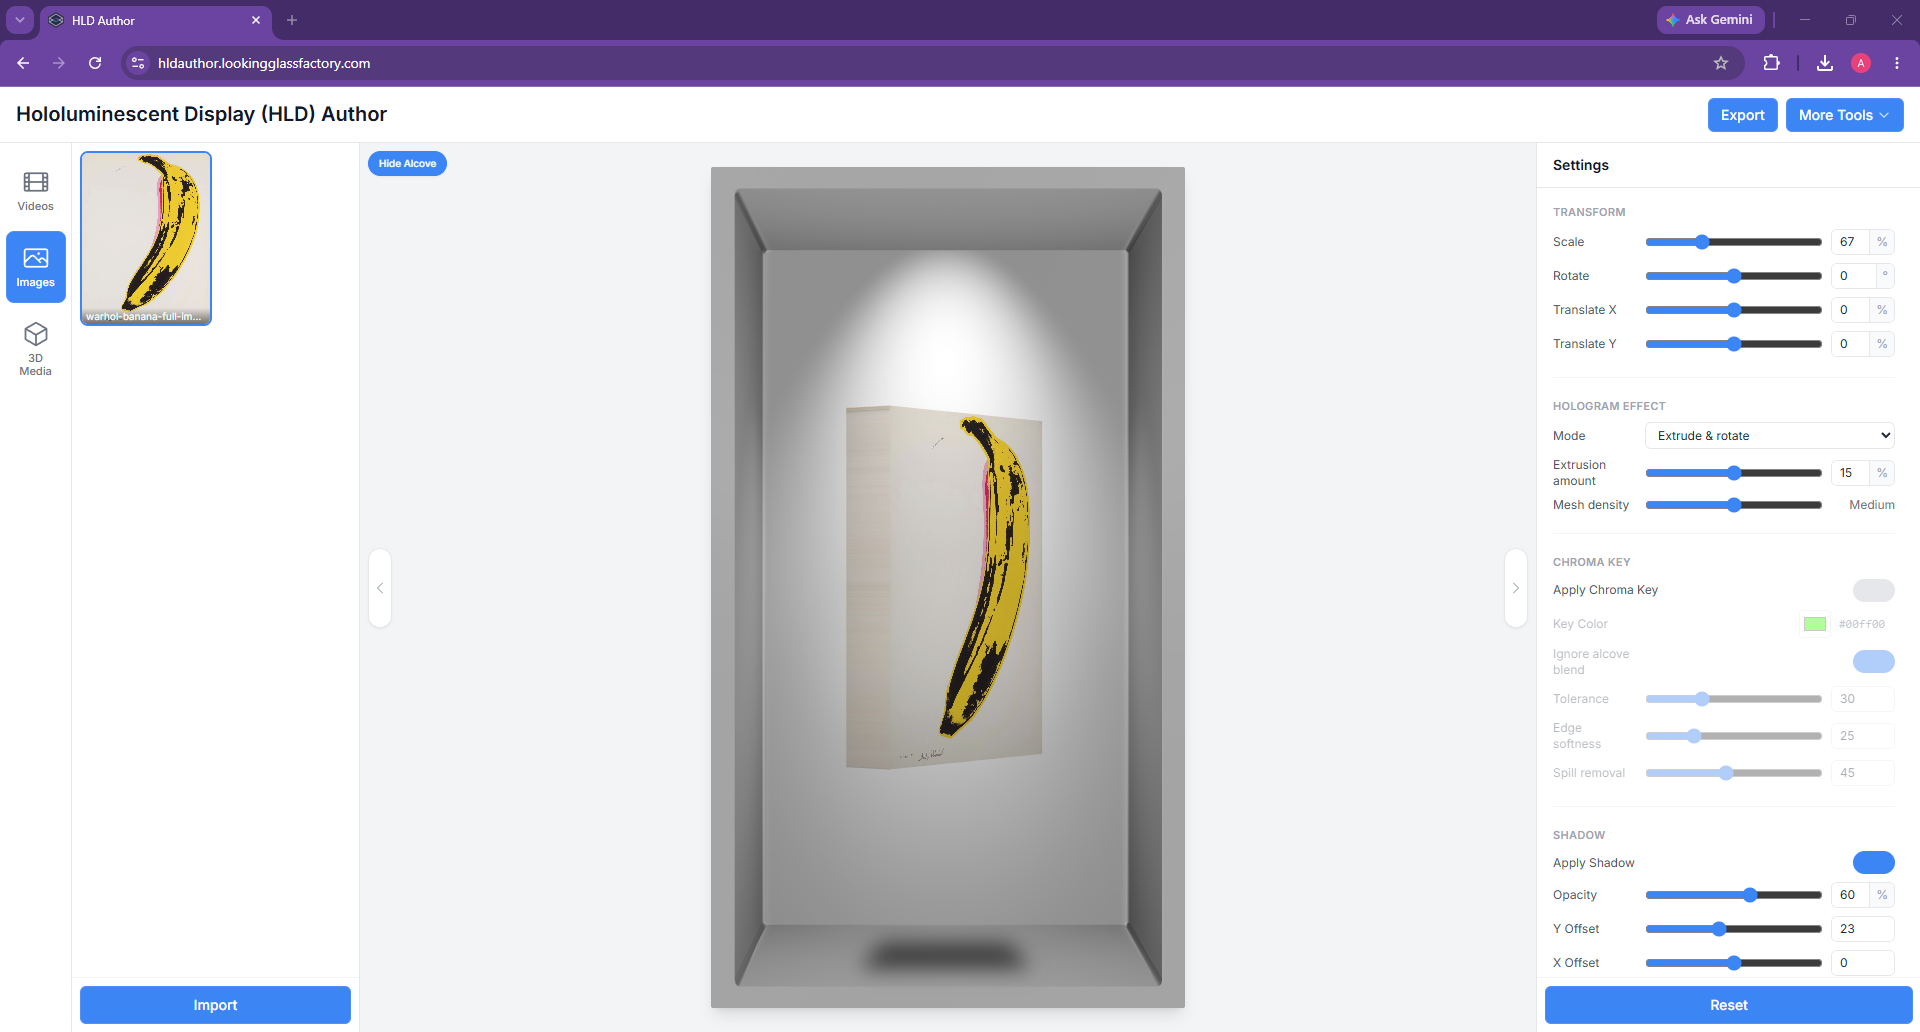
Images use the same **Transform**, **Chroma Key**, and **Shadow** controls as videos. The **Hologram Effect** mode determines how a still image moves and gains depth in the exported video:

* **None** keeps the image as a still, flat plane with no added motion. Use it when the source already contains the presentation you want, though in general this is not recommended as it reduces the spatial effect of the display.
* **Float** keeps the image flat but moves it gently across the canvas. **Vertical range** and **Horizontal range** set the travel distance as a percentage of the canvas; the speed controls set how quickly each motion repeats. This is the default and is a good fit for logos, cutout artwork, and images that should face the viewer throughout the export.
* **Extrude & rotate** turns the visible image shape into a shallow 3D mesh and rotates it to reveal real thickness. This is ideal for things like logos. **Extrusion amount** controls the depth, **Mesh density** controls the silhouette detail, and **Orbits per Export** controls the number of complete rotations. Use a transparent image or chroma key the background first when you want the subject silhouette extruded; otherwise the full rectangular image is extruded.
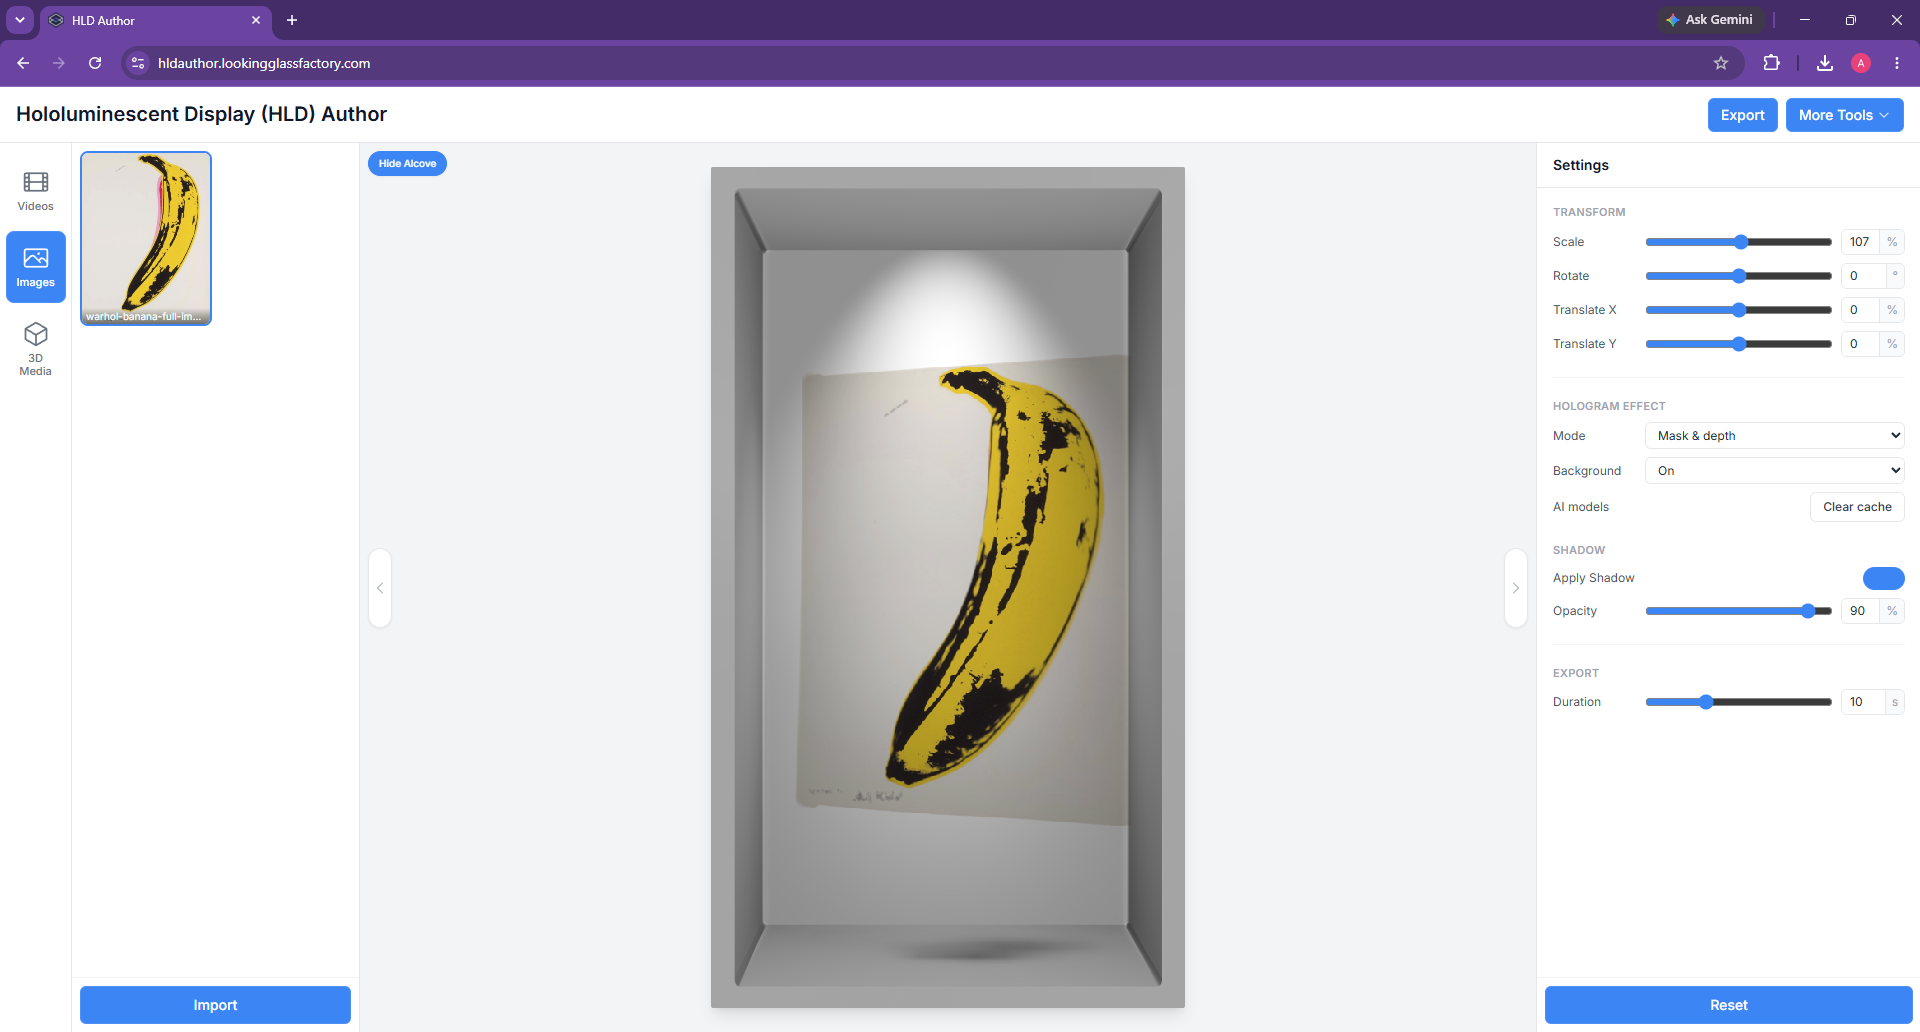
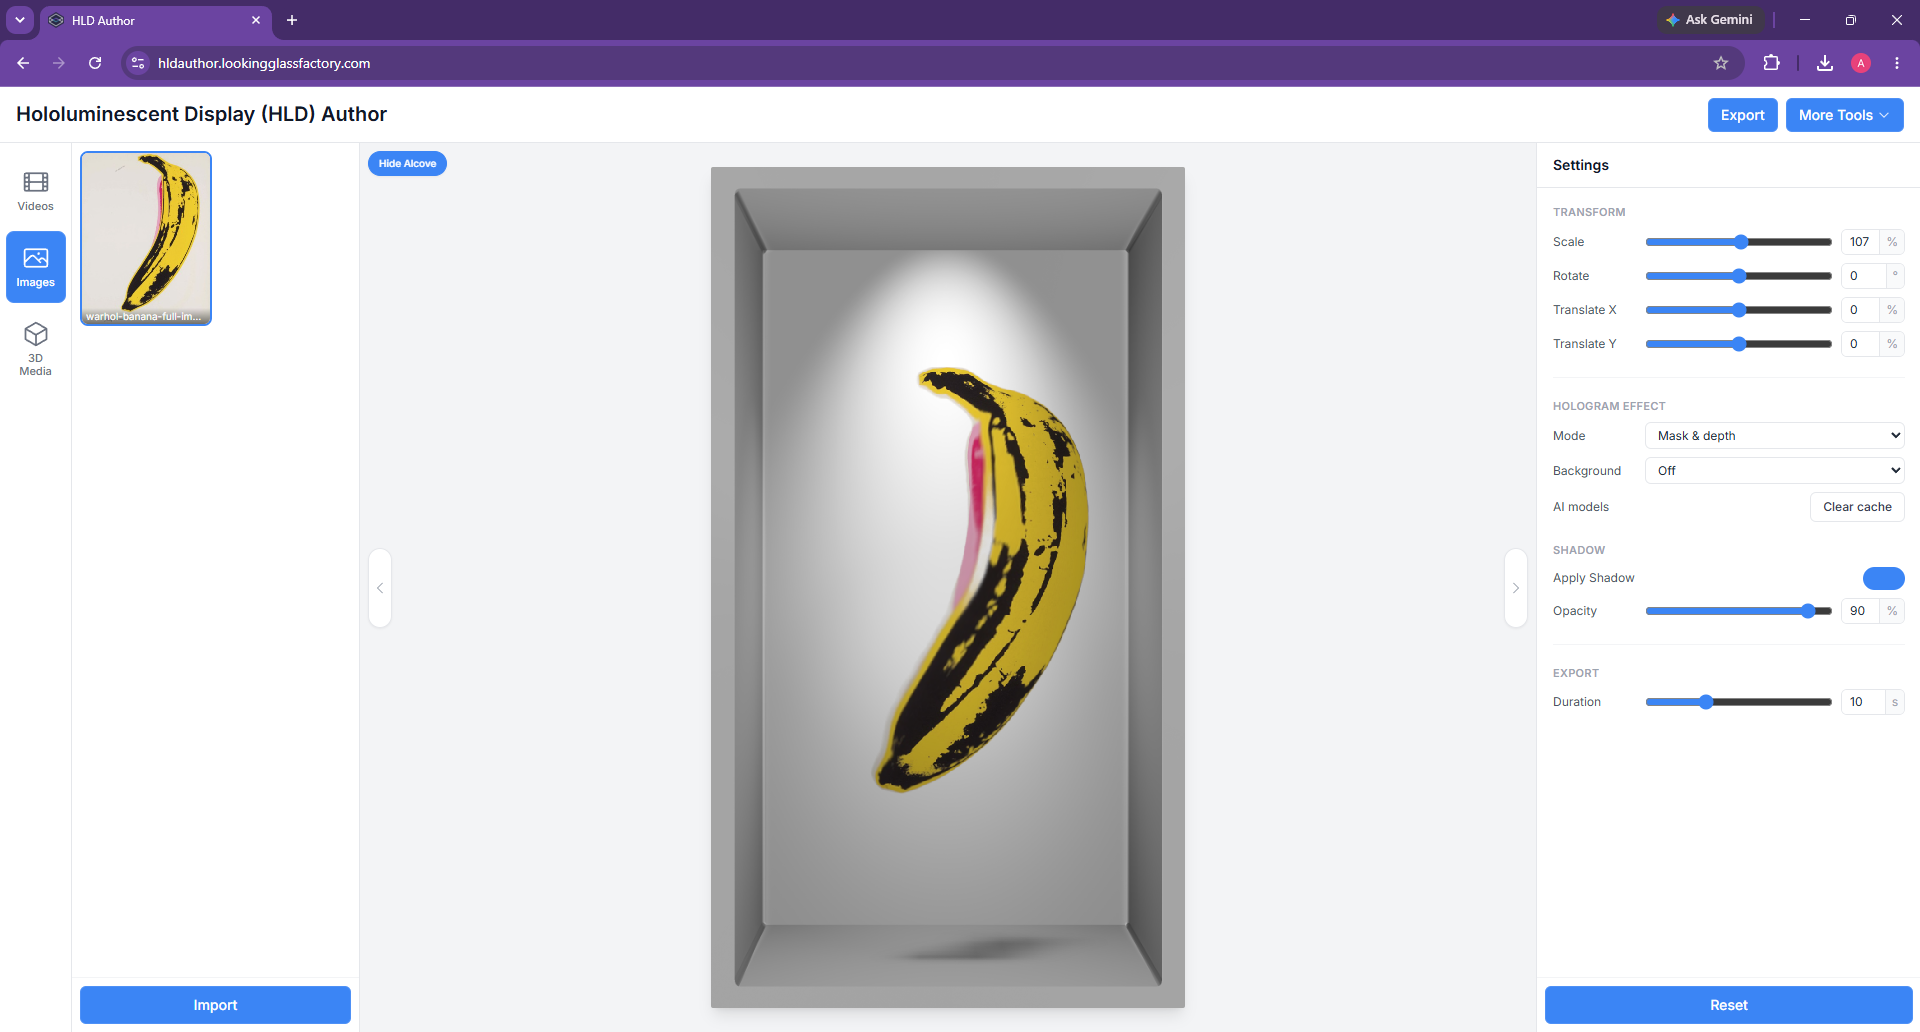
* **Mask & depth** uses local AI processing to estimate the subject, background, and depth of a JPG, PNG, or WebP photo. It creates a dimensional view with parallax. Choose **Background On** to keep the original background, **Off** to remove it, or **Partial** for a semi-transparent background.

Use **Export Duration** to set the length of the MP4 generated from a still image.

#### Float

<figure><img src="/files/Db6vUH78Hg5NvGZ5aqx2" alt=""><figcaption><p>Float adds adjustable horizontal and vertical motion while the image stays flat</p></figcaption></figure>

#### Extrude & rotate

<figure><img src="/files/UUvi9YacP5316QH01Lb4" alt=""><figcaption><p>Extrude &#x26; rotate gives the image real mesh thickness and rotates it to reveal the sides</p></figcaption></figure>

#### Mask & depth

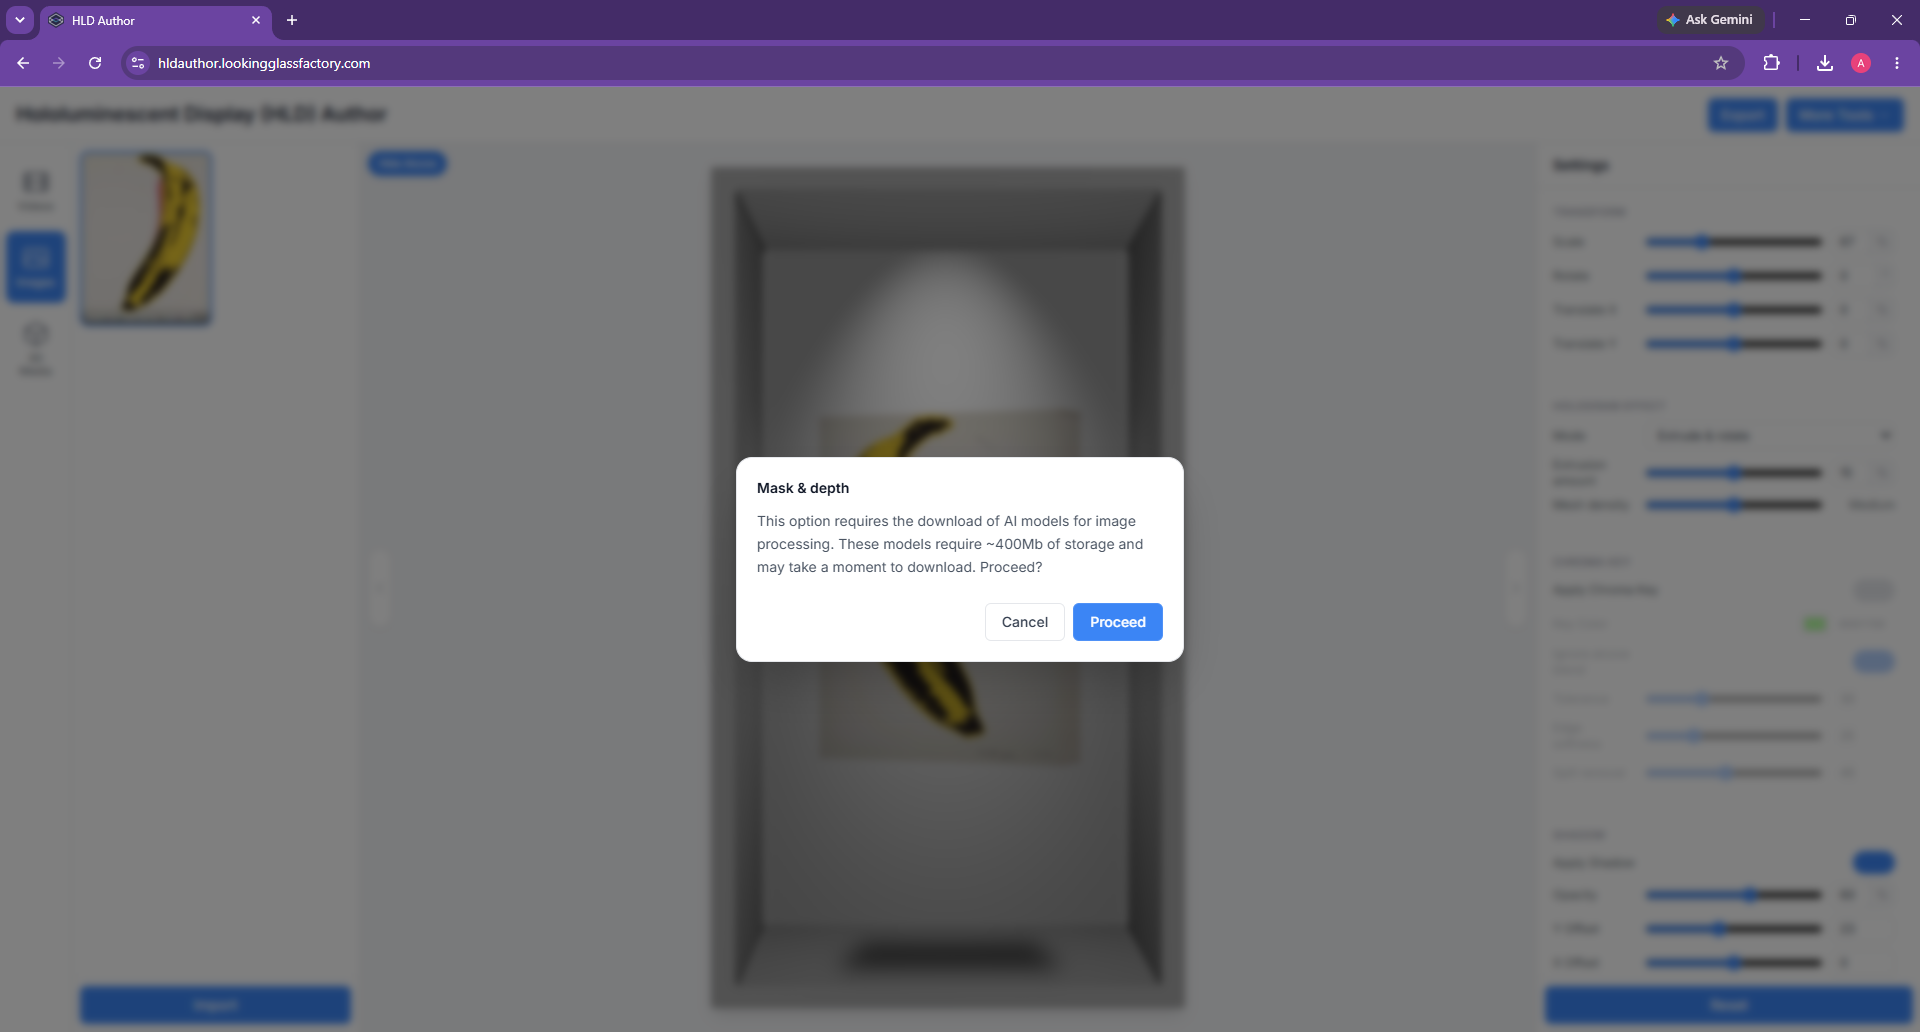
The first time you select **Mask & depth**, HLD Author asks permission to download about 400 MB of AI models. Choose **Proceed** and keep the tab open while the models download and process the image. The models are cached in your browser for later use; after processing, **Clear cache** removes them if you need to recover the storage space.

<figure><img src="/files/W3V5h06FS5uVAk3zhy3S" alt=""><figcaption><p>The one-time AI model download prompt for Mask &#x26; depth</p></figcaption></figure>

<figure><img src="/files/s25kUrk4mNXF5UU620Kg" alt=""><figcaption><p>Mask &#x26; depth with the original background on</p></figcaption></figure>

<figure><img src="/files/NDq63UcV2IkBQwWebfvF" alt=""><figcaption><p>Mask &#x26; depth with the background removed</p></figcaption></figure>

### 3D Media settings

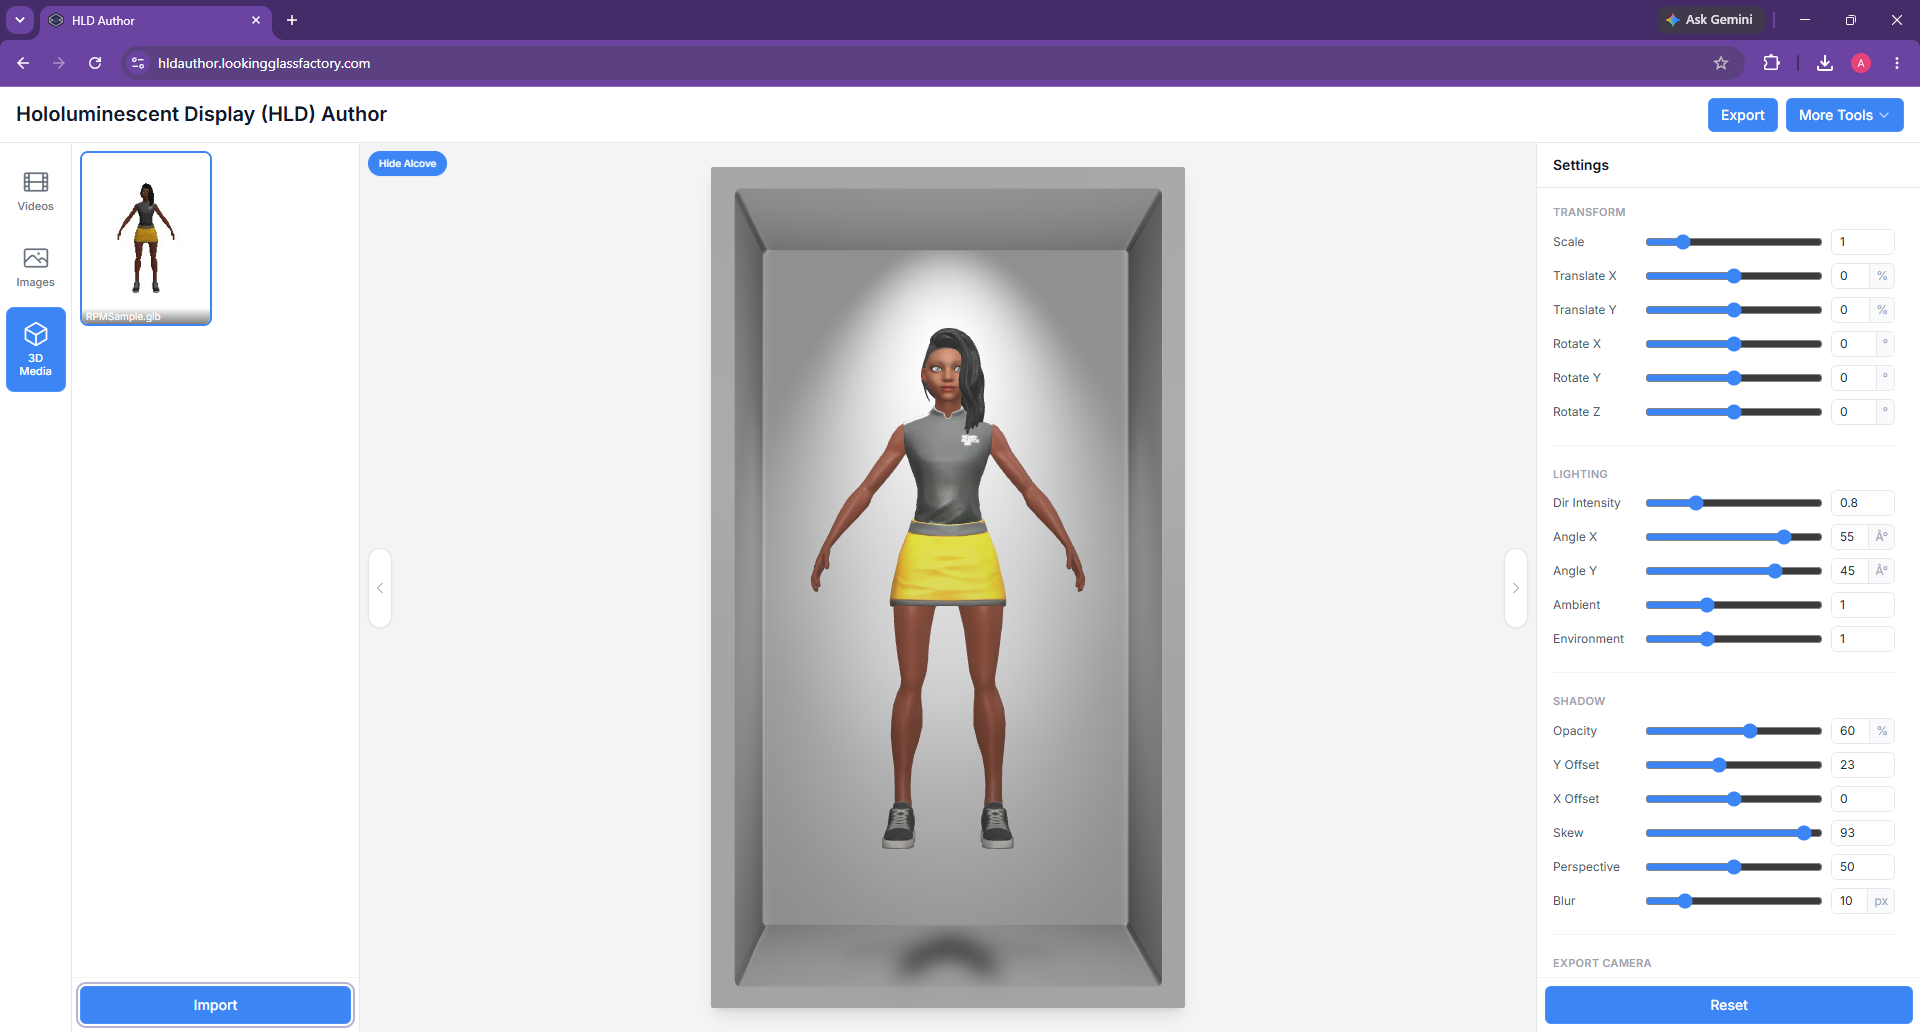
* **Transform** scales, positions, and rotates the model on all three axes.
* **Lighting** adjusts environmental (HDRI), ambient, and directional lighting so materials remain readable on the display.
* **Shadow** controls the model's grounding shadow.
* **Animation** chooses an embedded animation clip when one is available in an FBX, GLTF, or GLB file.
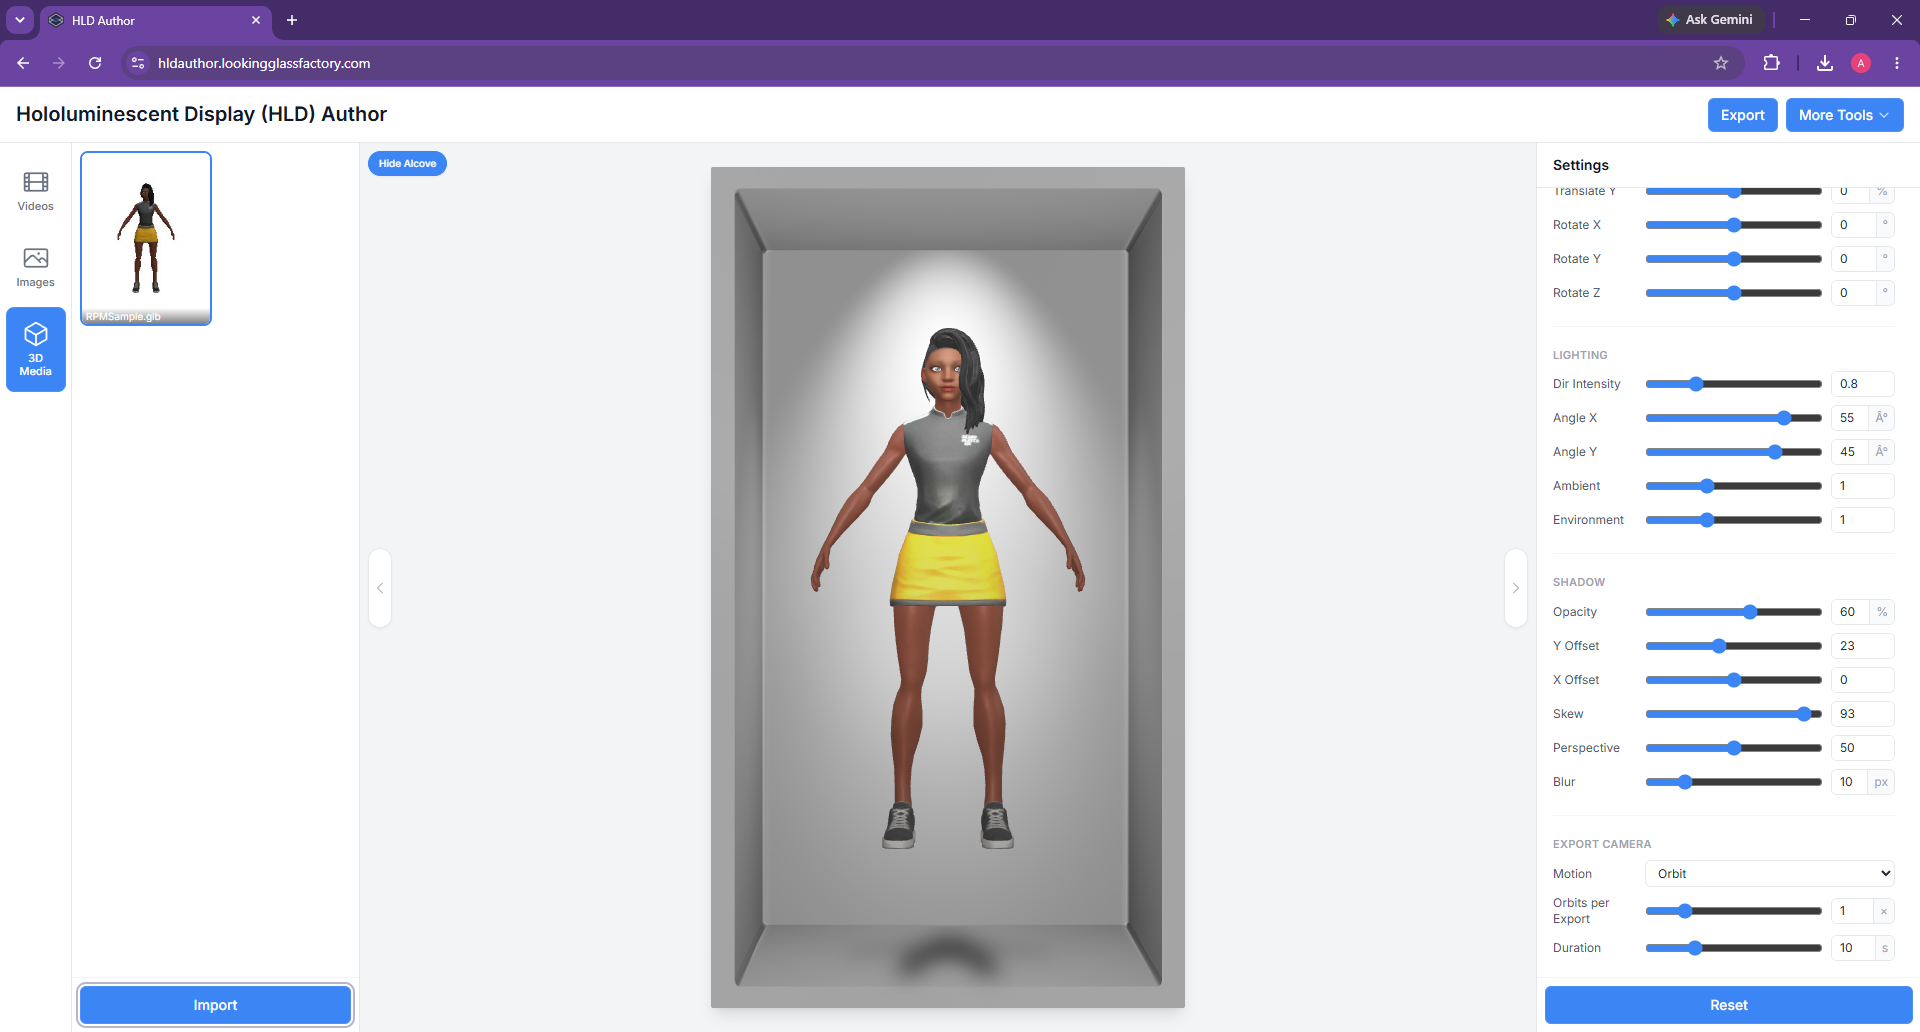
* **Export Camera** controls the motion added to the exported video. Choose **Orbit** for complete 360-degree rotations or **Sway** to rock the view back and forth through a fixed angle. Set the number of orbits or sway angle, then set the export duration.

<figure><img src="/files/zQdRltr3mBfjvuSqgG2a" alt=""><figcaption><p>An imported textured GLB model</p></figcaption></figure>

<figure><img src="/files/6F7W70Jt35pD8I9MzoZA" alt=""><figcaption><p>An imported STL model rendered with the default material</p></figcaption></figure>

<figure><img src="/files/NukiVE1XhKnpuSD3m9IB" alt=""><figcaption><p>Orbit and duration controls for a 3D export</p></figcaption></figure>

<figure><img src="/files/c9iOfQCNhVrT1i8EbZYP" alt=""><figcaption></figcaption></figure>

## Export for your playback destination

1. Select the item you want to export.
2. Click **Export**.
3. Choose the destination tab: **Demo Media Player**, **BrightSign**, or **General**.
4. Choose the output target.
5. Click **Export**.
6. Wait for the progress bar to finish.
7. Save the MP4 if your browser asks where to put the file.

### Demo Media Player

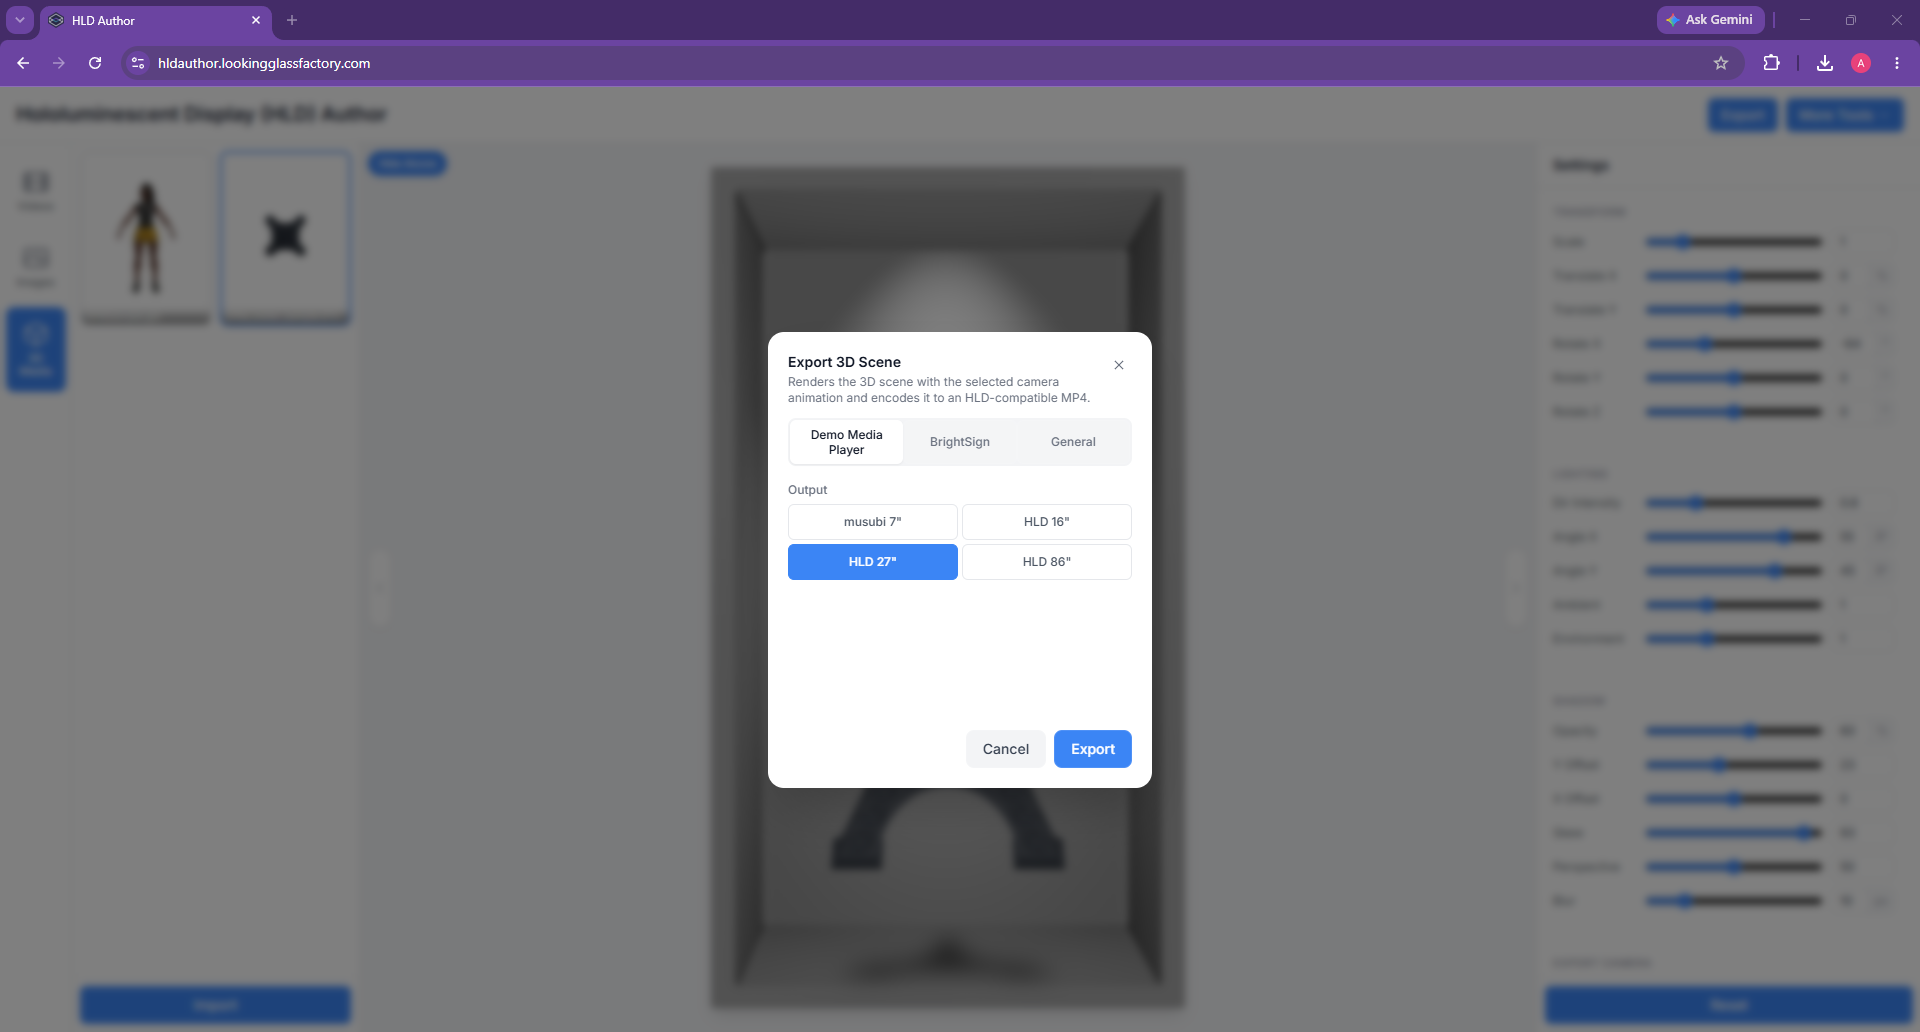
Use this tab for playback on the included Demo Media Player or musubi target. Available outputs are:

* **musubi 7"**: portrait H.264
* **HLD 16"**: rotated 1080p HEVC
* **HLD 27"**: rotated 4K HEVC
* **HLD 86"**: rotated 4K HEVC

HLD Author names these exports with target-specific suffixes, such as `source_hld_27.mp4` or `source_hld_musubi-7.mp4`.

<figure><img src="/files/LZnasdHStlzC50Afwqqv" alt=""><figcaption><p>Demo Media Player output choices</p></figcaption></figure>

### BrightSign

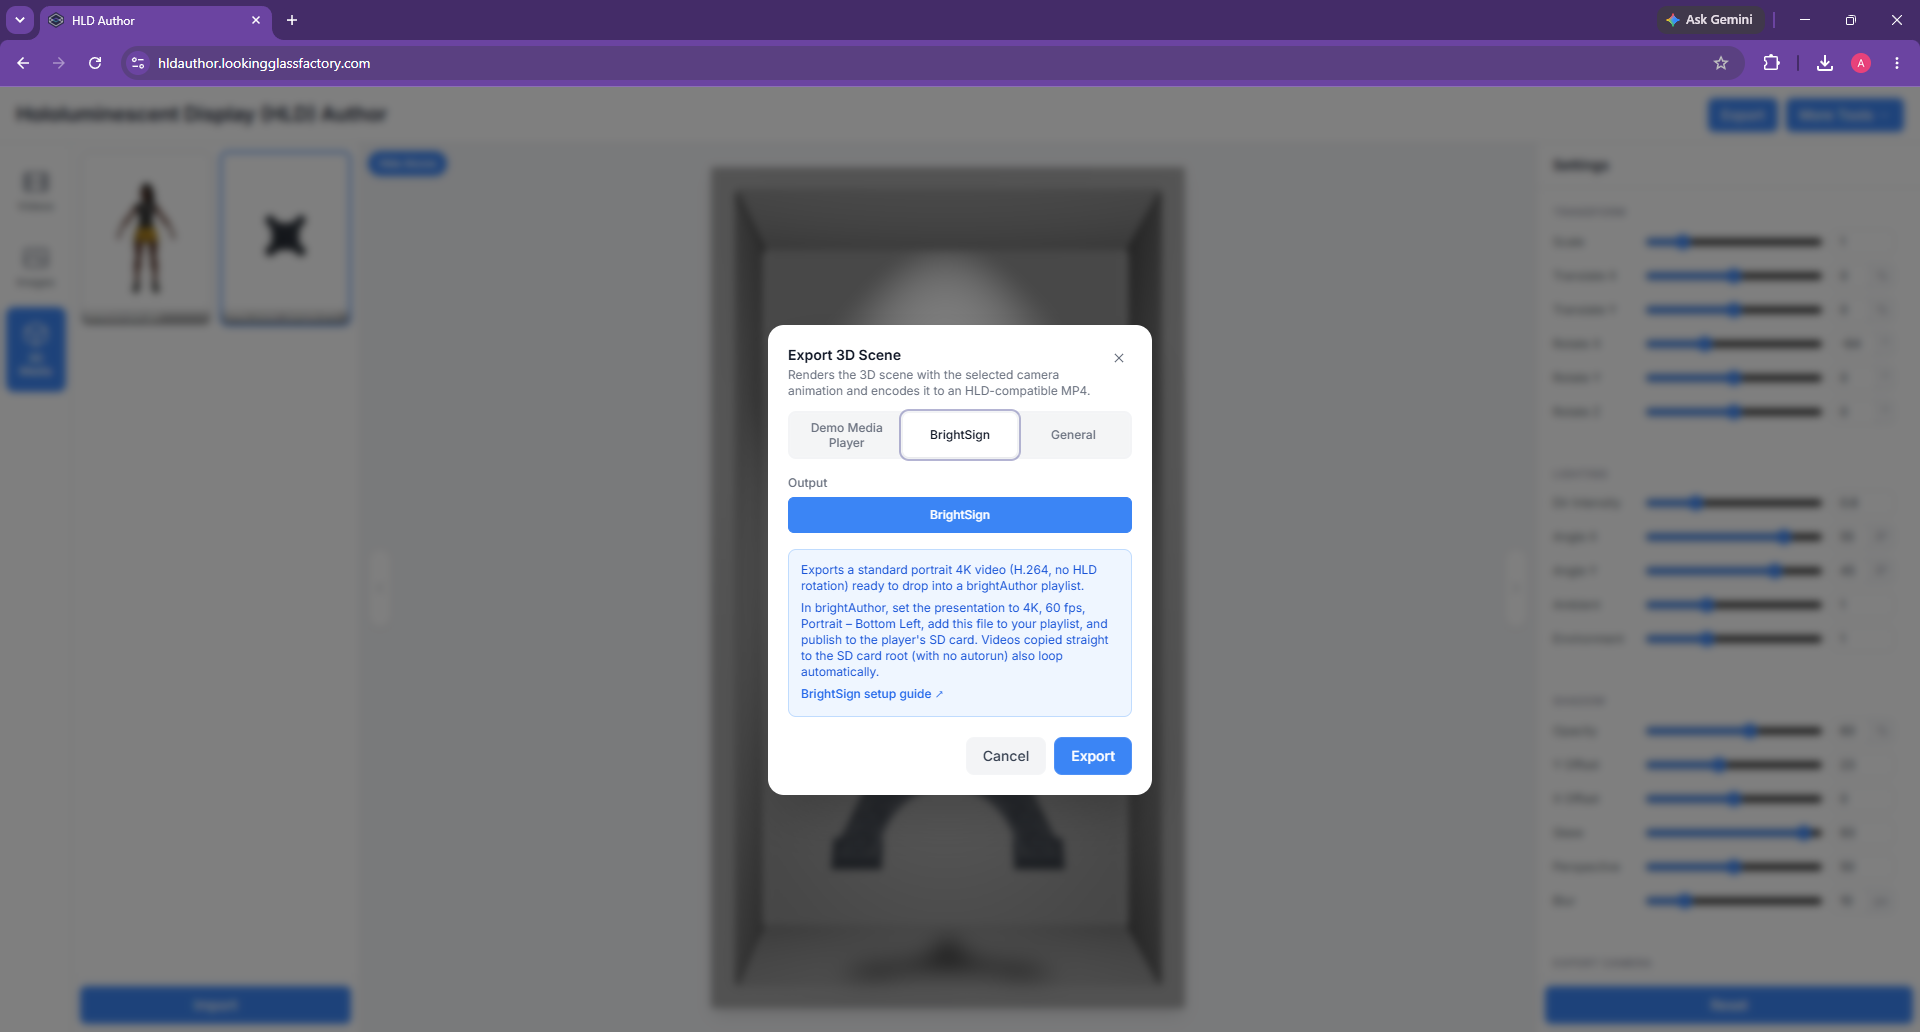
Use this tab when you are preparing a file for a BrightSign presentation. The output is a standard portrait 4K H.264 MP4 with no HLD rotation. HLD Author names BrightSign exports like `source_brightsign.mp4`.

<figure><img src="/files/n95w1R1gvXLovuELRcA8" alt=""><figcaption><p>BrightSign export and deployment guidance</p></figcaption></figure>

### General

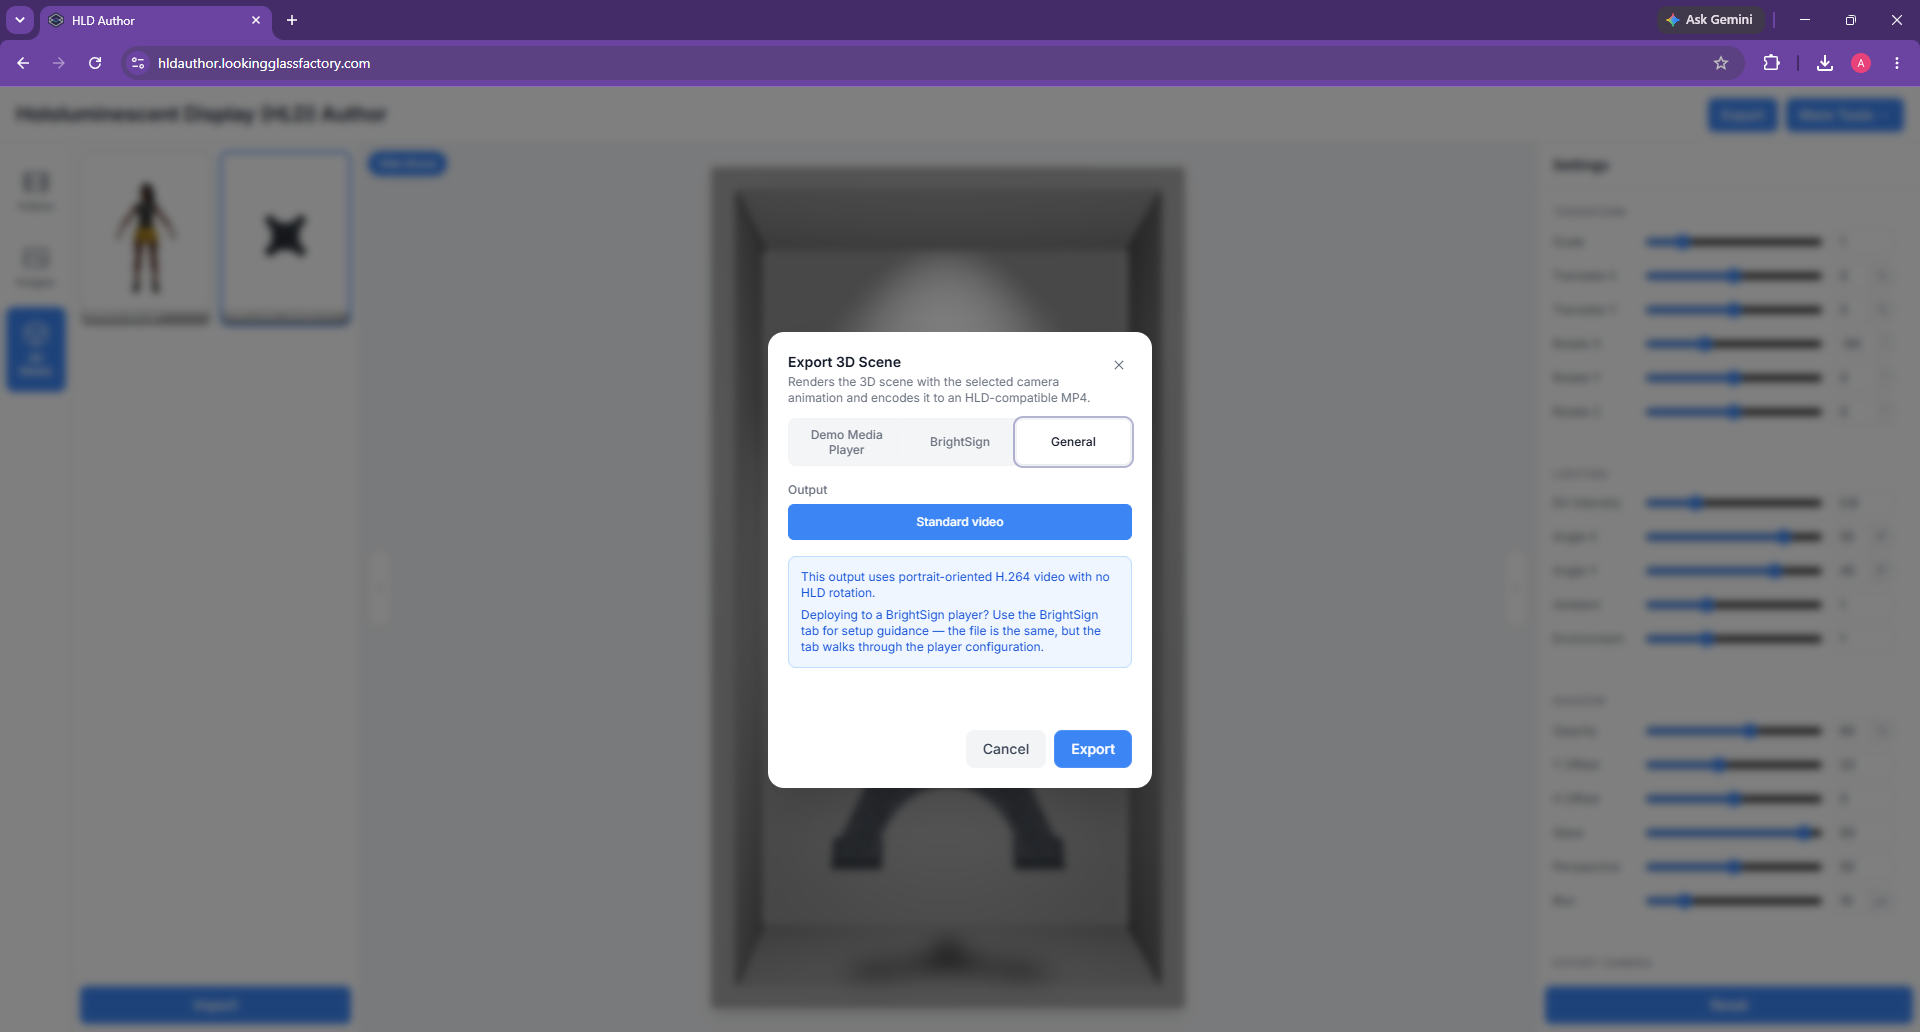
Use this tab when you need a standard portrait video for other playback workflows. The output is a standard portrait 4K H.264 MP4 with no HLD rotation.

<figure><img src="/files/tioz1mwPBFs7Jyj8QG0x" alt=""><figcaption><p>General standard-video export</p></figcaption></figure>

{% hint style="warning" %}
Do not use a rotated Demo Media Player HLD export for BrightSign or General playback. BrightSign and General targets should stay portrait-oriented with no HLD rotation.
{% endhint %}

<figure><img src="/files/c9iOfQCNhVrT1i8EbZYP" alt=""><figcaption></figcaption></figure>

## Deploy the exported file

### Demo Media Player

1. Copy the exported MP4 to the USB thumb drive connected to the Demo Media Player.
2. Insert the drive into one of the player USB-A ports.
3. Wait for playback to begin automatically.

Videos loop in alphanumeric filename order. For more detail, see [Using the Demo Media Player](/managing-content/using-the-demo-media-player.md).

### BrightSign

Add the BrightSign export to Zone 1 of your brightAuthor connected presentation and publish to the player storage or SD card. In brightAuthor, use the HLD presentation settings from [BrightSign digital signage player](/managing-content/brightsign-digital-signage-player.md), including 4K output, 60 fps, and Portrait - Bottom Left orientation.

### General playback

Use the General export anywhere you need a standard portrait H.264 MP4. This output is not rotated for the HLD Demo Media Player.

<figure><img src="/files/c9iOfQCNhVrT1i8EbZYP" alt=""><figcaption></figcaption></figure>

## Troubleshooting

### An HLD output is disabled

HLD 16", HLD 27", and HLD 86" Demo Media Player outputs require HEVC encoding support. Open HLD Author in Chrome 130 or newer and try again.

### The video looks sideways outside the Demo Media Player

That usually means you exported for an HLD Demo Media Player target. Use **BrightSign** or **General** if you need a normal portrait H.264 file.

### The alcove reference appears while editing

The alcove overlay is a framing reference only. Use **Hide Alcove** if you want to inspect the media by itself.

### Adapted hologram-box content has visible color bands

Adjust **Sample depth** so HLD Author samples a cleaner strip along the source edges. You can also change the source scale or position to keep bright subjects and hard transitions away from the sampled edges.

### Extrude & rotate turns the whole image into a block

The source still has an opaque rectangular background. Use a PNG or WebP with transparency, or enable **Chroma Key** to isolate the subject before choosing **Extrude & rotate**.

### Mask & depth takes time on first use

The first use downloads and caches about 400 MB of local AI models before processing begins. Keep HLD Author open until the model progress and image processing finish. Use **Clear cache** afterward only if you need to remove the downloaded models.

### A 3D model imports without textures

OBJ material libraries and textures are not imported yet. For textured 3D assets, use GLB or GLTF when possible.

### Export fails or the browser reports unsupported encoding

Try Chrome 130 or newer. If HEVC is unavailable on your system, export to **BrightSign**, **General**, or **musubi 7"**, which use H.264.

<figure><img src="/files/c9iOfQCNhVrT1i8EbZYP" alt=""><figcaption></figcaption></figure>

## Known issues

Exports from Nvidia machines, when combined with content exported from Mac, Intel, and AMD machines, can play back with a black frame between content from different systems. For best results, export all content from the same computer.

<figure><img src="/files/c9iOfQCNhVrT1i8EbZYP" alt=""><figcaption></figcaption></figure>

## Support

If you have any feature requests or issues and need support, please contact us at <support@lookingglassfactory.com> or join our [Discord](https://discord.gg/bqs8F2cpH).