> For the complete documentation index, see [llms.txt](https://hlddocs.lookingglassfactory.com/llms.txt). Markdown versions of documentation pages are available by appending `.md` to page URLs; this page is available as [Markdown](https://hlddocs.lookingglassfactory.com/apps-and-tools/musubi-app.md).

# musubi app

{% hint style="info" %}
The musubi app is currently in closed beta. Want to get access? Sign up [here](https://docs.google.com/forms/d/e/1FAIpQLSc-qlAe-Ho35EbXmLpEUGCbrVu8loeaWCsrBiiyHY34RRIgeg/viewform?usp=header)!
{% endhint %}

The musubi app is for creating 3D memories for a Looking Glass [musubi](https://look.glass/musubi). You can import photos and videos, let the app process them into musubi-ready media, organize the results into albums, and transfer them to a connected musubi device over USB.

This guide walks through the basic workflow:

* Import source photos and videos
* Let the musubi app convert them locally into holographic media
* Edit the resulting memories
* Organize memories into albums
* Transfer albums or individual memories to a connected musubi display
* Review and manage media already on the connected display

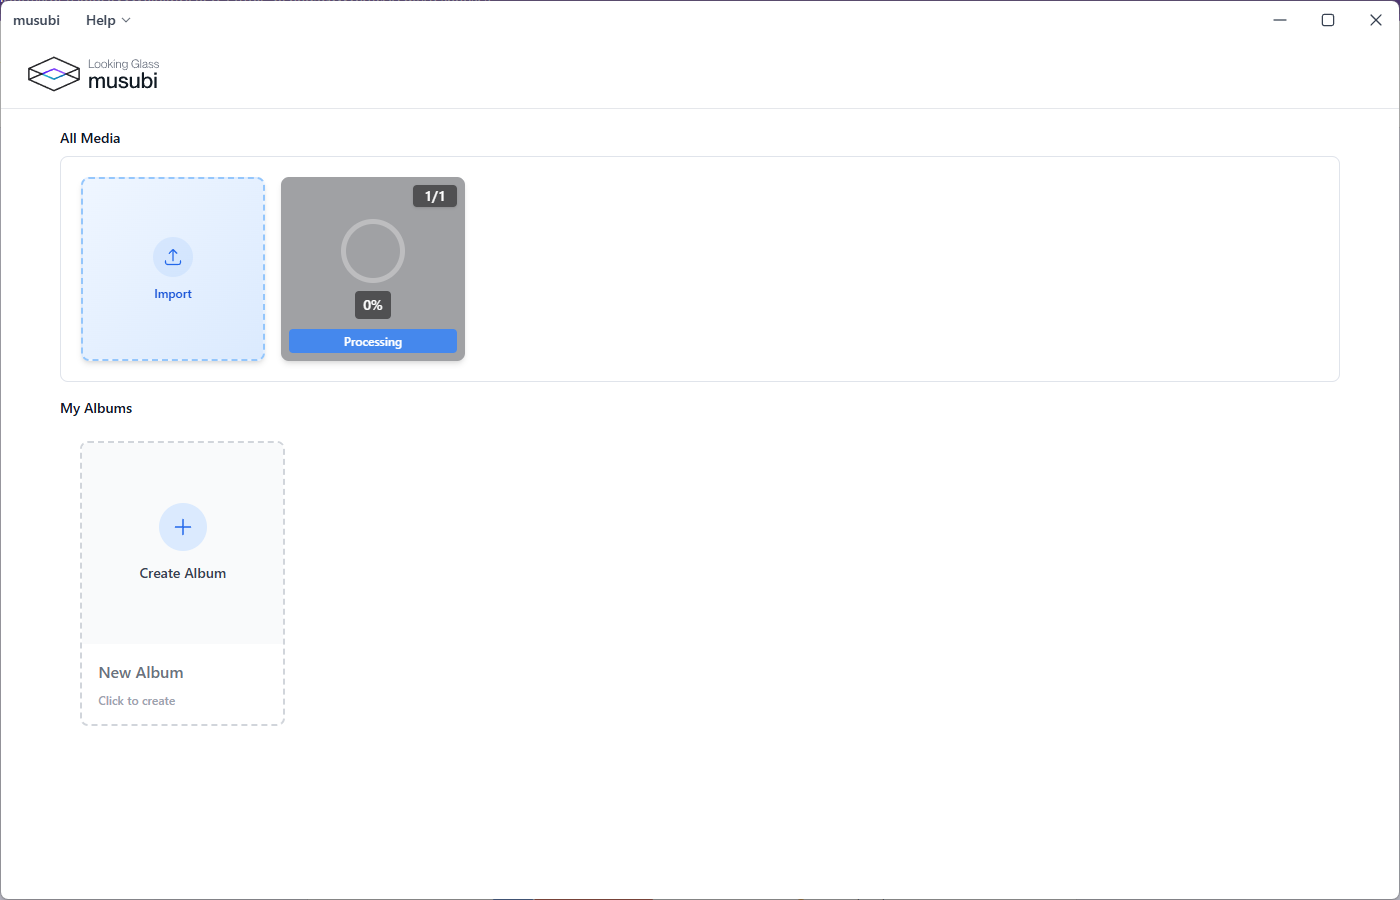
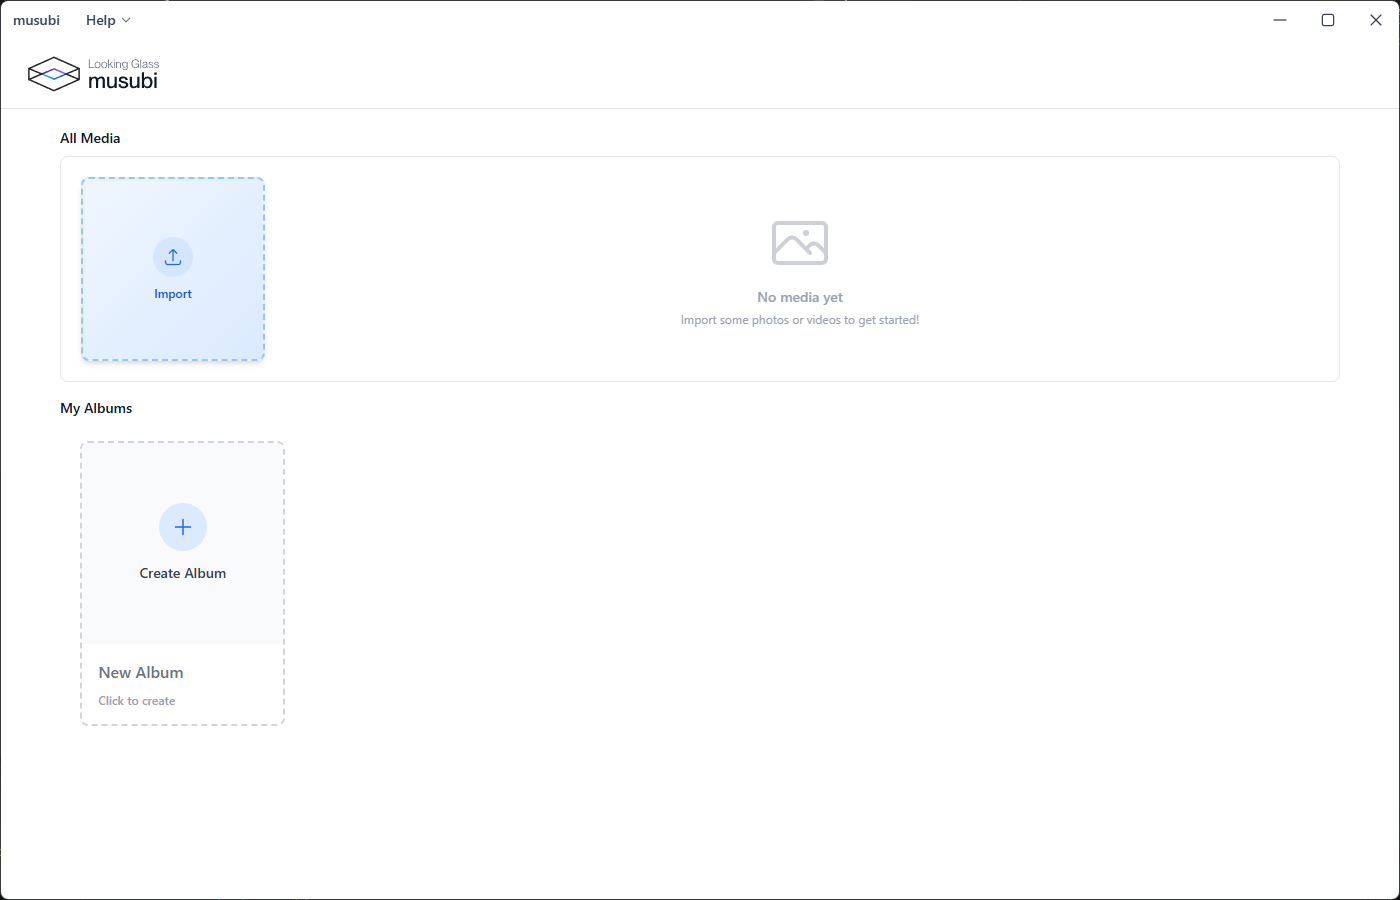
<figure><img src="/files/zXBFakDCzoY4BYEeObDL" alt=""><figcaption><p>The main UI for the musubi app</p></figcaption></figure>

<figure><img src="/files/c9iOfQCNhVrT1i8EbZYP" alt=""><figcaption></figcaption></figure>

## What you'll need

* The musubi desktop app
* Photos or videos to import
* A 7-inch musubi frame
* The included USB-C cable for data transfer

Supported source media:

| Media type | Supported formats               |
| ---------- | ------------------------------- |
| Images     | JPG/JPEG, PNG, WEBP, HEIC, HEIF |
| Videos     | MP4, WEBM, MOV                  |

{% hint style="info" %}
The musubi frame uses USB-C for power and data. It does not have HDMI input and can't be used as a secondary monitor.
{% endhint %}

<figure><img src="/files/c9iOfQCNhVrT1i8EbZYP" alt=""><figcaption></figcaption></figure>

## Using the musubi app

The musubi app is built to import, convert, and edit your media so you can transfer it to a connected musubi device. To do so:

1. Launch the musubi app
2. Select the "Import" button
3. Select one or more photos or videos and import them

The app will use local AI models to convert your media into a hologram. This may take a moment, depending on your computer's processing power.

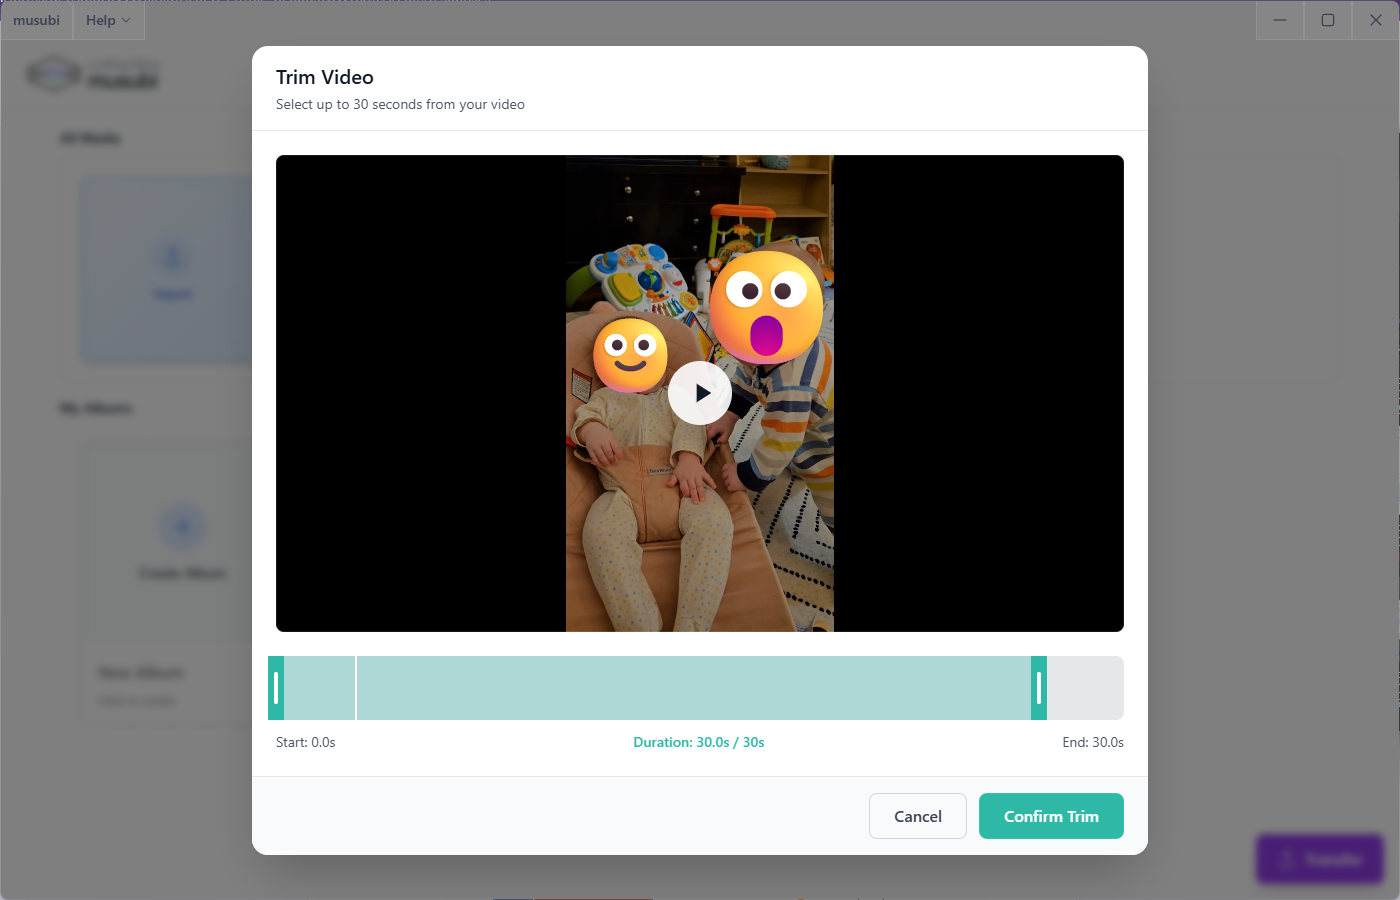
<figure><img src="/files/jEp9lt01aLy2j40ohgJD" alt=""><figcaption></figcaption></figure>

If you import a video longer than 30 seconds, the app asks you to trim it before import. Choose the part you want to keep, then continue.

<figure><img src="/files/divv3r8BBu6eVtT1rOdz" alt=""><figcaption></figcaption></figure>

{% hint style="info" %}
Keep the app open while files are processing. Completed items appear in **All Media** and can be opened, edited, added to albums, or transferred.
{% endhint %}

Once the media has been processed, there will be options to edit the content. There are two different processes to do this - one for photos and one for videos.

### Editing photos

Editing photos will adjust how the content appears in your musubi display once transferred.

The edit window includes two preview modes:

* **Simulated HLD** shows the photo with a visual reference for how it will look in the musubi display
* **Canvas** shows the processed media on a blank canvas

You can edit the content to adjust its appearance. The edit controls include:

* **Background**: choose **On**, **Off**, or **Partial** to show the photo background to varying degrees
* **Duration**: how long the photo will appear in the musubi playlist
* **Scale**: change the size of the photo
* **X Position** and **Y Position**: adjust the position of the photo
* **Rotate 90 degrees**: rotate the content

Once you're adjusted the photo, select **Save** to save the changes.

### Editing videos

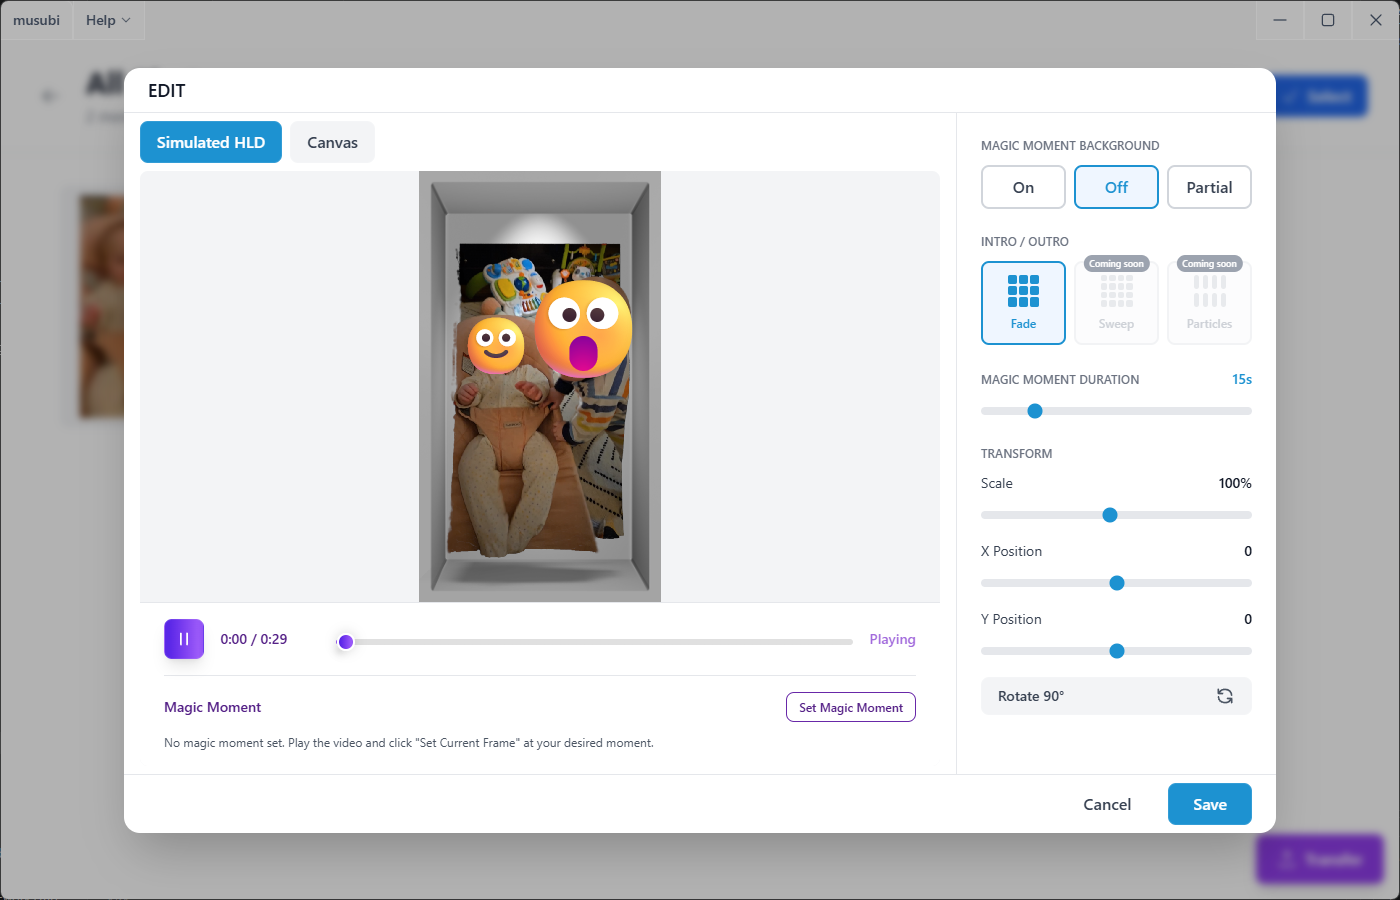
Videos work very differently from photos. We add spatial data to the video and then allow you to select a moment during the video to become a **Magic Moment**. This Magic Moment becomes a freeze-frame of the video with a holographic effect that can be edited like a photo.

The edit screen for videos has:

* **Simulated HLD** shows the video with a visual reference for how it will look in the musubi display
* **Canvas** shows the processed media on a blank canvas

There are also edit controls. These control both the video itself and the Magic Moment, depending on the option:

* **Magic Moment Background**: choose **On**, **Off**, or **Partial** to show the background to varying degrees during the Magic Moment
* **Magic Moment Duration**: determines how long the Magic Moment will display for
* **Scale**: change the size of the video
* **X Position** and **Y Position**: adjust the position of the video
* **Rotate 90 degrees**: rotate the video

You can also manage the video playback timeline and, at a moment you feel is ideal, set the Magic Moment. This can be removed and regenerated if you want to change it.

<figure><img src="/files/artC8tfD1Hb8OFPaFXLR" alt=""><figcaption></figcaption></figure>

<figure><img src="/files/c9iOfQCNhVrT1i8EbZYP" alt=""><figcaption></figcaption></figure>

## Organize albums

Use albums to group media before transfer.

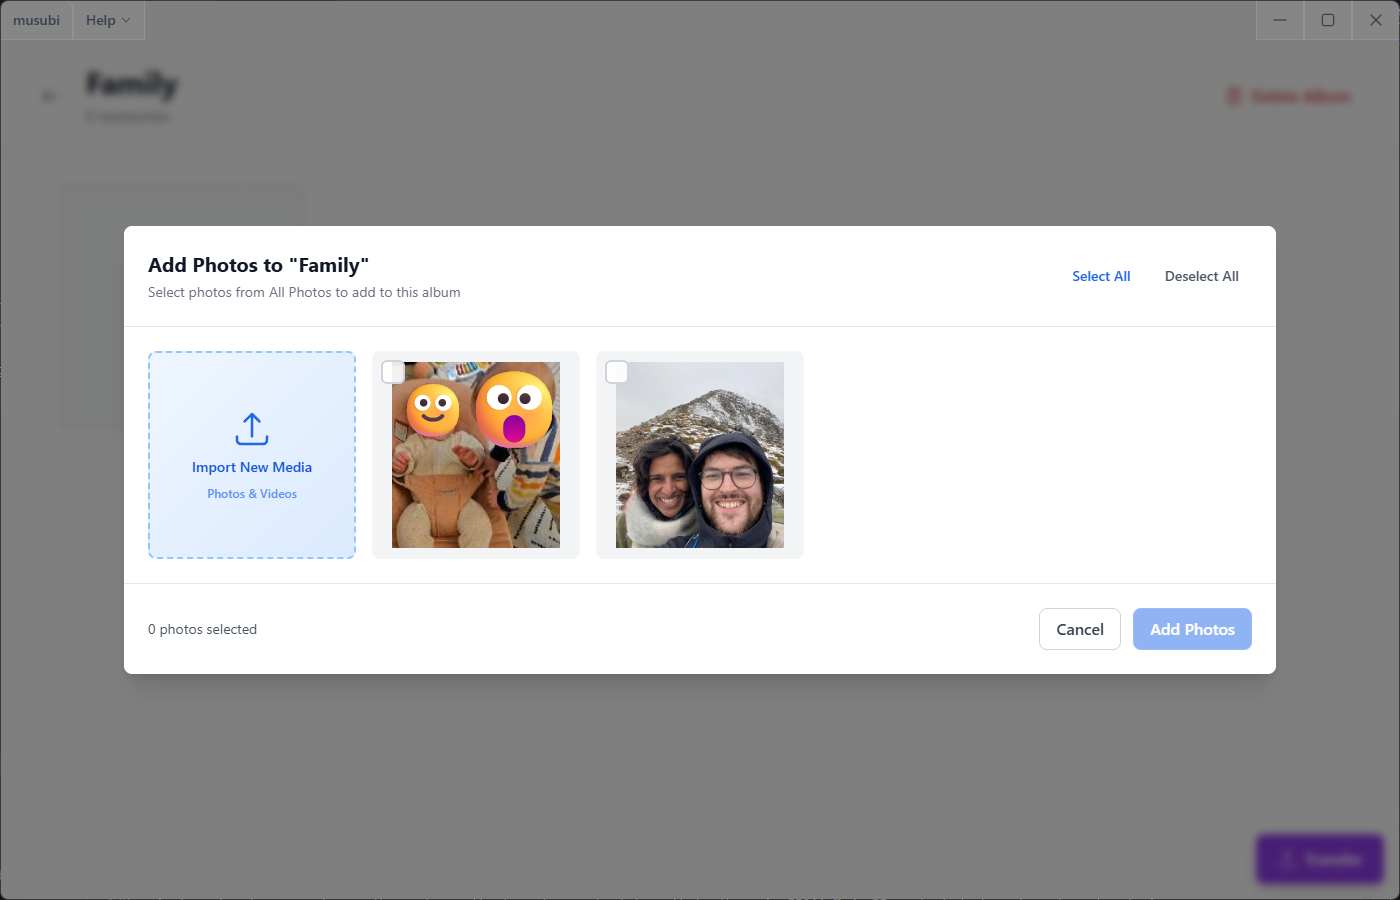
1. In **My Albums**, choose **Create Album**
2. Give the album a name and, optionally, a description
3. Open the album
4. Use **Add Photos** to choose media from **All Media** or import new media directly into the album flow

<figure><img src="/files/Vk9KdUQ05yrl4wPZRPIz" alt=""><figcaption></figcaption></figure>

Removing an item from an album does not delete it from your local library. Deleting an item permanently removes it from storage and from any albums that include it, so use delete only when you no longer need the memory.

<figure><img src="/files/c9iOfQCNhVrT1i8EbZYP" alt=""><figcaption></figcaption></figure>

## Transfer to a connected musubi

Connect the musubi frame to your computer with a USB-C cable and make sure it is powered on.

If the musubi app does not detect a device, it shows a no-device message and asks you to connect and power on the frame. Once the frame is detected, the app shows it as a connected a musubi display.

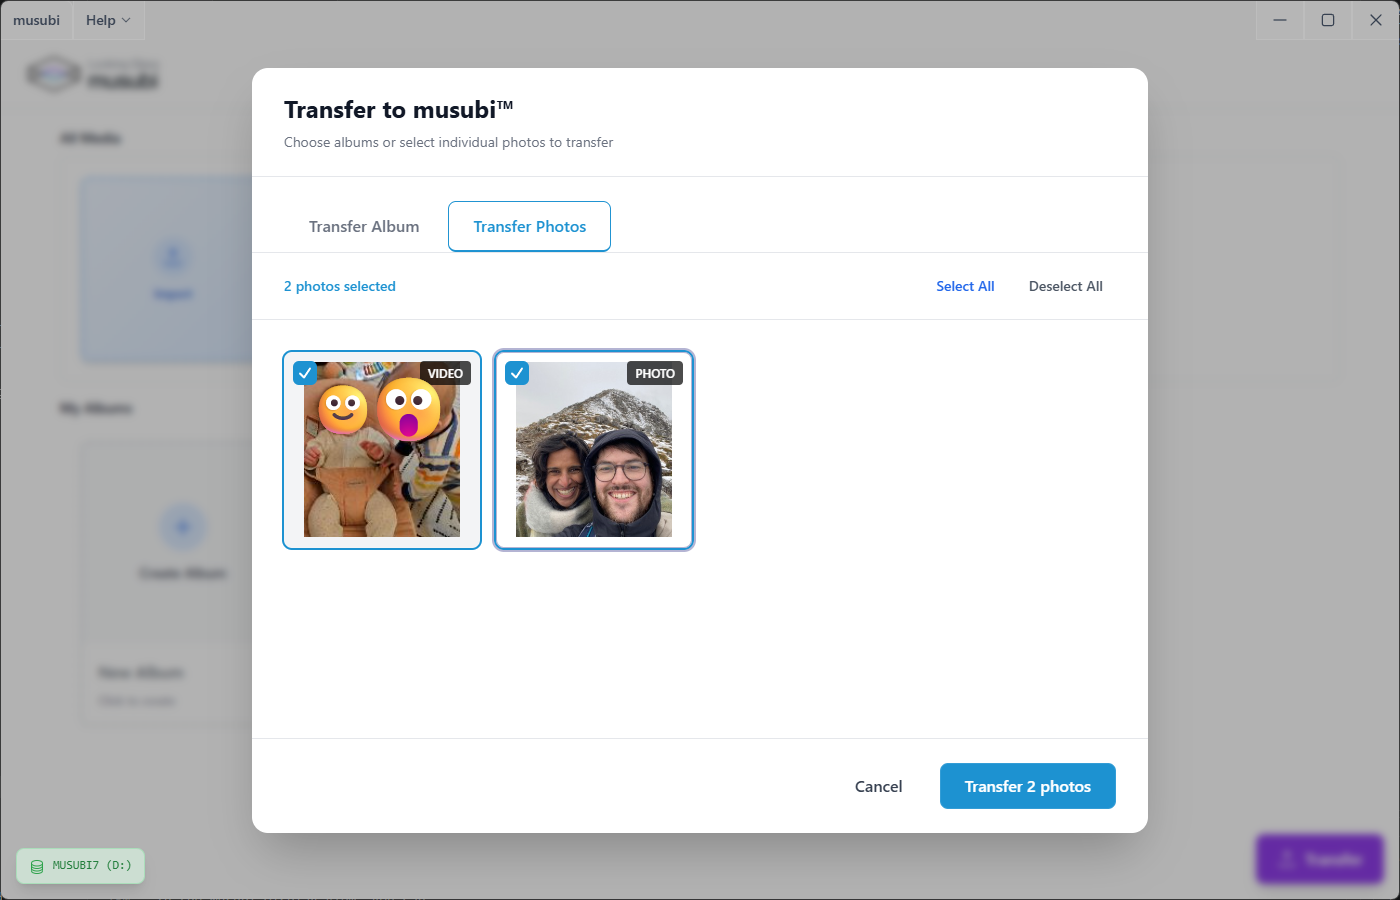
To transfer from the main page view:

1. Choose the transfer control
2. Select **Transfer Album** or **Transfer Photos**
3. Pick one album or select individual media items
4. Choose **Transfer**
5. Wait for the transfer progress to finish
6. When completed, disconnect your musubi device and your new content will play

<figure><img src="/files/G4MQOeZs7mzt2B1ekHZN" alt=""><figcaption></figcaption></figure>

To transfer from inside an album, choose the transfer control from that album. In **All Media**, selected items transfer if selection mode is active; otherwise the current media set transfers.

{% hint style="warning" %}
Do not unplug the musubi while transfer progress is still running. Wait for the app to finish copying media to the connected frame.
{% endhint %}

<figure><img src="/files/c9iOfQCNhVrT1i8EbZYP" alt=""><figcaption></figcaption></figure>

## Manage media on your musubi display

When a musubi frame is connected, a musubi shows a **Musubi Display** card in the Albums view. Open it to review the media currently on the connected frame.

In the Musubi Display view, you can:

* See the media stored on the connected display
* Delete items from the display without changing your local albums
* Open editable items when musubi can match the display item to local metadata
* Re-encode editable items so the display copy matches your latest local edit

Some items may be device-only. Device-only items can be viewed or deleted from the connected display, but they may not be editable from local settings because the app cannot match them to the editable local project data on your computer. This is common for the demo content.

<figure><img src="/files/c9iOfQCNhVrT1i8EbZYP" alt=""><figcaption></figcaption></figure>

## Troubleshooting

### The app does not detect the frame

Confirm that the 7-inch musubi frame is powered on and connected with the included USB-C cable. If it still does not appear, unplug the frame, reconnect it, and wait for your operating system to mount the device before trying the transfer again.

### The frame does not act like a monitor

That is expected. The musubi frame has USB-C power/data only and no HDMI. It is not used as a secondary display. Transfer media from the app, then review it on the frame.

### Transfer is disabled

Make sure at least one completed item or album is available to transfer. If media is still processing, wait for it to finish. If no device is connected, the app waits for the USB connection before enabling transfer.

### A display item is stale

If a display item was edited locally after it was transferred, re-encode it from the Musubi Display view in the app. Re-encoding creates a fresh display copy using the current local edit settings and copies it to the connected frame.

### An item is not editable from Musubi Display

The display may contain media that does not match the local editable metadata on your computer. You can still view or delete device-only items from the connected display, but to edit them, re-import the original source media into the app.

<figure><img src="/files/c9iOfQCNhVrT1i8EbZYP" alt=""><figcaption></figcaption></figure>

## Support

If you have any feature requests or issues and need support, please contact us at <support@lookingglassfactory.com> or join our [Discord](https://discord.gg/bqs8F2cpH).