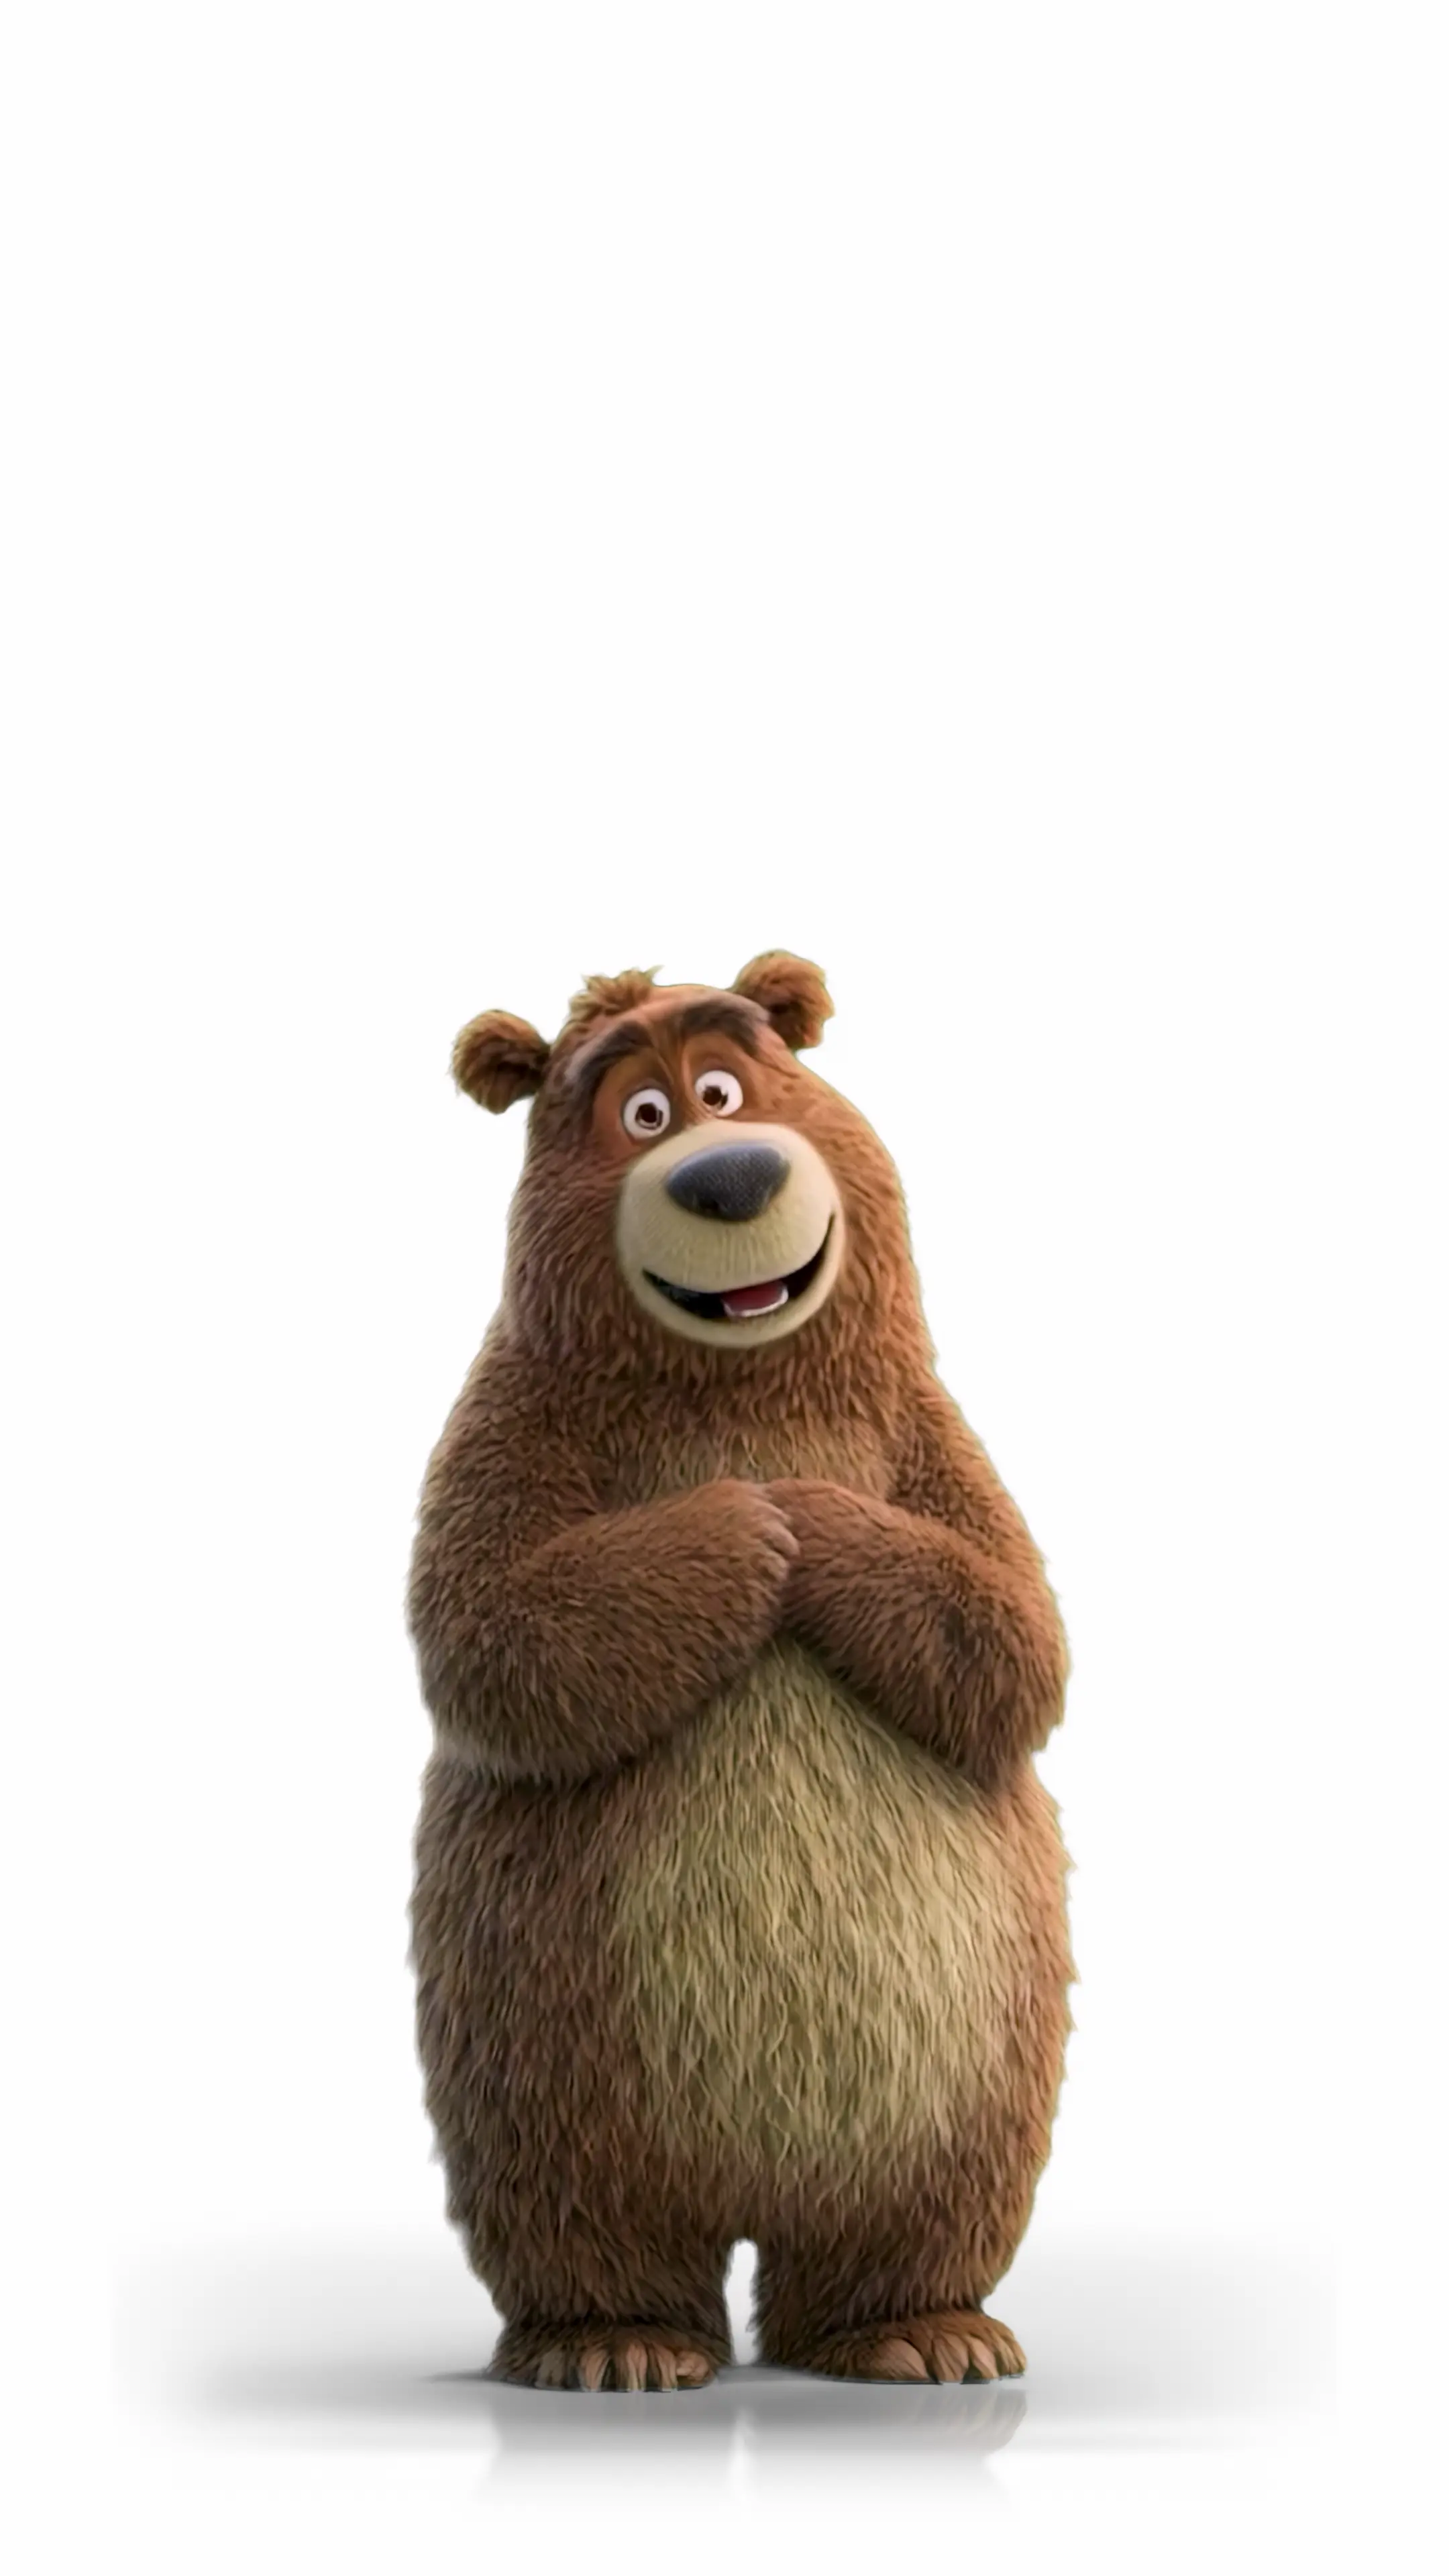
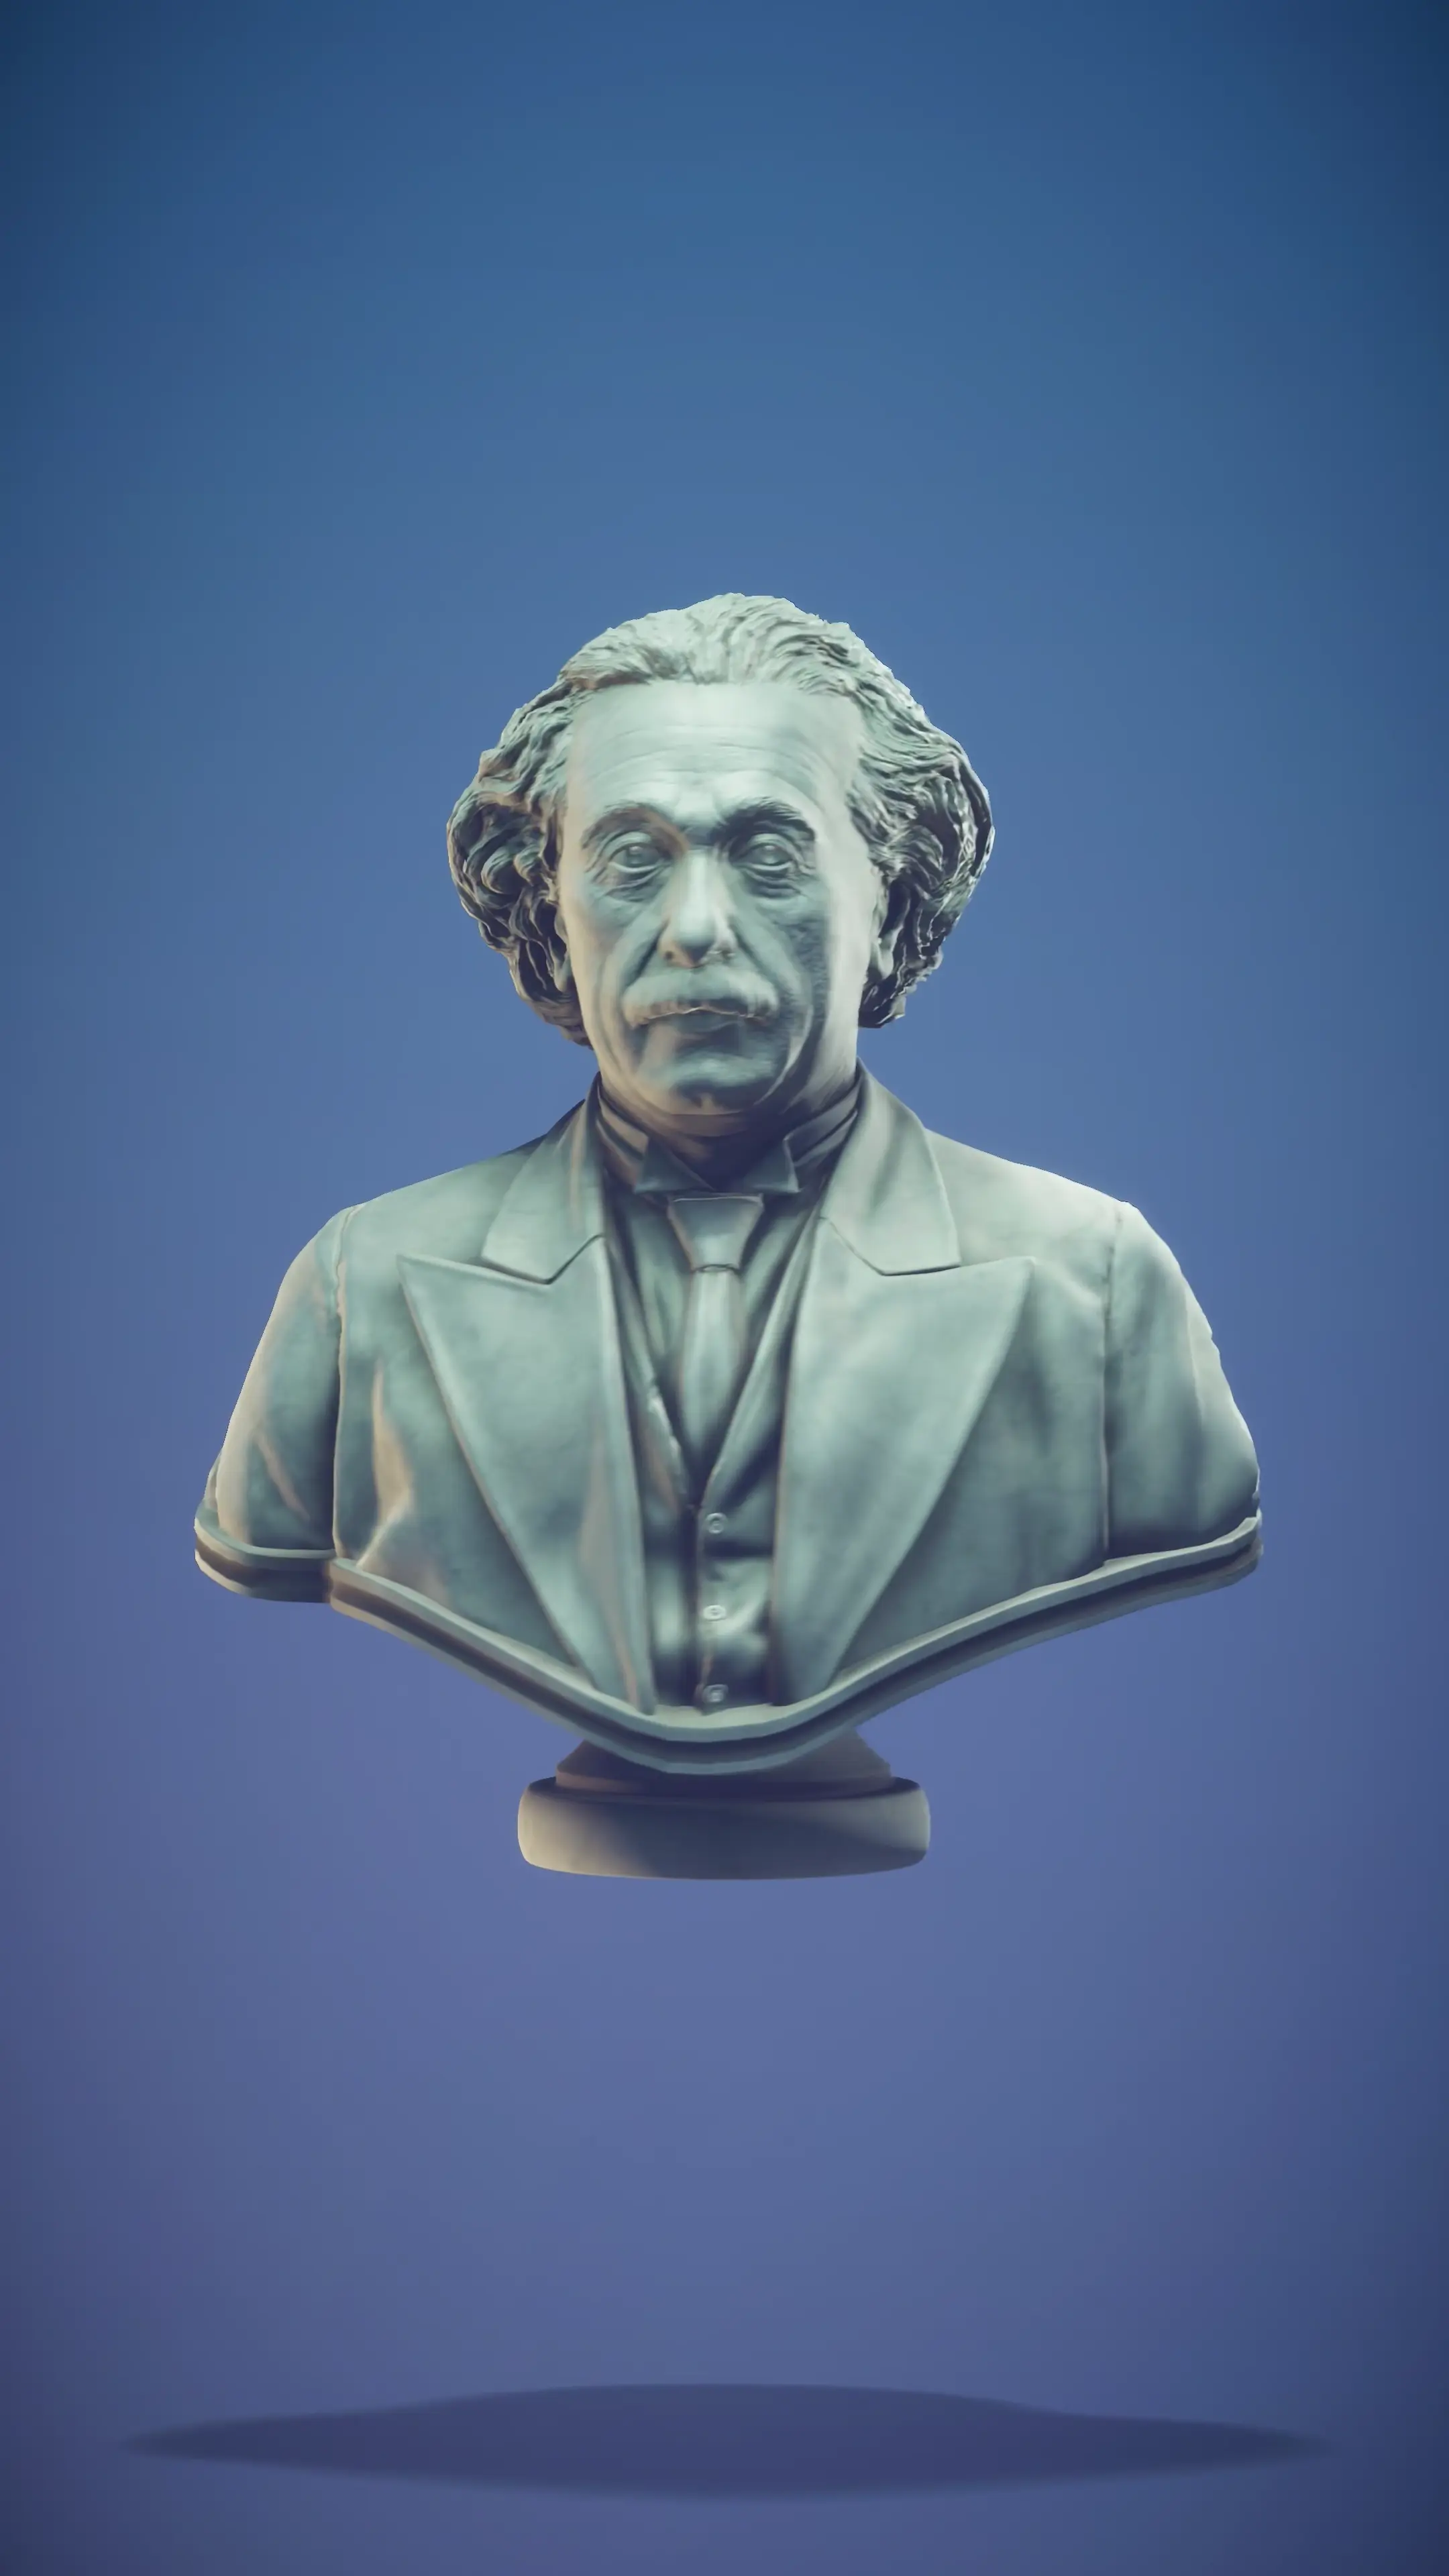
# Looking Glass Hololuminescent™ Displays
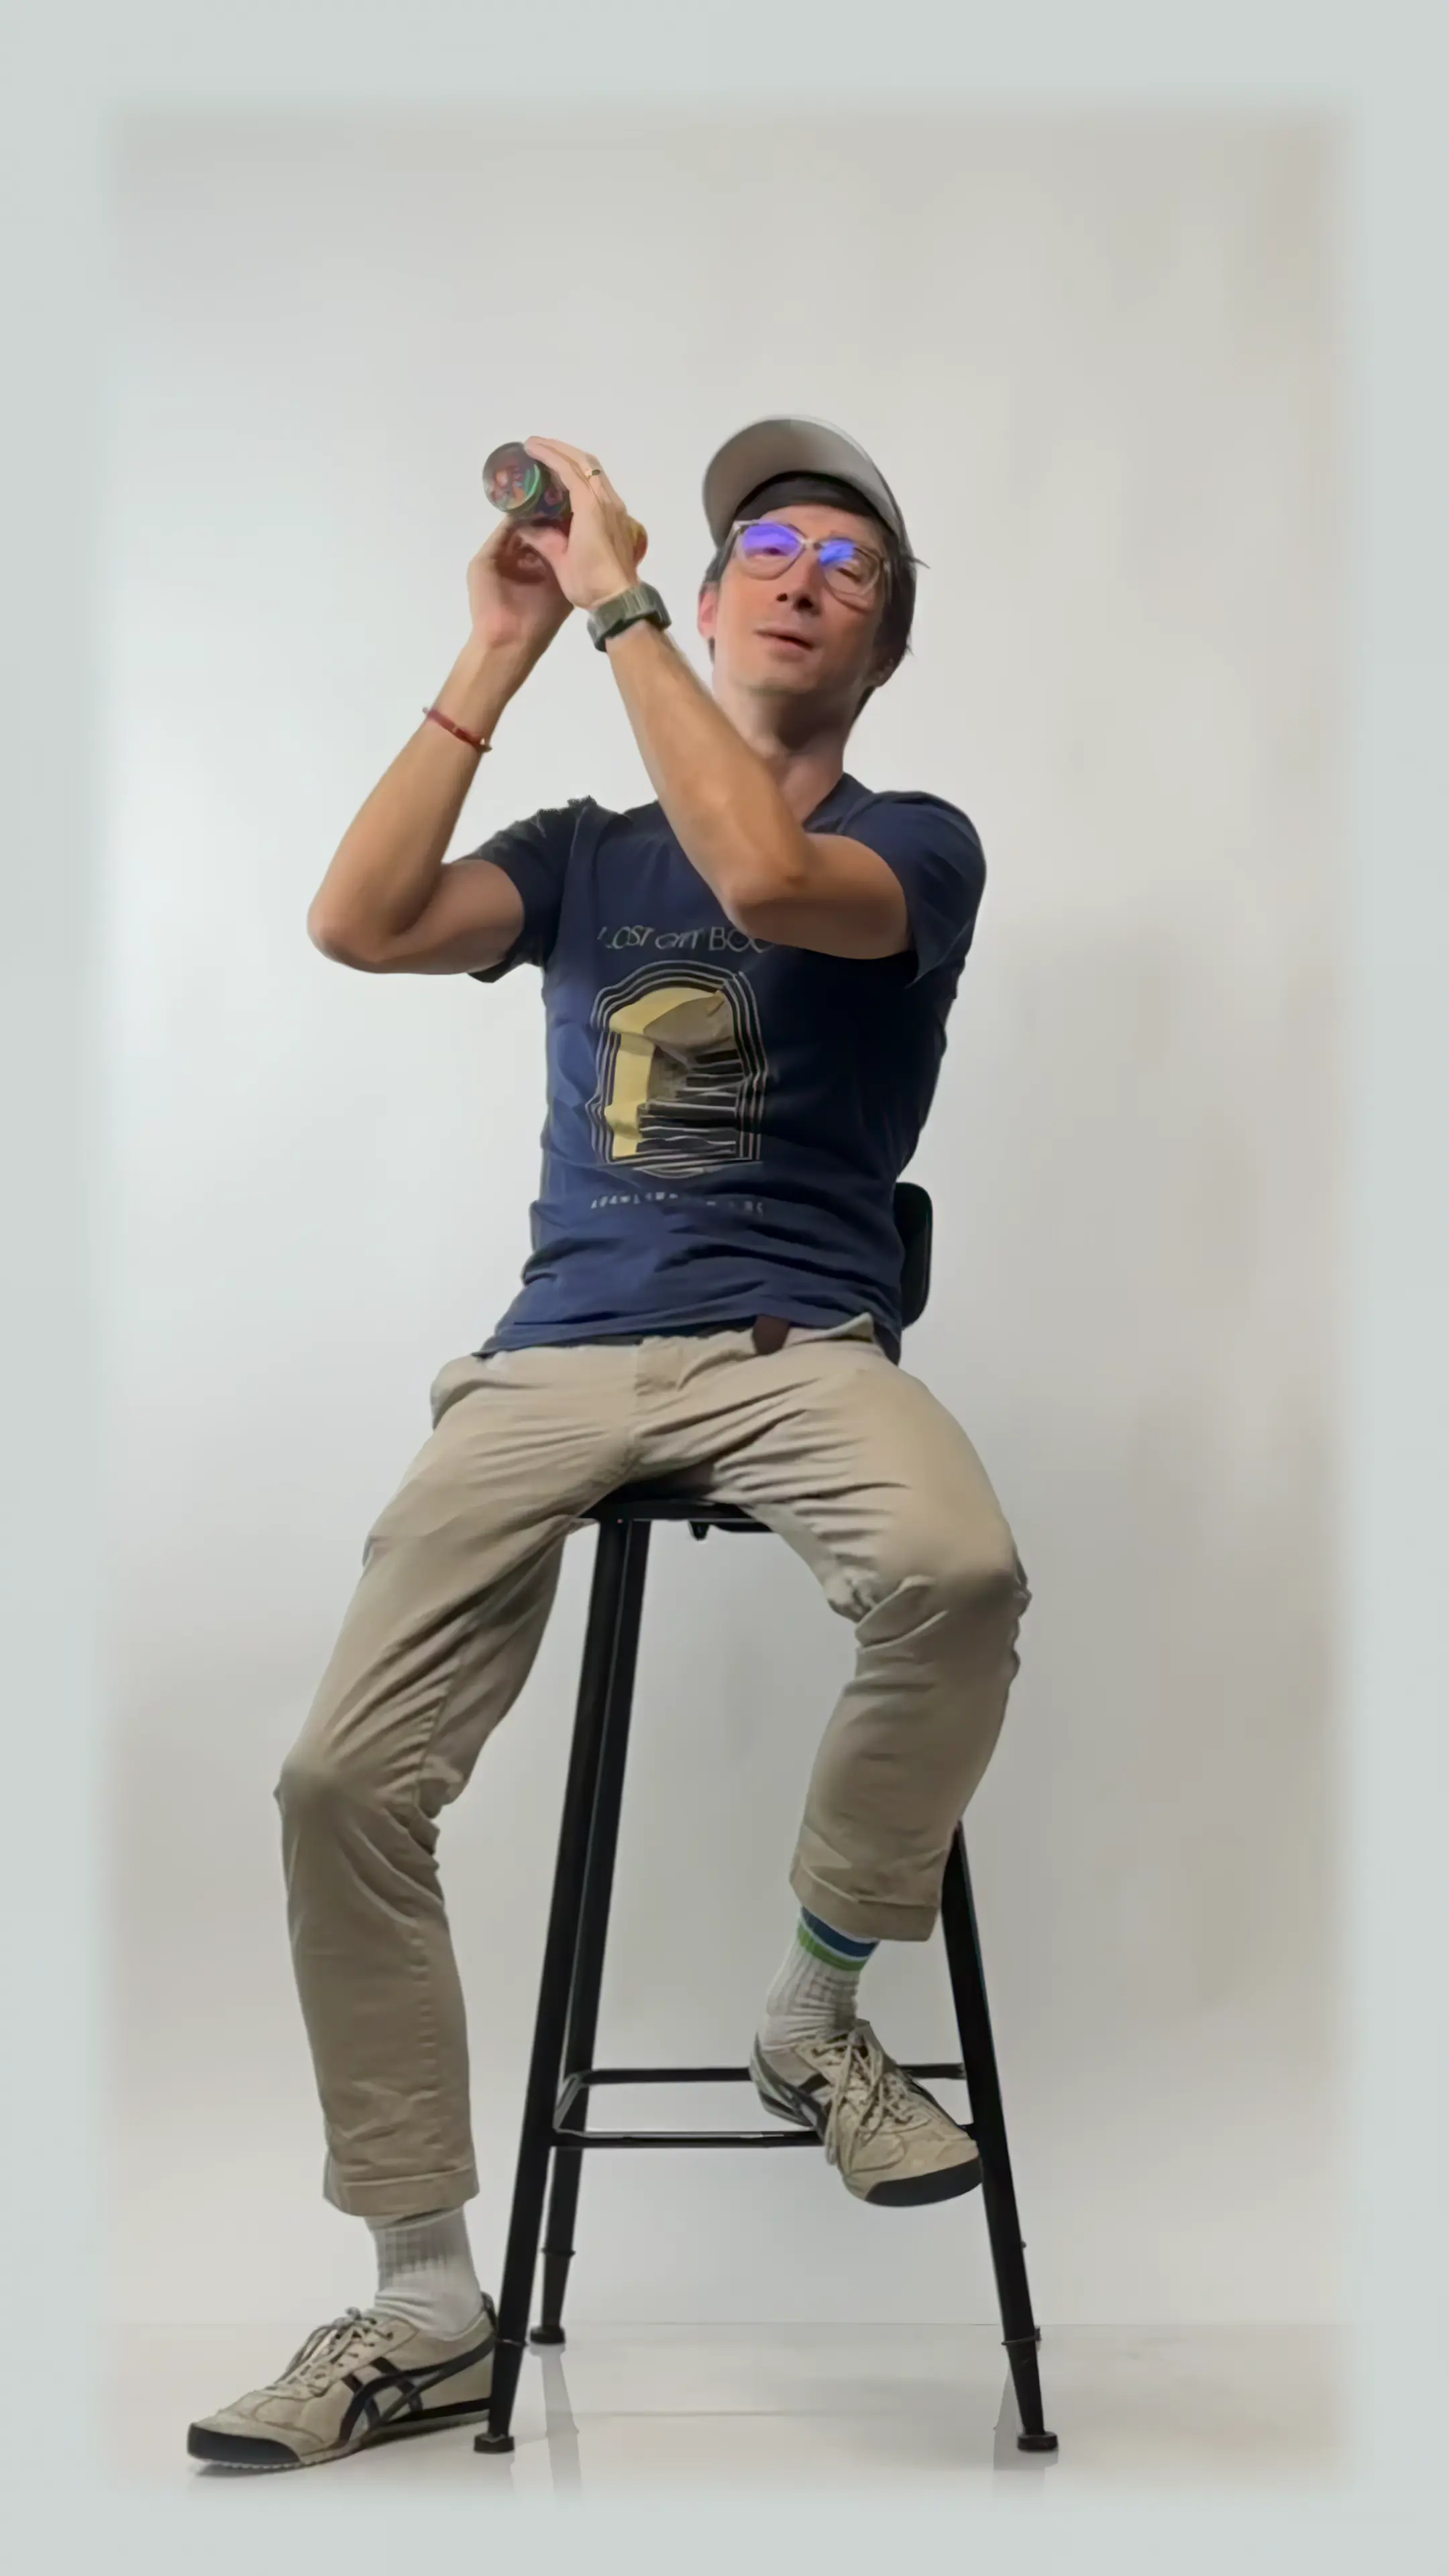
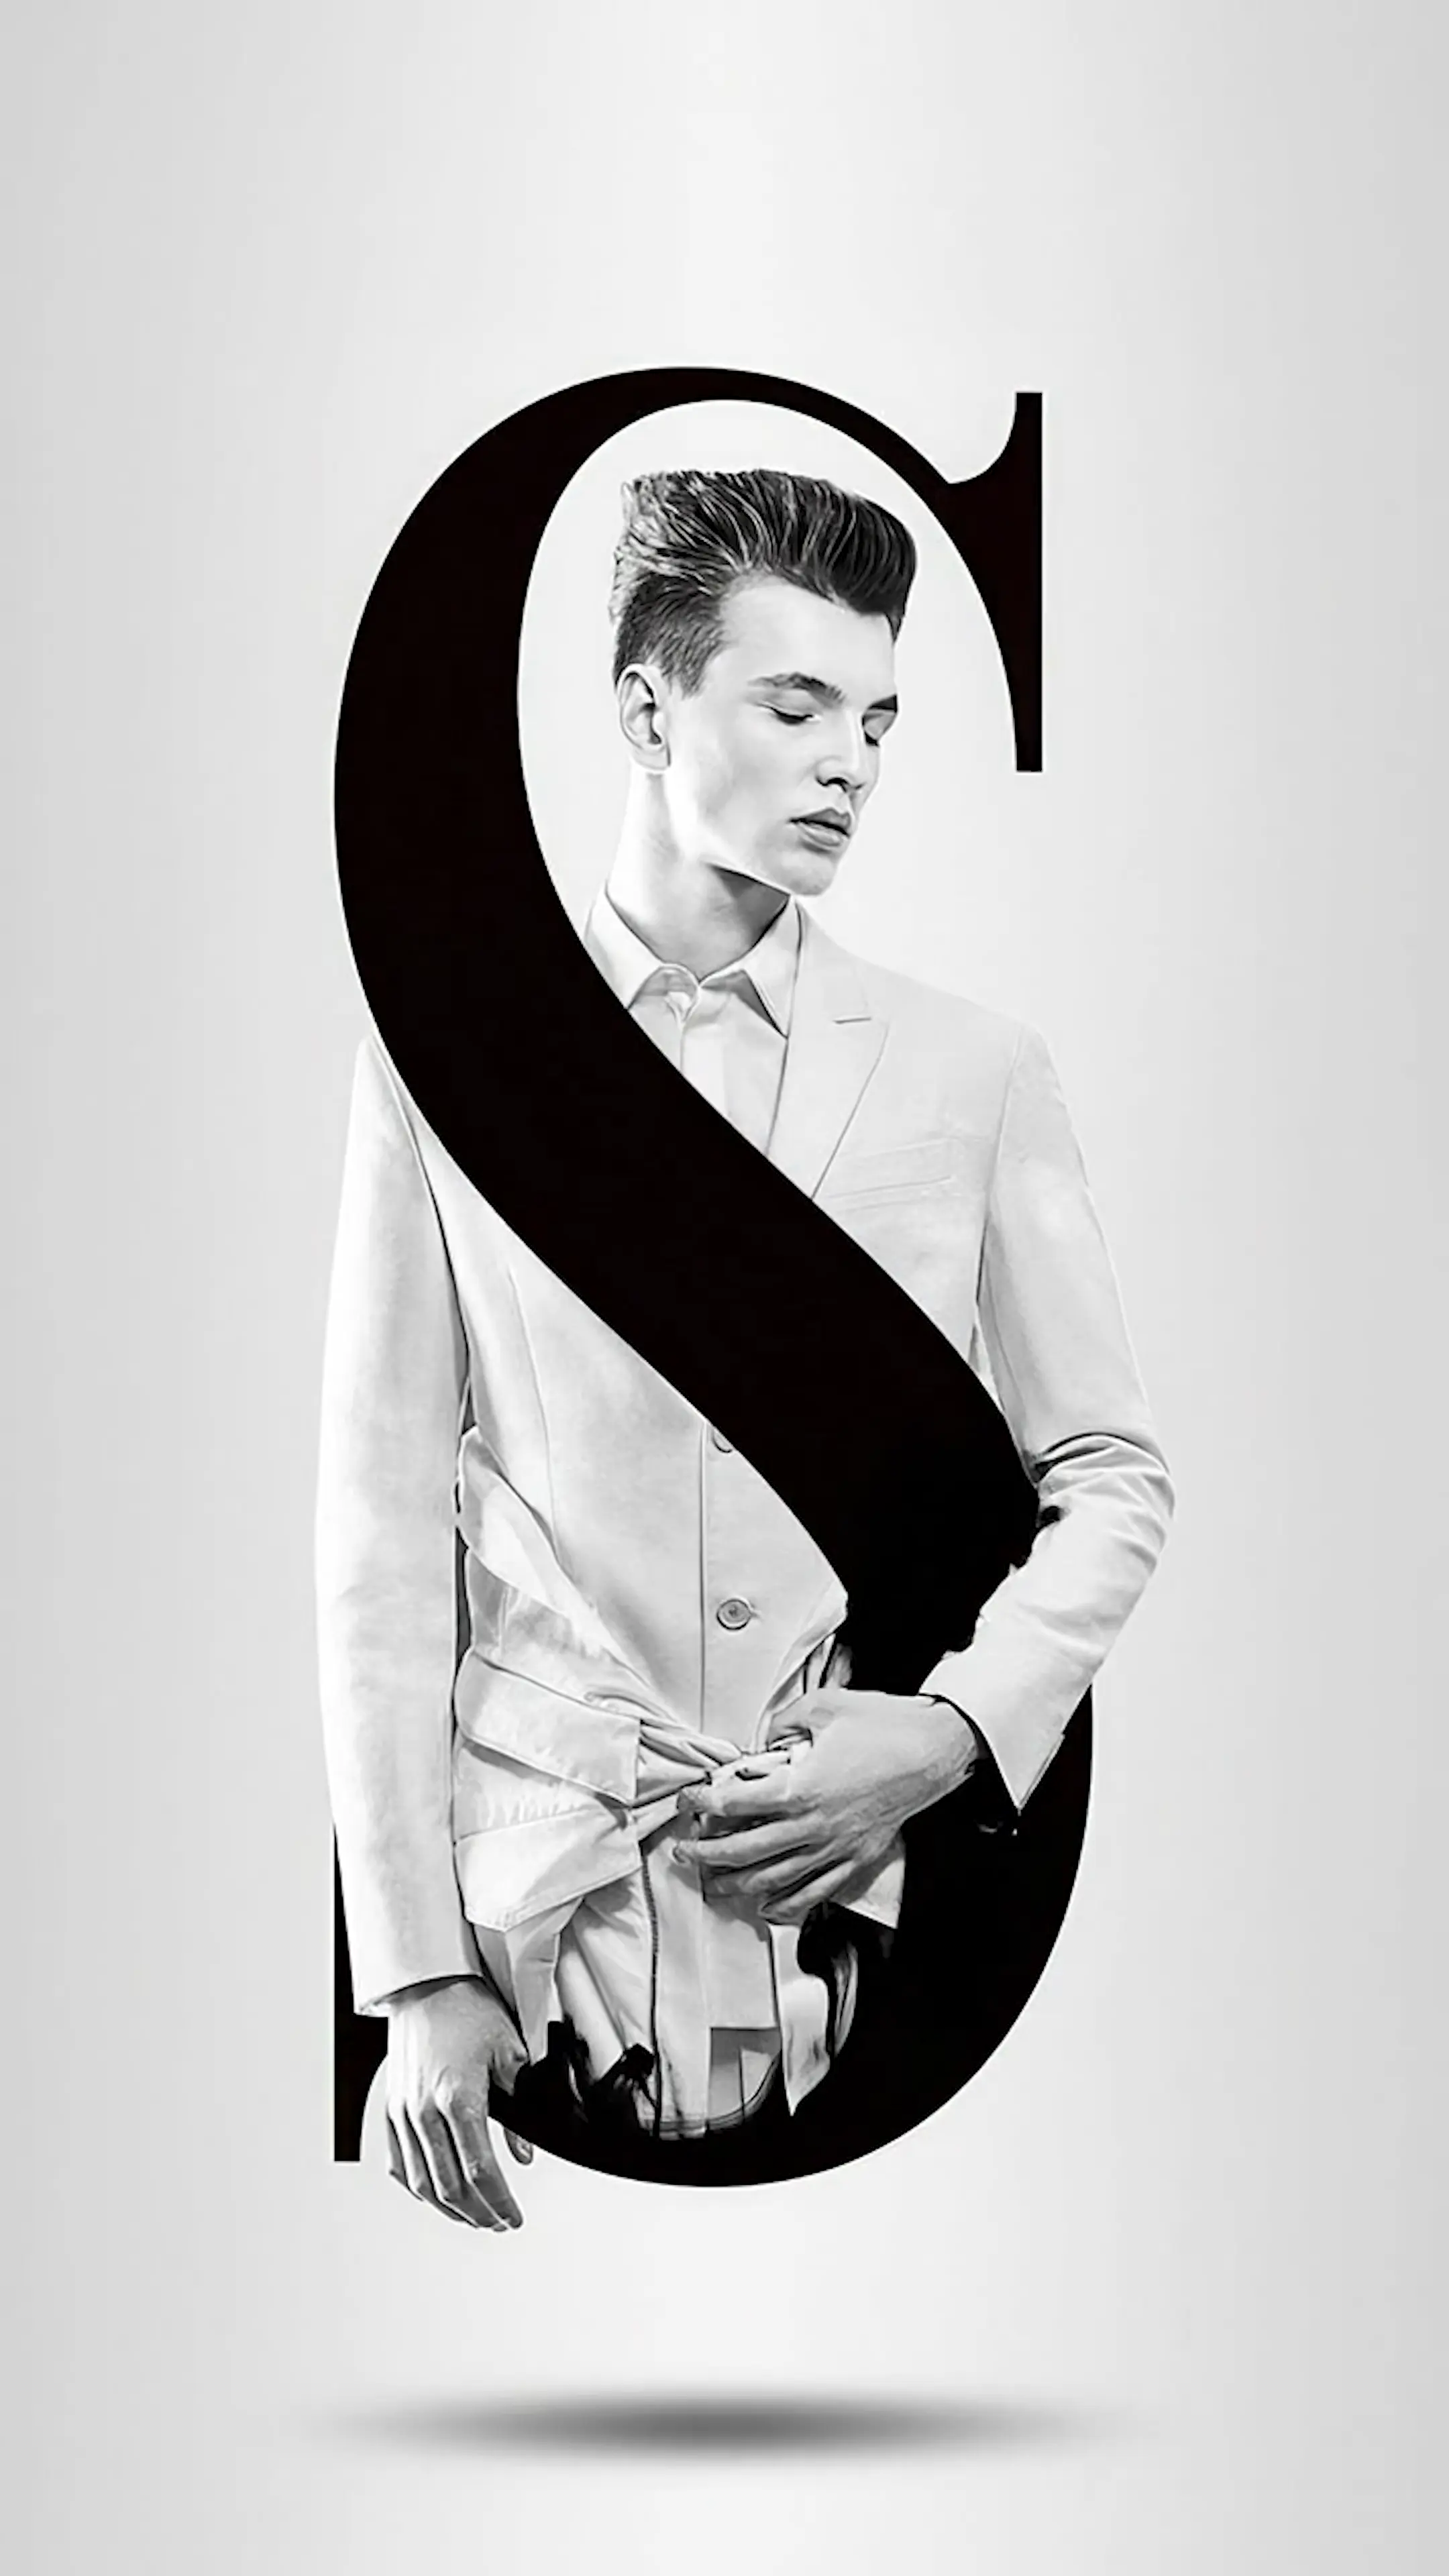
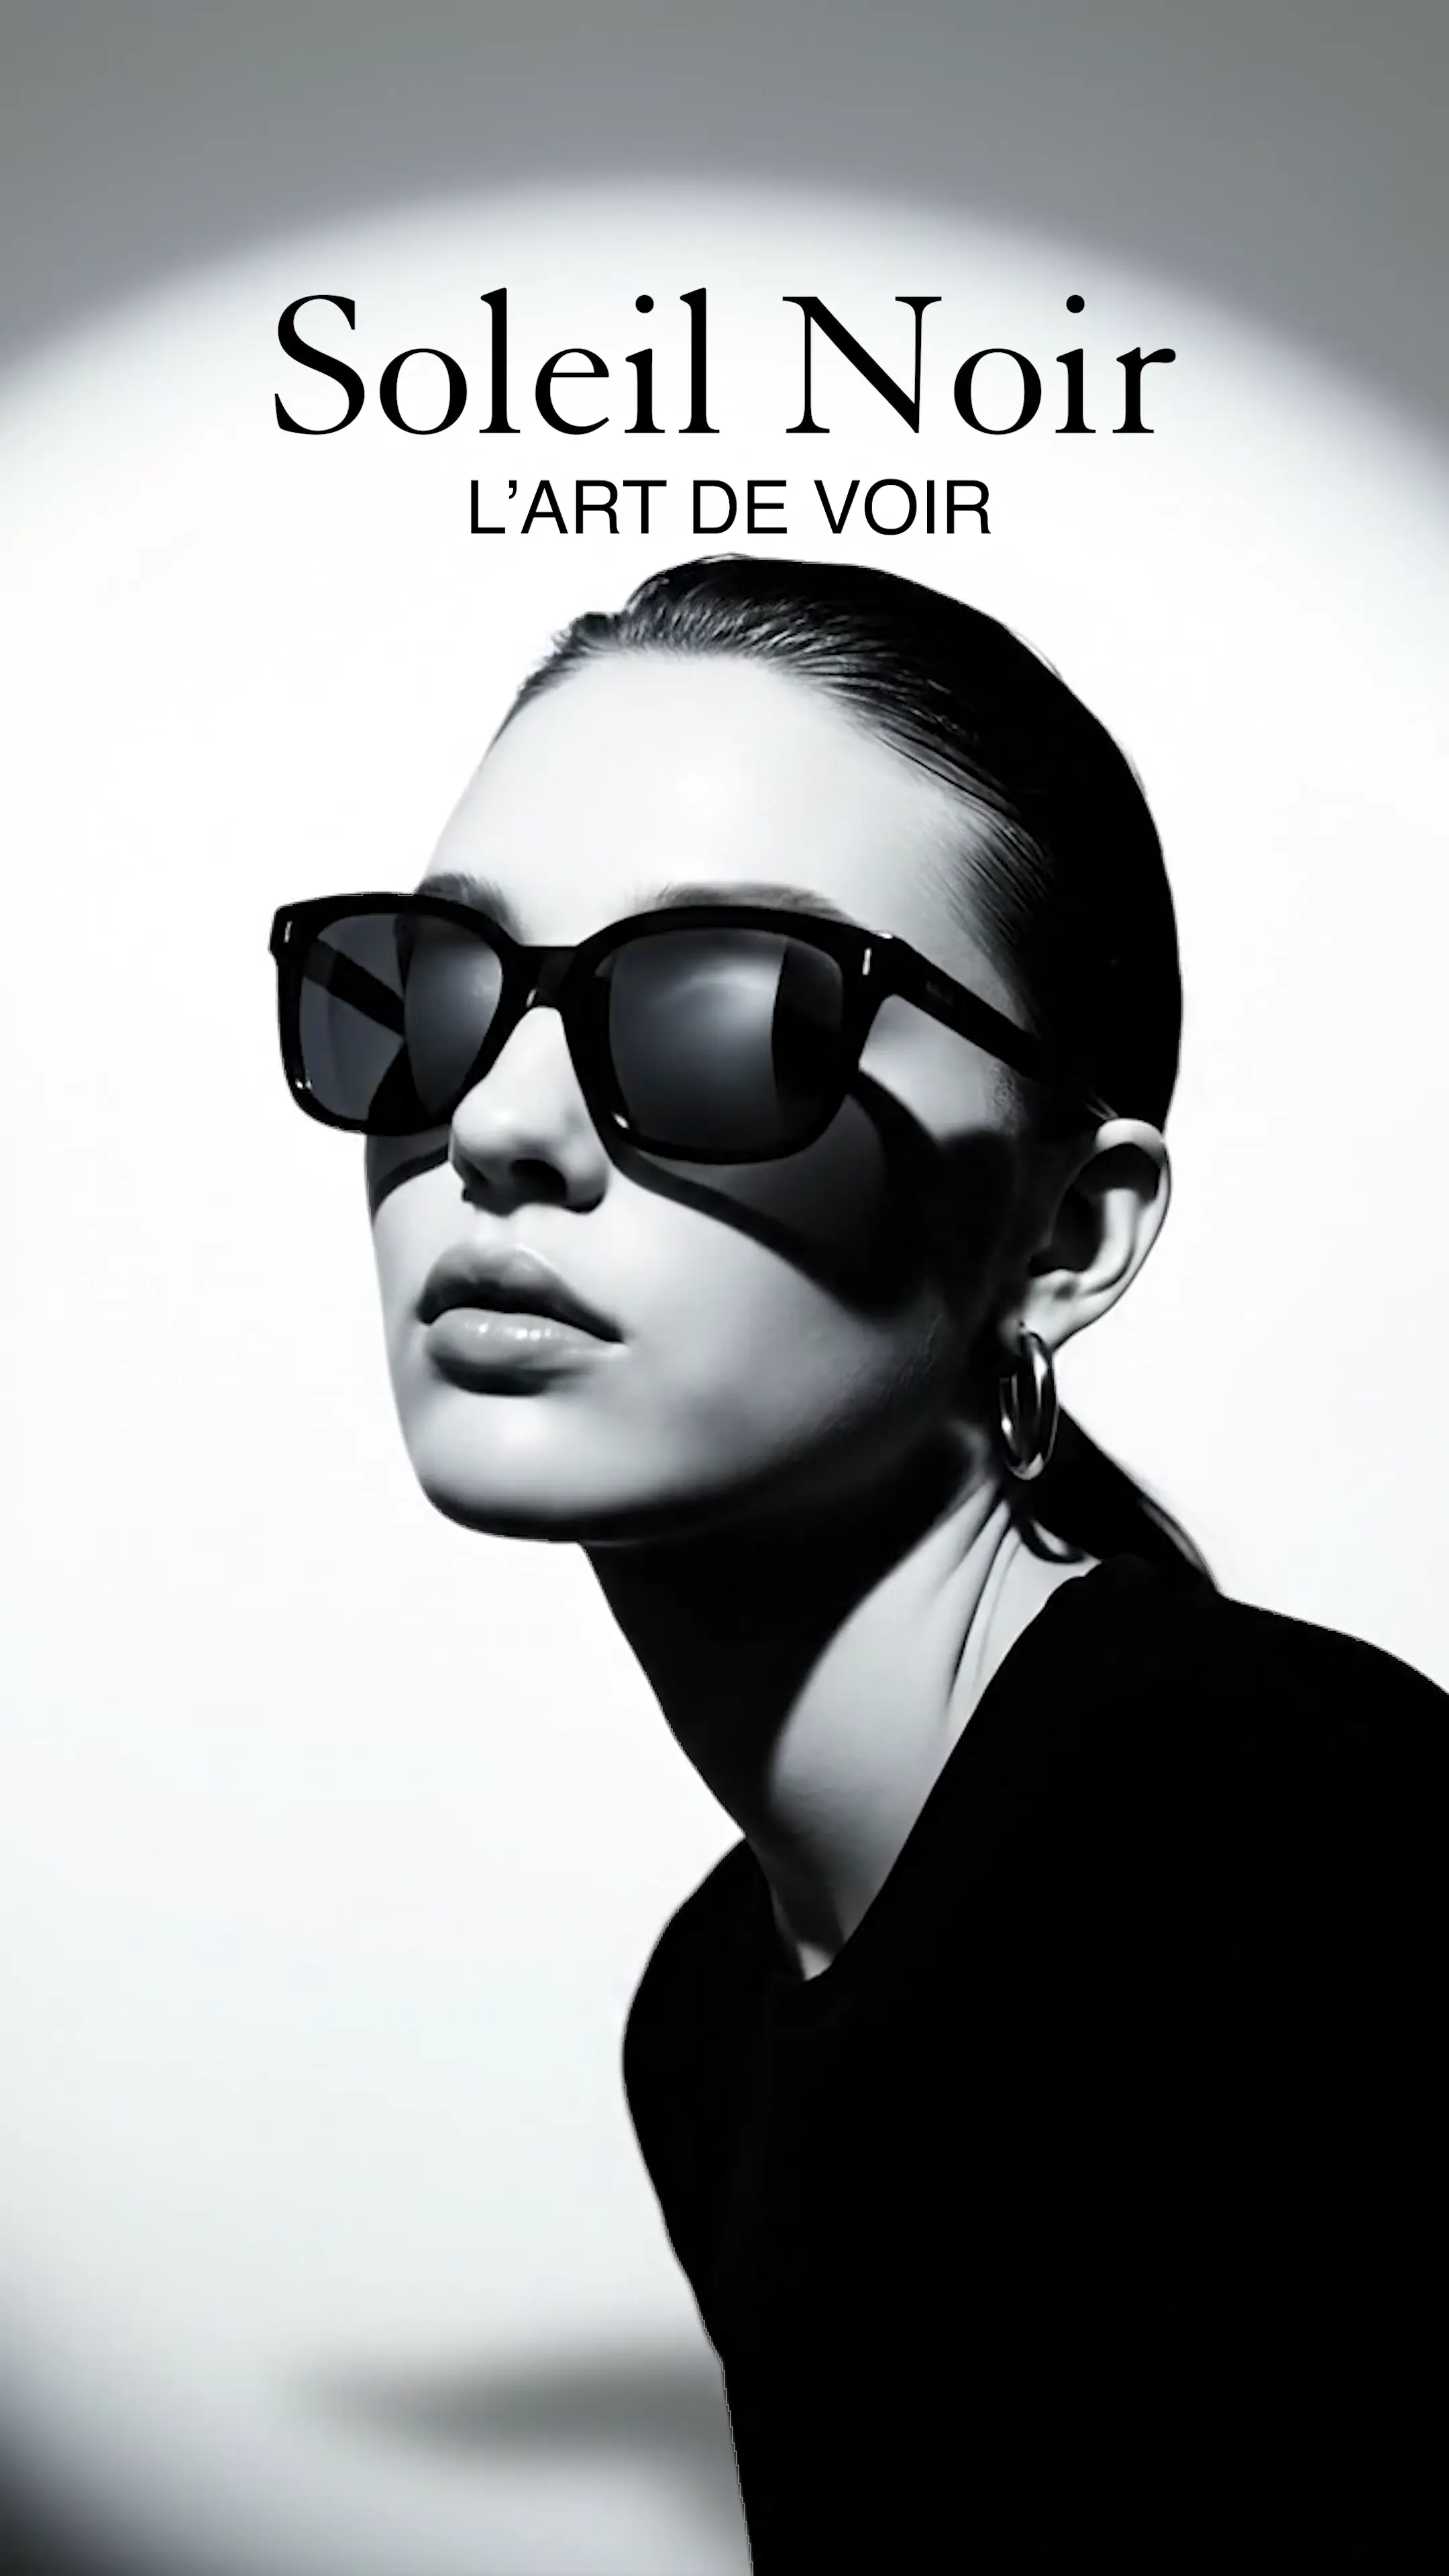
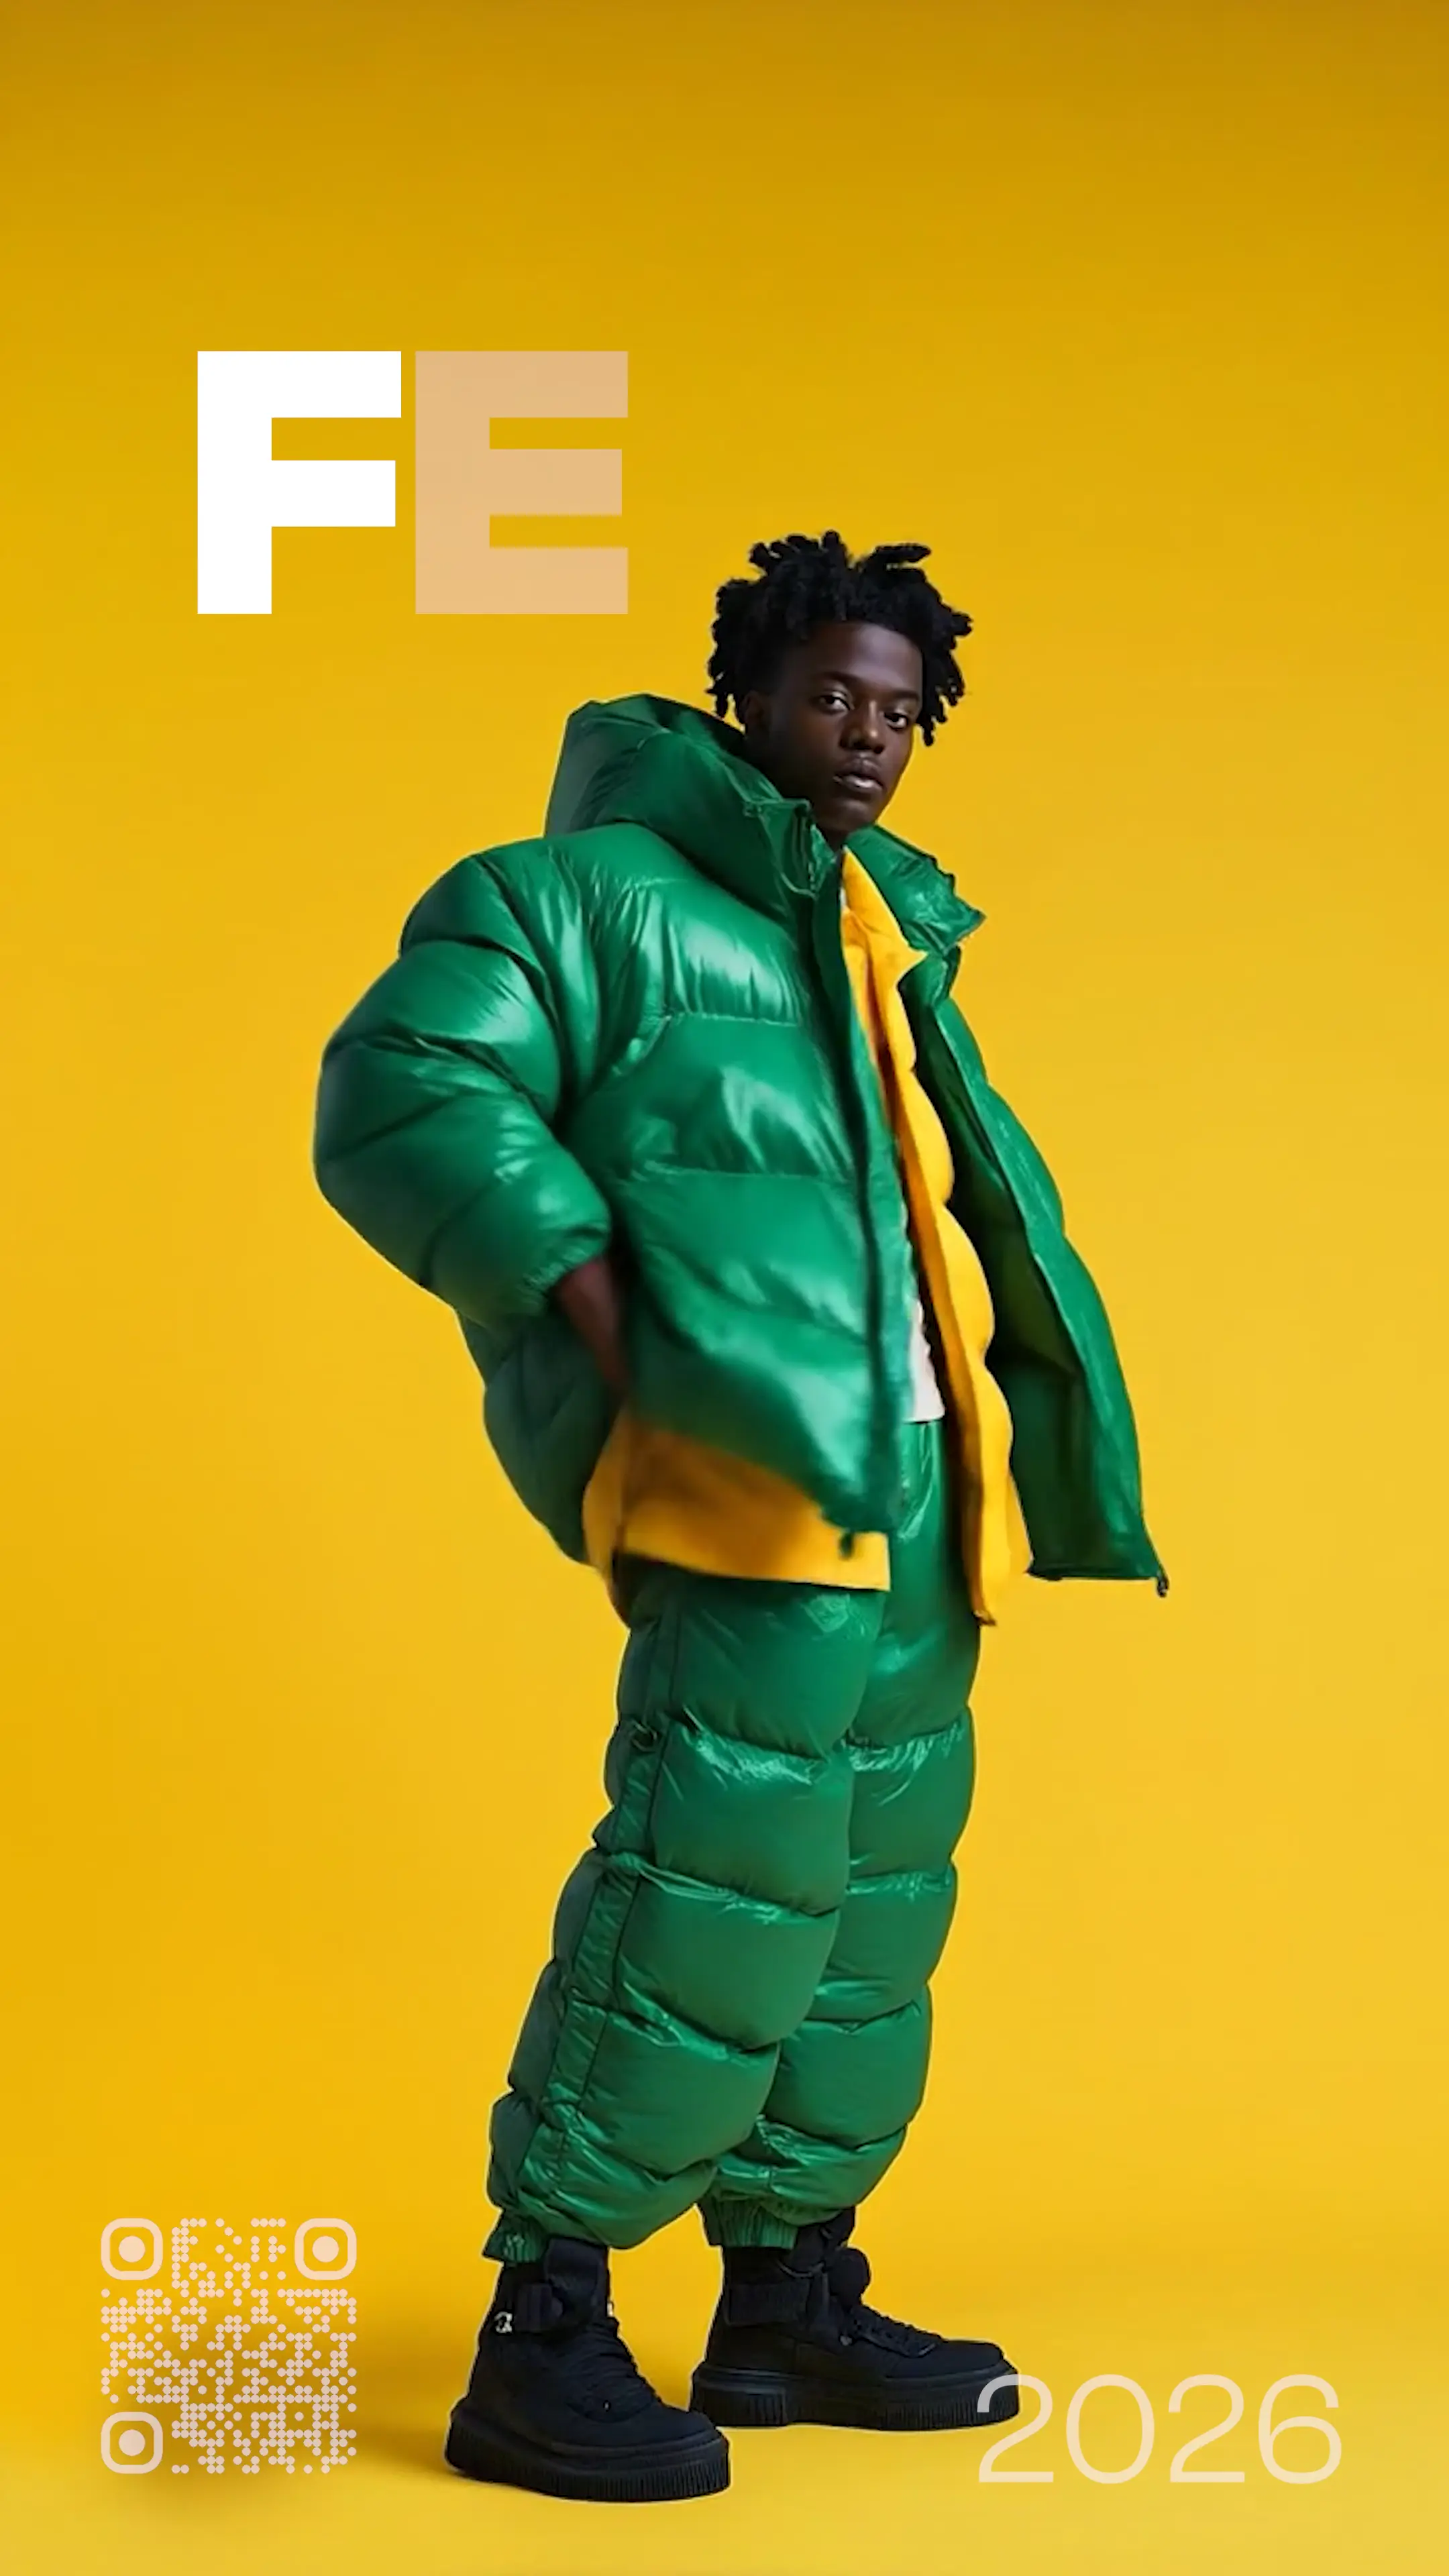
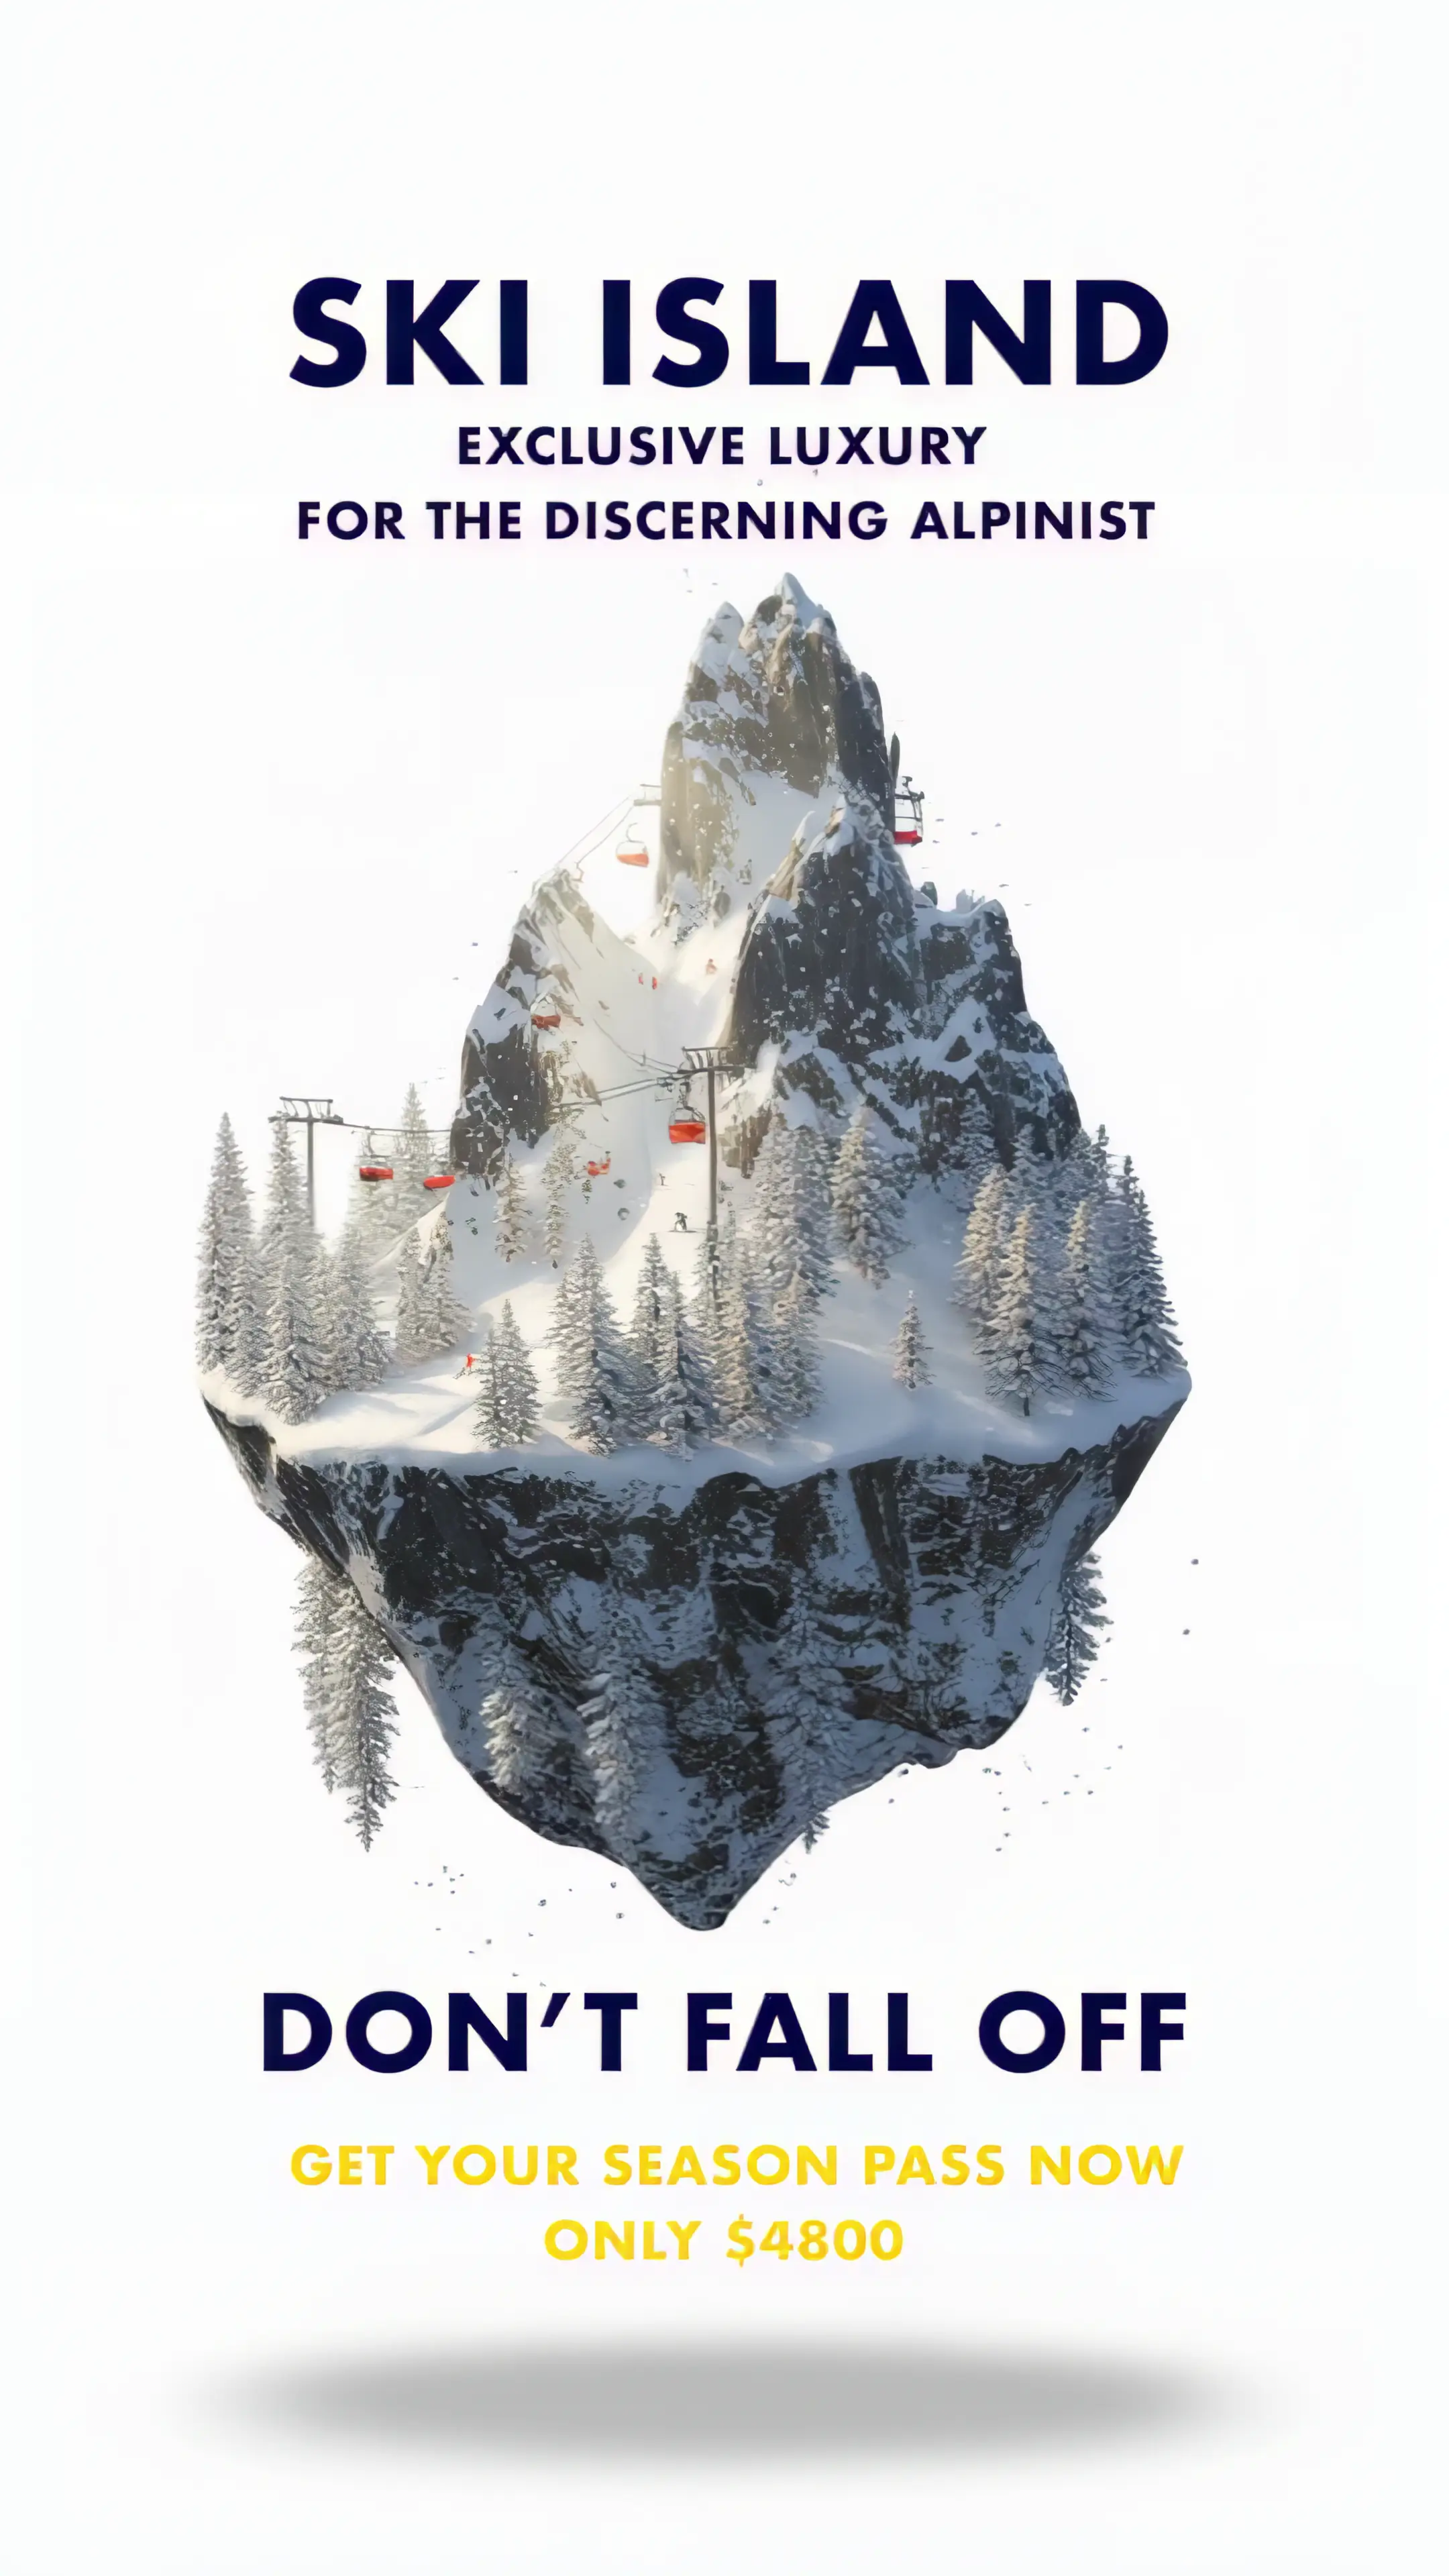
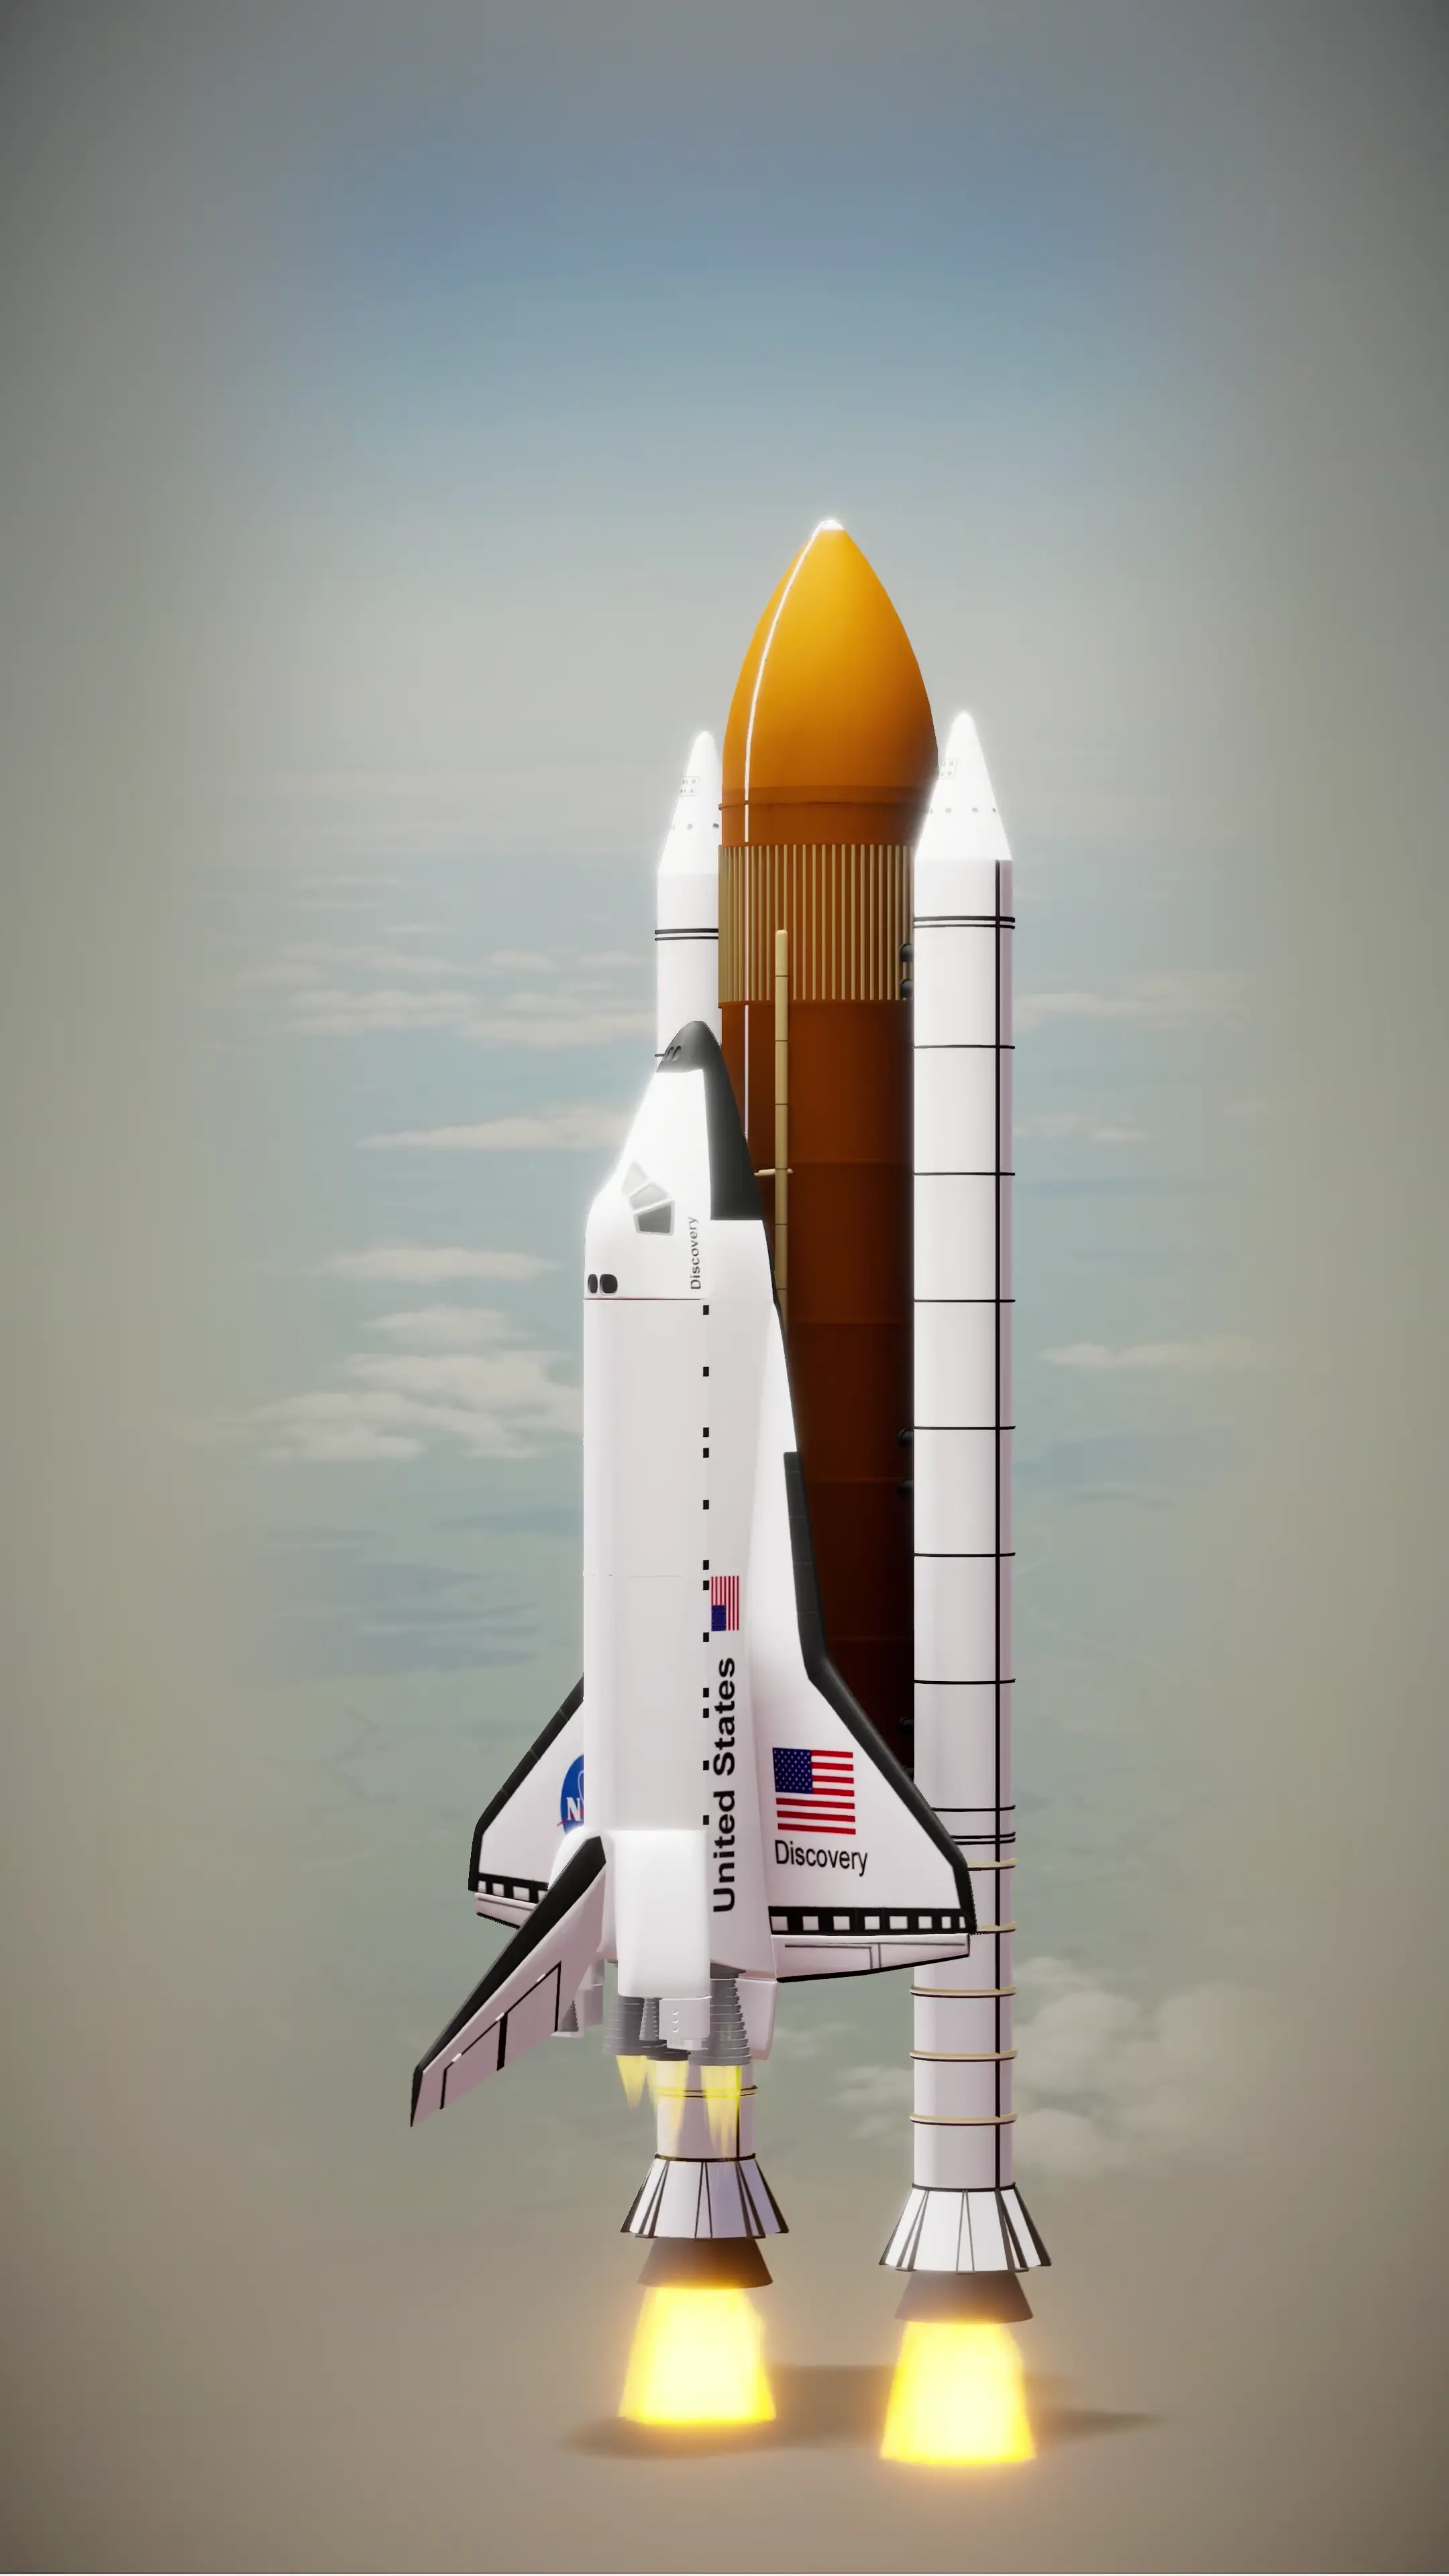
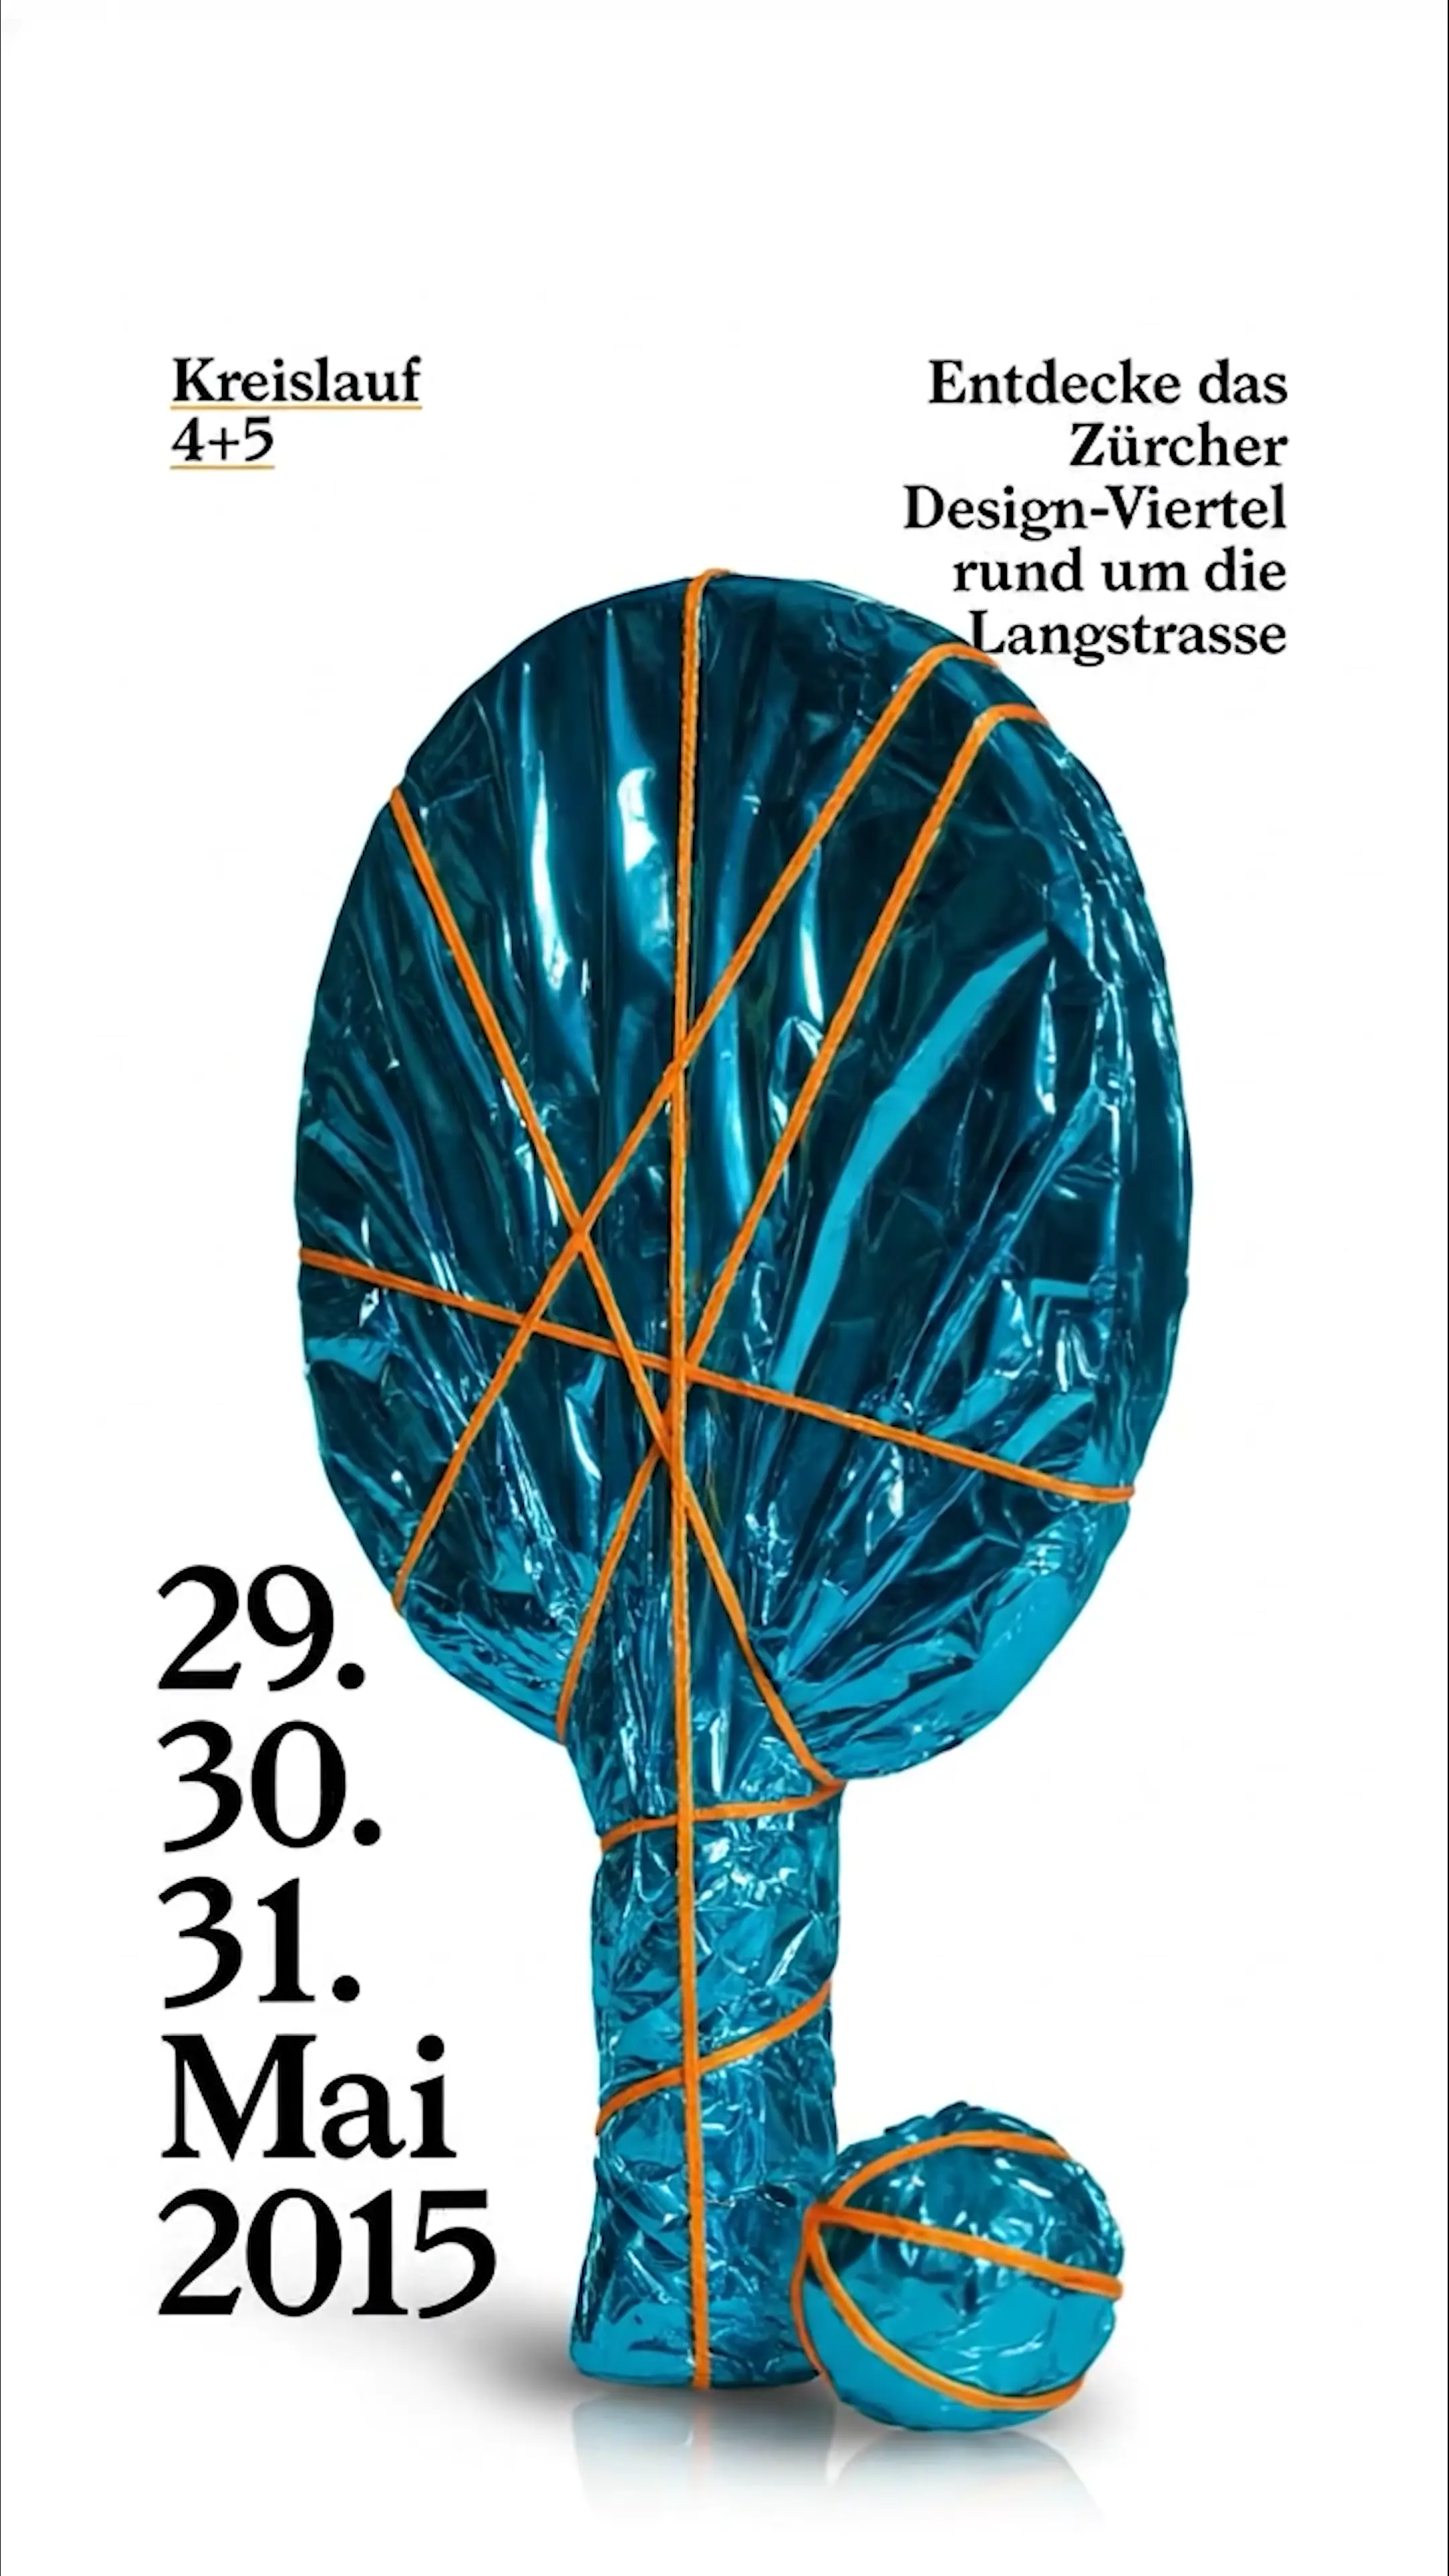
Welcome to a new way to display your brand's content and drive engagement with an incredibly thin form factor.
Looking Glass HLD Displays utilize a fixed holographic volume combined with high resolution display panels to create mind-blowing 3D effects. In this guide we'll walk you through how to create content for this new category of display — both video content and real-time applications.
{% hint style="info" %}
## Getting Started
Set up your [**musubi**](/getting-started/musubi-setup-guide) and load your first holographic memories with the musubi app.
Set up your [**HLD 86"**](/getting-started/hld-86-setup-guide) with our step-by-step setup guide.
For other HLD models, follow our [**general onboarding guide**](https://lookingglassfactory.com/hld-setup).
Read more about our full display lineup on our [**website**](https://lookingglassfactory.com/hld-overview).
{% endhint %}
## Creative guidelines
Any video tool can be used to create content — from digital content creation (DCC) apps like Blender and C4D to generative AI tools like Kling and Veo. Real-time applications are also supported. Simply run the application on a computer that can connect to the HLD via HDMI, and ensure your content is created following our guidelines.
See our creative guidelines for instructions on how to frame [people/characters](/creative-guidelines/characters) and [products](/creative-guidelines/products) in the HLD and recreate this setup in your tool of choice.
For step-by-step tutorials for tools like Premiere Pro, After Effects, and Blender, see our [Content Guides](#content-guides) below.
## Content guides
## Creating, reviewing, and preparing content
Once you have a video, still image, or supported 3D asset, open it in the browser-based [**HLD Author**](/apps-and-tools/hld-author).
HLD Author lets you:
* Adjust framing, rotation, chroma key, shadows, lighting, and media-specific effects
* Create animated or depth-treated output from still images and render supported 3D media
* Preview your content on a simulated Hololuminescent Display
* Export the correct MP4 for the included [HLD Demo Media Player](/managing-content/using-the-demo-media-player), BrightSign, or standard portrait-video playback
This is the easiest way to create or refine HLD-ready content and confirm framing, depth, and orientation before deployment.
## Deploying content
If your content has been generated and reviewed in [HLD Author](/apps-and-tools/hld-author), and you now want to set up playback on hardware, see these guides:
* Use the [Demo Media Player](/managing-content/using-the-demo-media-player) for simple, bundled playback
* Convert the included Demo Media Player into a full digital signage solution with [Yodeck](/managing-content/yodeck-digital-signage-player)
* Use [BrightSign](/managing-content/brightsign-digital-signage-player) for long-term digital signage installations
# musubi setup guide
Unbox, set up, and load your first holographic memories onto musubi.
This guide walks you through unboxing musubi, attaching the display stand, playing the preloaded demo content, using the playback controls, and loading your own photos and videos with the musubi app.
{% hint style="warning" %}
Read and keep the supplied safety instructions before using musubi. Use only the supplied power adapter. Do not crush, cut, burn, or attempt to replace the internal battery, and keep the device away from extreme heat.
{% endhint %}
## Video setup guide
{% embed url="" %}
## What you'll need
* The musubi display
* The supplied display stand
* The supplied power adapter
* The supplied USB-C cable
* A supported Mac or Windows computer - [see requirements](/apps-and-tools/musubi-app#computer-requirements)
* A photo or short video to turn into a holographic memory
The package also includes a cleaning cloth and the safety instructions.
The package includes the musubi display, display stand, power adapter, and USB-C cable.
{% hint style="info" %}
musubi uses USB-C for power and data. It does not have an HDMI input and does not act as a secondary monitor.
{% endhint %}
## Unbox and inspect musubi
1. Open the book-style package.
2. Remove the cleaning cloth and safety instructions. Read the safety instructions before continuing.
3. Lift the inner cover to reveal the setup QR code and accessories.
4. Remove the power adapter, USB-C cable, display stand, and musubi display.
5. Confirm that all parts are present and check them for visible damage.
6. If anything is damaged or missing, stop and contact support before continuing.
## Set up the display stand
**Parts required**
* The musubi display
* The silver screw-in display stand
1. Hold musubi securely with the back facing you.
2. Locate the threaded stand socket beside the USB-C port.
3. Screw the display stand clockwise into the socket until it is secure.
4. Place musubi upright in portrait orientation on a flat, stable surface.
5. Make sure the stand rests securely before releasing the display.
Screw the display stand into the socket beside the USB-C port.
## Turn on the demo content
musubi includes preloaded demo content that begins playing after startup.
1. If the battery needs to be charged, connect the supplied USB-C cable between musubi and the supplied power adapter, then connect the adapter to power.
2. Press the rear **Power** button.
3. Wait for the Looking Glass startup animation to finish.
4. Confirm that the preloaded demo content begins playing.
## Use the playback controls
The three circular controls are on the back of musubi. From left to right:
| Control | Icon | Purpose |
| ------- | ------------ | ----------------------------------------------------------------------------------------- |
| Power | Power symbol | Turns musubi on or off. |
| Volume | Speaker | Changes the playback volume. The current level briefly appears at the top of the display. |
| Next | Double arrow | Skips to the next memory. |
The rear controls, from left to right, are Power, Volume, and Next.
## Connect musubi to a computer
1. Make sure musubi is powered on.
2. Connect one end of the supplied USB-C cable to the **TYPE-C** port on the back of musubi.
3. Connect the other end directly to a USB-C port on your computer.
4. Wait while musubi shows the USB connection screen and your computer mounts it as a removable drive.
Keep musubi powered on and connected while importing, processing, and transferring content.
## Download and install the musubi app
1. Download the musubi app [here](/apps-and-tools/musubi-app#download-application).
2. Open the installer and follow the on-screen instructions.
3. Launch the musubi app.
{% hint style="info" %}
See full instructions on how to use the app in the [musubi app guide](/apps-and-tools/musubi-app).
{% endhint %}
## Load your first memory
1. In the musubi app, confirm that the **Musubi Display** card shows **Connected**.
2. Under **All Media**, choose **Import**.
3. Select a photo or video, then choose **Open**.
4. Keep the app open while it converts the file into a holographic memory.
5. Open the completed memory to preview and edit it.
6. Adjust the background, duration, scale, position, or rotation as needed, then choose **Save**.
Preview and adjust the processed memory before transferring it.
7. Return to **All Media** and choose **Select**.
8. Select the memory you want to load, then choose **Transfer**. You can also transfer all your media by selecting **Transfer** with nothing selected.
9. Wait for encoding and copying to finish. Do not disconnect musubi until the app reports **Export Complete**.
Wait for Export Complete before ejecting or disconnecting musubi.
10. Eject the device/volume MUSUBI7 from your computer.
11. Disconnect the USB-C cable from the musubi display.
12. Wait for musubi to load and play the newly transferred memory.
{% hint style="warning" %}
Do not unplug musubi while the app is encoding or copying content.
{% endhint %}
The new memory begins playing after musubi is safely disconnected.
## Troubleshooting
### musubi does not turn on
1. Connect musubi to the supplied power adapter with the supplied USB-C cable.
2. Confirm that the adapter is connected to a working power source.
3. Press the rear **Power** button and allow the display time to start.
### The computer or app does not detect musubi
1. Make sure musubi is powered on.
2. Disconnect and securely reconnect both ends of the supplied USB-C cable.
3. Connect the cable directly to the computer instead of through a hub.
4. Wait for the removable drive to mount, then reopen the musubi app.
### The new content does not play
1. Confirm that the app reported **Export Complete** before you disconnected musubi.
2. Safely eject the musubi drive and disconnect the USB-C cable.
3. Wait for the display to leave the USB connection screen and load the new memory.
### No audio is playing
Press the rear **Volume** button. The current volume level appears briefly at the top of the display; continue pressing until you reach the desired level.
## Next steps
* Learn how to import, edit, organize, and transfer more content with the [musubi app](/apps-and-tools/musubi-app).
* Organize memories into albums before transferring them to musubi.
* Keep the supplied safety instructions and packaging for future reference.
## Support
If you have questions or encounter an issue with musubi, contact us at .
# HLD 86" setup guide
Set up and safely install your Looking Glass 86" Hololuminescent Display.
This guide walks you through unpacking the HLD 86", installing the included floor stand, playing the preloaded demo content, and optionally connecting an external computer.
{% hint style="warning" %}
Assembly and lifting require **3 to 4 people**. Switch off and disconnect the display from power before mounting, moving, or cleaning it. Only qualified personnel should open the display housing.
{% endhint %}
This page is a quick setup guide. Keep and read the complete Installation, Safety and User Manual supplied with your display before installation.
## What you'll need
* The HLD 86"
* The supplied AC power cable
* The remote controller
* The included Demo Media Player, connected and preloaded with demo content
* The included floor stand and its mounting hardware
* Tools appropriate for the supplied M8 fasteners
* Optional: an external computer and a compatible video cable:
* HDMI 2.0
* DisplayPort 1.2
* USB-C with DisplayPort Alt Mode
* A flat, padded table large enough to support the display
* 3 to 4 people for the final mounting and lift
Power cable (1), remote controller (2), and included floor stand (3)
## Before installation
### Acclimate the display
If the display was transported in cold weather or exposed to a large temperature change, let it slowly adjust to room temperature.
{% hint style="warning" %}
If condensation is present on or inside the display, do not power it on. Wait approximately **12 hours** before use.
{% endhint %}
### Unpack and inspect
1. Remove the packaging and keep it for future transport.
2. Confirm that the delivery matches your order.
3. Keep all supplied documentation.
4. Check the display and accessories for visible transport damage.
5. If anything is damaged or missing, stop and contact support before continuing.
## Choose a mounting option
### Included floor stand
Use the four-step process below to assemble the included floor stand and attach it to the display.
### Wall mount or third-party stand
The back of the HLD 86" has a **600 x 800 mm VESA pattern** with standard **M8 screw holes**.
{% hint style="warning" %}
Have a qualified installer select the mounting hardware, verify the supporting structure, and complete the installation.
{% endhint %}
## Assemble the included floor stand
### Step 1: Install the leveling feet
**Parts required**
* 1 stand base
* 6 hex nuts
* 6 leveling feet
1. Thread one hex nut onto each leveling foot.
2. Screw three leveling feet into the threaded holes along each short edge of the stand base.
The feet can be adjusted after installation to compensate for an uneven floor.
Install three leveling feet along each short edge of the base.
### Step 2: Attach the stand brackets
**Parts required**
* 2 stand brackets
* 6 M8 washers
* 6 M8x30 screws
1. Position both stand brackets on the stand base.
2. Align the mounting holes.
3. Secure each bracket with three M8 washers and three M8x30 screws.
Attach both stand brackets to the base.
### Step 3: Install the stand plate
**Parts required**
* 1 stand plate
* 4 M8 washers
* 4 M8x30 screws
1. Place the stand plate across the two stand brackets.
2. Align the four mounting holes.
3. Secure the plate with four M8 washers and four M8x30 screws.
Secure the stand plate across the two brackets.
### Step 4: Mount the display
**Parts required**
* 4 M8 washers
* 4 M8x55 screws - use the longer screws for this step
{% hint style="warning" %}
Place the display face down only on a **flat, padded table**. Use **3 to 4 people** to lift the completed assembly into its upright position.
{% endhint %}
1. Make sure the display is switched off and disconnected from power.
2. Carefully lay the display face down on the padded table.
3. Position the assembled floor stand on the back of the display.
4. Align the four mounting holes.
5. Secure the stand with four M8 washers and four M8x55 screws.
6. With 3 to 4 people, carefully lift the complete assembly into its upright position.
7. Adjust the leveling feet until the stand is stable and level.
Use the four longer M8x55 screws to attach the stand to the display.
## Connect video and power
The video, audio, control, and power connections are on the back of the display.
Rear controls and connections
| # | Control or connection | Purpose |
| -- | --------------------- | -------------------------------------------------------------- |
| 1 | Carry handle | Use while positioning the display during installation. |
| 2 | Light sensor | Adjusts screen brightness based on ambient light when enabled. |
| 3 | IR sensor | Receives commands from the remote controller. |
| 4 | Status LED | Shows power, signal, and startup status. |
| 5 | OSD buttons | Control power, menus, selection, and settings. |
| 6 | Speakers | Two integrated 10 W speakers. |
| 7 | HDMI 2.0 | Video and audio input. |
| 8 | DisplayPort 1.2 | Video and audio input. |
| 9 | USB-C | Video through DisplayPort Alt Mode, plus touch/data. |
| 10 | 3.5 mm AUX out | Audio output for headphones or powered speakers. |
| 11 | USB-A 5V/3A out | Power output for a compatible peripheral. |
| 12 | RS232 | 3.5 mm serial connection for OSD control. |
| 13 | AC input | 100-240V AC, 50/60Hz power input. |
| 14 | AC power switch | Switches incoming AC power on or off. |
### Play the included demo content
The Demo Media Player arrives connected to the display and includes preloaded demo content. No additional video or player cabling is required for your first power-on.
1. Set the rear **AC power switch** to **OFF**.
2. Connect the supplied AC cable to the display and a compatible power source.
3. Set the rear **AC power switch** to **ON**.
4. If the display does not start automatically, press the power button on the rear OSD controls or on the remote controller.
5. Wait for the preloaded demo content to appear before changing inputs.
The display searches for an active input automatically by default. If the demo content does not appear, use the remote's **AV/TV** button or the OSD **Input** menu to select **HDMI**.
{% hint style="info" %}
The **Default Power** firmware setting controls whether the display turns on automatically after AC power is applied. This guide assumes that setting is **Off**, so you need to press the power button. If the setting is **On**, the display starts when AC power is applied and you can skip step 4.
{% endhint %}
## Use the HLD with an external computer
To use a PC or Mac instead of the included Demo Media Player:
1. Shut down the computer.
2. Set the rear **AC power switch** to **OFF** and disconnect the display from AC power.
3. Disconnect the Demo Media Player's HDMI cable from the display. If your computer will use USB-C for video or touch, also disconnect the player's touch/data cable from the display's USB-C port.
4. Connect the computer to the display using **HDMI**, **DisplayPort**, or **USB-C with DisplayPort Alt Mode**.
5. If you are using HDMI or DisplayPort and want touch input, connect a compatible USB data cable between the computer and the display's USB-C port.
6. Connect the supplied AC cable to the display and a compatible power source.
7. Turn on the computer.
8. Set the rear **AC power switch** to **ON**.
9. If the display does not start automatically, press the power button on the rear OSD controls or on the remote controller.
A single compatible USB-C connection can carry both video and touch/data.
The display searches for an active input automatically by default. If the computer does not appear, use the remote's **AV/TV** button or the OSD **Input** menu to select the connected input.
{% hint style="info" %}
To return to the preloaded demo content, set the rear AC power switch to **OFF** and disconnect the display from AC power. Disconnect the external computer, reconnect the Demo Media Player's cables to their original ports, and then follow the steps above.
{% endhint %}
{% hint style="warning" %}
If you notice smoke, a burning smell, or unusual noise, disconnect the display from power immediately and stop using it.
{% endhint %}
## Check the status LED
| LED state | Meaning | What to do |
| --------- | -------------------------------------------------------------------------------------- | --------------------------------------------------------------------------------- |
| Off | The display has no power or is in sleep mode. | Check the AC cable and rear power switch, or wake the display. |
| Red | No video signal is present on the selected input, or the display is in soft power-off. | Check the source and cable, select the correct input, and press the power button. |
| Yellow | The display failed to start. | Disconnect power and contact support. |
| Green | A valid video signal is present. | The display is ready to use. |
{% hint style="info" %}
Before moving or cleaning the display, power it off, set the rear AC power switch to **OFF**, disconnect the AC cable, and wait until the status LED is off.
{% endhint %}
## Troubleshooting
### The display has no image
1. Confirm that the AC cable is secure and the rear power switch is **ON**.
2. If you are using the included Demo Media Player, allow it time to start and confirm its cables are secure. If you are using an external computer, confirm that it is powered on and connected.
3. Select the connected input from the remote or OSD menu.
4. If you are using USB-C, confirm that the source and cable support DisplayPort Alt Mode.
5. If graphics drivers were just installed or updated, wait one to two minutes for the computer to finish starting.
### Touch is not responding with the Demo Media Player
The touch function may not respond when the HLD 86" first powers on, or it may stop responding after a period of use.
1. Locate the USB-C cable connected to the included Demo Media Player.
2. Disconnect the USB-C cable from the Demo Media Player.
3. Reconnect the cable securely.
4. Wait for the touch connection to be restored, then test touch again.
### The display shows a yellow status LED
The display did not start correctly. Disconnect it from power and contact support.
### The stand is not level
With the display upright and supported, adjust the six leveling feet until the base is stable and level.
## Next steps
Once the status LED is green and your source is visible:
* Use [HLD Author](/apps-and-tools/hld-author) to preview and prepare content for the display.
* Learn how to replace or add to the preloaded content with the [Demo Media Player](/managing-content/using-the-demo-media-player).
* For long-term deployments, set up a [Yodeck](/managing-content/yodeck-digital-signage-player) or [BrightSign](/managing-content/brightsign-digital-signage-player) digital signage player.
## Support
If you have questions or encounter an issue with your HLD 86", contact us at .
# HLD Author
Use the HLD Author web app to import videos, images, and 3D media, preview content, and export MP4 files for your playback target.
[**Access HLD Author here**](https://hldauthor.lookingglassfactory.com/)
{% hint style="info" %}
This web version of HLD Author has replaced our desktop app version. For the previous version, see [here](/apps-and-tools/hld-author/hld-author-desktop-legacy)
{% endhint %}
HLD Author is a web app for preparing content for Looking Glass Hololuminescent Displays. Use it to import source media, frame it on a 9:16 canvas, and export an MP4 for the Demo Media Player, BrightSign, or standard video playback.
This guide walks through the basic workflow:
* Open HLD Author in Chrome
* Import videos, images, or 3D media
* Edit the content (chroma key, add a shadow, etc.)
* Export the right MP4 for your playback destination
The main HLD Author workspace
## What you'll need
* Chrome 130 or newer, required for HLD (HEVC) exports and recommended for WebGPU support
* Source media to import
* A playback destination, such as the included Demo Media Player, a BrightSign player, or another standard video player
Supported source media:
| Media type | Supported formats |
| ---------- | ----------------------------- |
| Videos | MP4, MOV, WEBM |
| Images | JPG/JPEG, PNG, WEBP, GIF, SVG |
| 3D Media | GLB, GLTF, PLY, OBJ, STL, FBX |
{% hint style="info" %}
HLD Author chooses the video codec from the output target you select during export. HLD 16", HLD 27", and HLD 86" Demo Media Player outputs use rotated HEVC, while musubi, BrightSign, and General outputs use portrait H.264.
{% endhint %}
## Open HLD Author
Open [HLD Author](https://hldauthor.lookingglassfactory.com/) in Chrome 130 or newer.
The main workspace includes:
* **Videos**, **Images**, and **3D Media** tabs in the left media library
* A 9:16 canvas in the center
* A **Show Alcove** or **Hide Alcove** button for the alcove framing reference
* A contextual **Settings** panel on the right with different options to edit imported media
* **Export** button in the top toolbar to export for different target deployment platforms
* **More Tools** button in the top toolbar to access other content creation resources
## Import your source media
1. Choose the tab that matches your source: **Videos**, **Images**, or **3D Media**.
2. Click **Import**.
3. Select one or more supported files from your computer.
4. Select an imported thumbnail to load it onto the canvas.
GLB/GLTF and FBX files can include animation clips, which appear in the Settings panel when available.
{% hint style="info" %}
If an imported video already looks prepared for the Demo Media Player or musubi, HLD Author may ask whether that was intentional. If you choose **Yes**, the app can adjust rotation and shadow behavior so the file is handled as already prepared media.
{% endhint %}
Confirm whether a detected video was intentionally prepared for the Demo Media Player
HLD-ready video shown with its rotation and shadow adjustments
For OBJ files, material libraries and textures are not imported yet, so OBJ assets will render with the default material.
## Canvas and settings
Use the canvas to check framing before export. The alcove reference overlay is only a design guide in the app; it is not encoded into your exported video.
1. Click **Hide Alcove** if you want to review the source media without the alcove reference.
2. Click **Show Alcove** to bring the framing guide back.
3. Use the chevrons beside the canvas to collapse or expand the media library and Settings panel.
4. Use **Reset** if you want to return the selected item to its default settings.
### Video settings
Use **Transform** to adjust scale, rotation, and X/Y position.
#### Adapt hologram box content
Some videos are created for hologram box setups and have content that extends to the edge of the video frame, violating the HLD's outside bezel design. Turn on **Adapt Holobox Content** to scale that source slightly and fill the exposed frame with colors sampled from the source edges. This preserves the subject's proportions while preventing the content from covering the bezel. The adjustment is included in the export.
Turning on **Adapt Holobox Content** also turns off the generated shadow, since this type of source usually includes its own scene and grounding. Use **Sample depth** to change how far into the source HLD Author samples the edge colors. If the fill picks up a bright object or creates a visible band, try a shallower sample or reposition the source.
#### Chroma key
Turn on **Apply Chroma Key** to remove a solid-color background from a video or image. Set the key color with the swatch or color picker, then tune **Tolerance**, **Edge softness**, and **Spill removal** until the background disappears without eroding the subject. **Ignore alcove blend** lets the color picker sample the source color without the alcove overlay changing it.
A video before chroma key is applied
The same video with its keyed background removed
Use **Shadow** to add or remove a grounding shadow and adjust its opacity, position, shape, and blur.
### Image settings
Images use the same **Transform**, **Chroma Key**, and **Shadow** controls as videos. The **Hologram Effect** mode determines how a still image moves and gains depth in the exported video:
* **None** keeps the image as a still, flat plane with no added motion. Use it when the source already contains the presentation you want, though in general this is not recommended as it reduces the spatial effect of the display.
* **Float** keeps the image flat but moves it gently across the canvas. **Vertical range** and **Horizontal range** set the travel distance as a percentage of the canvas; the speed controls set how quickly each motion repeats. This is the default and is a good fit for logos, cutout artwork, and images that should face the viewer throughout the export.
* **Extrude & rotate** turns the visible image shape into a shallow 3D mesh and rotates it to reveal real thickness. This is ideal for things like logos. **Extrusion amount** controls the depth, **Mesh density** controls the silhouette detail, and **Orbits per Export** controls the number of complete rotations. Use a transparent image or chroma key the background first when you want the subject silhouette extruded; otherwise the full rectangular image is extruded.
* **Mask & depth** uses local AI processing to estimate the subject, background, and depth of a JPG, PNG, or WebP photo. It creates a dimensional view with parallax. Choose **Background On** to keep the original background, **Off** to remove it, or **Partial** for a semi-transparent background.
Use **Export Duration** to set the length of the MP4 generated from a still image.
#### Float
Float adds adjustable horizontal and vertical motion while the image stays flat
#### Extrude & rotate
Extrude & rotate gives the image real mesh thickness and rotates it to reveal the sides
#### Mask & depth
The first time you select **Mask & depth**, HLD Author asks permission to download about 400 MB of AI models. Choose **Proceed** and keep the tab open while the models download and process the image. The models are cached in your browser for later use; after processing, **Clear cache** removes them if you need to recover the storage space.
The one-time AI model download prompt for Mask & depth
Mask & depth with the original background on
Mask & depth with the background removed
### 3D Media settings
* **Transform** scales, positions, and rotates the model on all three axes.
* **Lighting** adjusts environmental (HDRI), ambient, and directional lighting so materials remain readable on the display.
* **Shadow** controls the model's grounding shadow.
* **Animation** chooses an embedded animation clip when one is available in an FBX, GLTF, or GLB file.
* **Export Camera** controls the motion added to the exported video. Choose **Orbit** for complete 360-degree rotations or **Sway** to rock the view back and forth through a fixed angle. Set the number of orbits or sway angle, then set the export duration.
An imported textured GLB model
An imported STL model rendered with the default material
Orbit and duration controls for a 3D export
## Export for your playback destination
1. Select the item you want to export.
2. Click **Export**.
3. Choose the destination tab: **Demo Media Player**, **BrightSign**, or **General**.
4. Choose the output target.
5. Click **Export**.
6. Wait for the progress bar to finish.
7. Save the MP4 if your browser asks where to put the file.
### Demo Media Player
Use this tab for playback on the included Demo Media Player or musubi target. Available outputs are:
* **musubi 7"**: portrait H.264
* **HLD 16"**: rotated 1080p HEVC
* **HLD 27"**: rotated 4K HEVC
* **HLD 86"**: rotated 4K HEVC
HLD Author names these exports with target-specific suffixes, such as `source_hld_27.mp4` or `source_hld_musubi-7.mp4`.
Demo Media Player output choices
### BrightSign
Use this tab when you are preparing a file for a BrightSign presentation. The output is a standard portrait 4K H.264 MP4 with no HLD rotation. HLD Author names BrightSign exports like `source_brightsign.mp4`.
BrightSign export and deployment guidance
### General
Use this tab when you need a standard portrait video for other playback workflows. The output is a standard portrait 4K H.264 MP4 with no HLD rotation.
General standard-video export
{% hint style="warning" %}
Do not use a rotated Demo Media Player HLD export for BrightSign or General playback. BrightSign and General targets should stay portrait-oriented with no HLD rotation.
{% endhint %}
## Deploy the exported file
### Demo Media Player
1. Copy the exported MP4 to the USB thumb drive connected to the Demo Media Player.
2. Insert the drive into one of the player USB-A ports.
3. Wait for playback to begin automatically.
Videos loop in alphanumeric filename order. For more detail, see [Using the Demo Media Player](/managing-content/using-the-demo-media-player).
### BrightSign
Add the BrightSign export to Zone 1 of your brightAuthor connected presentation and publish to the player storage or SD card. In brightAuthor, use the HLD presentation settings from [BrightSign digital signage player](/managing-content/brightsign-digital-signage-player), including 4K output, 60 fps, and Portrait - Bottom Left orientation.
### General playback
Use the General export anywhere you need a standard portrait H.264 MP4. This output is not rotated for the HLD Demo Media Player.
## Troubleshooting
### An HLD output is disabled
HLD 16", HLD 27", and HLD 86" Demo Media Player outputs require HEVC encoding support. Open HLD Author in Chrome 130 or newer and try again.
### The video looks sideways outside the Demo Media Player
That usually means you exported for an HLD Demo Media Player target. Use **BrightSign** or **General** if you need a normal portrait H.264 file.
### The alcove reference appears while editing
The alcove overlay is a framing reference only. Use **Hide Alcove** if you want to inspect the media by itself.
### Adapted hologram-box content has visible color bands
Adjust **Sample depth** so HLD Author samples a cleaner strip along the source edges. You can also change the source scale or position to keep bright subjects and hard transitions away from the sampled edges.
### Extrude & rotate turns the whole image into a block
The source still has an opaque rectangular background. Use a PNG or WebP with transparency, or enable **Chroma Key** to isolate the subject before choosing **Extrude & rotate**.
### Mask & depth takes time on first use
The first use downloads and caches about 400 MB of local AI models before processing begins. Keep HLD Author open until the model progress and image processing finish. Use **Clear cache** afterward only if you need to remove the downloaded models.
### A 3D model imports without textures
OBJ material libraries and textures are not imported yet. For textured 3D assets, use GLB or GLTF when possible.
### Export fails or the browser reports unsupported encoding
Try Chrome 130 or newer. If HEVC is unavailable on your system, export to **BrightSign**, **General**, or **musubi 7"**, which use H.264.
## Known issues
Exports from Nvidia machines, when combined with content exported from Mac, Intel, and AMD machines, can play back with a black frame between content from different systems. For best results, export all content from the same computer.
## Support
If you have any feature requests or issues and need support, please contact us at or join our [Discord](https://look.glass/discord).
# HLD Author desktop app (legacy)
HLD Author is a tool to preview your videos to make sure they look great on the HLD, with controls to export the video for smooth playback on the HLD Demo Media Player.
{% hint style="warning" %}
This page documents the discontinued HLD Author desktop app and is retained only for legacy reference. The desktop app is no longer supported or updated. Use the current [HLD Author web app](/apps-and-tools/hld-author) unless Looking Glass Support specifically asks you to use an archived desktop build.
{% endhint %}
Download HLD Author for WindowsDownload HLD Author for Mac
{% embed url="" %}
HLD Author is a desktop application for previewing and preparing video content for use with the HLD [Demo Media Player](/managing-content/using-the-demo-media-player). It allows you to validate how a video will appear on an HLD and, if needed, export a version that is compatible with the Demo Media Player included with your display.
HLD Author is intended for quick validation and preparation of video content. It is not currently used for content creation — to create content, see our content pipelines for [video editors](/content-pipelines/creating-with-video-editors), [3D tools](/content-pipelines/creating-videos-with-3d-tools), [GenAI](/content-pipelines/creating-videos-with-genai), and [real-world footage](/content-pipelines/filming-real-world-content).
{% hint style="info" %}
For the current web app workflow, including videos, images, 3D media, HLD Simulation Preview, and BrightSign or General exports, see [HLD Author](/apps-and-tools/hld-author).
{% endhint %}
## What is HLD Author?
HLD Author is a desktop application that helps you:
* Preview how your video will appear on an HLD without requiring physical access to the display
* Validate whether a video is compatible with the HLD Demo Media Player
* Export a properly formatted version **only when required** for the Demo Media Player
Please note that the Demo Media Player export described on this desktop-app page is not intended for third-party digital signage solutions, like BrightSign players or Yodeck, because those tools have their own video processing conventions. For current web app exports, use [HLD Author](/apps-and-tools/hld-author) and choose the **BrightSign** or **General** target when appropriate.
If you need advanced, scriptable, or batch video processing, we provide another tool, **HLD Encoder** (coming soon).
## Loading your video
To begin, click **Load Video** and select a video file from your computer. Supported formats are `.mp4`, `.avi`, and `.mov`.
Once loaded, your video will appear in the HLD preview. You can use this preview to evaluate framing and overall presentation before exporting.
### Camera controls
* **Left-click + drag**: Rotate around the display
* **Scroll wheel**: Zoom in and out
These controls help you understand how your content reads from different viewing angles.
## Video validation
When a video is loaded, HLD Author automatically checks whether it is compatible with the Demo Media Player.
If the video does not meet the required specifications, a popup will appear explaining that the video must be re-encoded to work correctly with the Demo Media Player.
You may dismiss this warning and continue previewing. Re-encoding is **not required** for previewing.
To understand what changes HLD Author applies during export, see our documentation on [media specs and encoding](/resources/media-specs-and-encoding).
## Exporting for the Demo Media Player
Click **Export** to generate a Demo Media Player–compatible version of your video.
{% hint style="warning" %}
**Only use the Demo Media Player export described here if you plan to use the HLD Demo Media Player.** Do **not** use rotated Demo Media Player exports with other digital signage players such as BrightSign.
{% endhint %}
#### Export Behavior
* The exported file will have `_HLD_encoded` appended to the filename
* Audio is preserved
* A progress bar shows export status
* You may set the output location manually or use the folder button to browse
* When complete, you can open the export folder directly
The exported video is compatible with **all HLD sizes** (16″, 27″, and 86″) when used with the Demo Media Player. The device selector dropdown is only used to preview in a realistic simulation of that HLD and does not affect export behavior.
## Sample content and tutorials
On the left side of the app, you’ll find sample videos demonstrating different types of HLD content, including:
* Real people
* Animated characters
* Product visuals
Each sample includes a **“See how it’s made”** link that opens a relevant tutorial explaining the content creation approach at a high level.
These examples are intended to provide inspiration and context, not prescriptive workflows.
## Documentation and support
* **Docs and guides** (bottom left) link to content creation workflows, including DCC tools and AI-generated content
* **Support** (top right) links to FAQs and ways to contact our support team
If you are new to the HLD ecosystem, these resources provide additional background on how the display works and how to create effective content.
## Advanced workflows
If you need:
* Batch processing
* Command-line control
* Integration into automated pipelines
See HLD Encoder (coming soon), which is designed for advanced and production-scale video preparation.
## Known issues
* The archived Windows desktop build requires the [HEVC Windows Video Extension](https://apps.microsoft.com/detail/9nmzlz57r3t7?hl=en-US). Previews may not work without it. This limitation applies to the discontinued desktop build; use the current [HLD Author web app](/apps-and-tools/hld-author) for the supported workflow.
## Support
If you have any feature requests or issues and need support, please contact us at or join our [Discord](https://look.glass/discord).
# musubi app
Use the musubi app to turn photos and short videos into 3D memories, organize them into albums, and transfer them to a connected 7-inch musubi frame.
## Download application
Download for WindowsDownload for Mac (Apple Silicon M1, M2, etc.)Download for Mac (Intel)
## Overview
The musubi app is for creating 3D memories for a Looking Glass [musubi](https://look.glass/musubi). You can import photos and videos, let the app process them into musubi-ready media, organize the results into albums, and transfer them to a connected musubi device over USB.
This guide walks through the basic workflow:
* Import source photos and videos
* Let the musubi app convert them locally into holographic media
* Edit the resulting memories
* Organize memories into albums
* Transfer albums or individual memories to a connected musubi display
* Review and manage media already on the connected display
The main UI for the musubi app
## Computer requirements
The musubi app supports Windows and macOS. Most computers made after 2020 will be fully compatible. See below for specific chipset guidance.
Supported Windows PCs:
Vendor
Minimum spec
Intel
11th-generation Intel Core graphics (11th-gen UHD or Iris Xe) or newer, including Core Ultra and Intel Arc
AMD integrated
Ryzen 4000-series processors with Radeon graphics or newer
AMD discrete
Radeon RX 5000 series or newer
NVIDIA
GeForce GTX 16 series, RTX 20 series, or newer
Supported Mac computers:
Vendor
Minimum spec
Apple Silicon
Apple M1 or newer
Intel integrated
HD 615, Iris Plus 640/650, UHD 617/630, or later Intel graphics in a Ventura-supported Mac
AMD
Radeon Pro 555/560 or later in a Ventura-supported Mac
Other requirements:
* 8 GB or more of RAM
* Windows 10 or 11 (64-bit)
* macOS 13+
## What you'll need
* The musubi desktop app
* Photos or videos to import
* A 7-inch musubi frame
* The included USB-C cable for data transfer
* A supported computer (see [above](#computer-requirements))
Supported source media:
| Media type | Supported formats |
| ---------- | ------------------------------- |
| Images | JPG/JPEG, PNG, WEBP, HEIC, HEIF |
| Videos | MP4, WEBM, MOV |
{% hint style="info" %}
The musubi frame uses USB-C for power and data. It does not have HDMI input and can't be used as a secondary monitor.
{% endhint %}
## Using the musubi app
The musubi app is built to import, convert, and edit your media so you can transfer it to a connected musubi device. To do so:
1. Launch the musubi app
2. Select the "Import" button
3. Select one or more photos or videos and import them
The app will use local AI models to convert your media into a hologram. This may take a moment, depending on your computer's processing power.
If you import a video longer than 30 seconds, the app asks you to trim it before import. Choose the part you want to keep, then continue.
{% hint style="info" %}
Keep the app open while files are processing. Completed items appear in **All Media** and can be opened, edited, added to albums, or transferred.
{% endhint %}
Once the media has been processed, there will be options to edit the content. There are two different processes to do this - one for photos and one for videos.
### Editing photos
Editing photos will adjust how the content appears in your musubi display once transferred.
The edit window includes two preview modes:
* **Simulated HLD** shows the photo with a visual reference for how it will look in the musubi display
* **Canvas** shows the processed media on a blank canvas
You can edit the content to adjust its appearance. The edit controls include:
* **Background**: choose **On**, **Off**, or **Partial** to show the photo background to varying degrees
* **Duration**: how long the photo will appear in the musubi playlist
* **Scale**: change the size of the photo
* **X Position** and **Y Position**: adjust the position of the photo
* **Rotate 90 degrees**: rotate the content
Once you're adjusted the photo, select **Save** to save the changes.
### Editing videos
Videos work very differently from photos. We add spatial data to the video and then allow you to select a moment during the video to become a **Magic Moment**. This Magic Moment becomes a freeze-frame of the video with a holographic effect that can be edited like a photo.
The edit screen for videos has:
* **Simulated HLD** shows the video with a visual reference for how it will look in the musubi display
* **Canvas** shows the processed media on a blank canvas
There are also edit controls. These control both the video itself and the Magic Moment, depending on the option:
* **Magic Moment Background**: choose **On**, **Off**, or **Partial** to show the background to varying degrees during the Magic Moment
* **Magic Moment Duration**: determines how long the Magic Moment will display for
* **Scale**: change the size of the video
* **X Position** and **Y Position**: adjust the position of the video
* **Rotate 90 degrees**: rotate the video
You can also manage the video playback timeline and, at a moment you feel is ideal, set the Magic Moment. This can be removed and regenerated if you want to change it.
## Organize albums
Use albums to group media before transfer.
1. In **My Albums**, choose **Create Album**
2. Give the album a name and, optionally, a description
3. Open the album
4. Use **Add Photos** to choose media from **All Media** or import new media directly into the album flow
Removing an item from an album does not delete it from your local library. Deleting an item permanently removes it from storage and from any albums that include it, so use delete only when you no longer need the memory.
## Transfer to a connected musubi
Connect the musubi frame to your computer with a USB-C cable and make sure it is powered on.
If the musubi app does not detect a device, it shows a no-device message and asks you to connect and power on the frame. Once the frame is detected, the app shows it as a connected a musubi display.
To transfer from the main page view:
1. Choose the transfer control
2. Select **Transfer Album** or **Transfer Photos**
3. Pick one album or select individual media items
4. Choose **Transfer**
5. Wait for the transfer progress to finish
6. When completed, disconnect your musubi device and your new content will play
To transfer from inside an album, choose the transfer control from that album. In **All Media**, selected items transfer if selection mode is active; otherwise the current media set transfers.
{% hint style="warning" %}
Do not unplug the musubi while transfer progress is still running. Wait for the app to finish copying media to the connected frame.
{% endhint %}
## Manage media on your musubi display
When a musubi frame is connected, a musubi shows a **Musubi Display** card in the Albums view. Open it to review the media currently on the connected frame.
In the Musubi Display view, you can:
* See the media stored on the connected display
* Delete items from the display without changing your local albums
* Open editable items when musubi can match the display item to local metadata
* Re-encode editable items so the display copy matches your latest local edit
Some items may be device-only. Device-only items can be viewed or deleted from the connected display, but they may not be editable from local settings because the app cannot match them to the editable local project data on your computer. This is common for the demo content.
## Known issues
* Rotated images may appear incorrectly in album-cover thumbnails or the Encoding modal.
* Adding existing media to an album may ignore that album’s settings.
* Album Settings may have awkward button layouts and limited album-editing options.
* Right-click menus may look incorrect in light mode.
* Transfer actions may send an entire album or library instead of only the selected media.
* Deleting and re-encoding media already on the musubi device is temperamental and has poor user feedback.
* Videos transferred with AMD chips occasionally have artifacts.
## Troubleshooting
### The app does not detect the frame
Confirm that the 7-inch musubi frame is powered on and connected with the included USB-C cable. If it still does not appear, unplug the frame, reconnect it, and wait for your operating system to mount the device before trying the transfer again.
### The frame does not act like a monitor
That is expected. The musubi frame has USB-C power/data only and no HDMI. It is not used as a secondary display. Transfer media from the app, then review it on the frame.
### Transfer is disabled
Make sure at least one completed item or album is available to transfer. If media is still processing, wait for it to finish. If no device is connected, the app waits for the USB connection before enabling transfer.
### A display item is stale
If a display item was edited locally after it was transferred, re-encode it from the Musubi Display view in the app. Re-encoding creates a fresh display copy using the current local edit settings and copies it to the connected frame.
### An item is not editable from Musubi Display
The display may contain media that does not match the local editable metadata on your computer. You can still view or delete device-only items from the connected display, but to edit them, re-import the original source media into the app.
## Support
If you have any feature requests or issues and need support, please contact us at or join our [Discord](https://look.glass/discord).
# Start here
## Creative guidelines
Any video tool can be used to create content — from digital content creation (DCC) apps like Blender and C4D to generative AI tools like Kling and Veo. Real-time applications are also supported with the HLD — simply run the application on a computer or iPad that can connect to the HLD via HDMI or DP, and ensure your content is created following our guidelines.
See our creative guidelines for instructions on how to frame [people/characters](https://hlddocs.lookingglassfactory.com/creative-guidelines/characters) and [products](https://hlddocs.lookingglassfactory.com/creative-guidelines/products) in the HLD and recreate this setup in your tool of choice.
For step-by-step tutorials for tools like Premiere Pro, After Effects, and Blender, see our [Content Guides](https://hlddocs.lookingglassfactory.com/#content-guides) below.
## Content guides
## Creating, reviewing, and preparing content
Once you have a video, still image, or supported 3D asset, open it in the browser-based [**HLD Author**](https://hlddocs.lookingglassfactory.com/apps-and-tools/hld-author).
HLD Author lets you:
* Adjust framing, rotation, chroma key, shadows, lighting, and media-specific effects
* Create animated or depth-treated output from still images and render supported 3D media
* Preview your content on a simulated Hololuminescent Display
* Export the correct MP4 for the included [HLD Demo Media Player](https://hlddocs.lookingglassfactory.com/managing-content/using-the-demo-media-player), BrightSign, or standard portrait-video playback
This is the easiest way to create or refine HLD-ready content and confirm framing, depth, and orientation before deployment.
## Deploying content
If your content has been generated and reviewed in [HLD Author](https://hlddocs.lookingglassfactory.com/apps-and-tools/hld-author), and you now want to set up playback on hardware, see these guides:
* Use the [Demo Media Player](https://hlddocs.lookingglassfactory.com/managing-content/using-the-demo-media-player) for simple, bundled playback
* Convert the included Demo Media Player into a full digital signage solution with [Yodeck](https://hlddocs.lookingglassfactory.com/managing-content/yodeck-digital-signage-player)
* Use [BrightSign](https://hlddocs.lookingglassfactory.com/managing-content/brightsign-digital-signage-player) for long-term digital signage installations
# How the HLD content pipeline works
This page walks through the complete journey of holographic content — from creation to playback — and explains the role of each tool along the way.
## Step 1: Create your content
Video content for HLDs is created **outside of Looking Glass software**, using tools you already know.
Common creation tools include:
* [Video tools](/content-pipelines/creating-with-video-editors) (After Effects, Premiere, Resolve)
* [3D tools](/content-pipelines/creating-videos-with-3d-tools) (Blender, Cinema 4D, Unity)
* [AI and generative tools](/content-pipelines/creating-videos-with-genai)
At this stage, the most important thing to understand is:
{% hint style="info" %}
Holographic content must be authored with **depth, camera position, lighting, and framing** in mind. What looks good on a flat screen may not look correct in an HLD.
{% endhint %}
👉 See: [Content guidelines for HLD](/creative-guidelines/products)
## Step 2: Preview and validate with HLD Author
Once you have content, you preview it using [**HLD Author**](/apps-and-tools/hld-author).
HLD Author allows you to:
* Preview how content will actually appear on an HLD
* Check depth, cropping, and composition
* Catch issues before deployment
**Important:**\
HLD Author supports both **content preparation** and **lightweight content creation**. You can adjust and convert existing videos, create animated or depth-treated output from still images, render imported 3D media, preview the result, and export an MP4 for your playback target. Use the dedicated content pipelines in Step 1 when you need more advanced source authoring.
👉 Learn more: [Using HLD Author](/apps-and-tools/hld-author)
## Step 3: Export for playback
From HLD Author, you export a version of your content that is optimized for HLD playback.
This ensures:
* Correct resolution and encoding
* Reliable performance
* Consistent results across different HLD sizes
👉 Learn more: [Media specs and encoding](/resources/media-specs-and-encoding)
## Step 4: Play content on the HLD
Final playback is handled by the **HLD Demo Media Player**.
This is where you:
* Load content onto the system
* Control playback
* Loop or sequence holograms for exhibitions, retail, or events
👉 Learn more: [HLD Demo Media Player](/managing-content/using-the-demo-media-player)
## Advanced workflows
For more advanced installations, HLDs can be integrated with:
* Professional digital signage computers, like BrightSign
* Existing content management software
* Real-time applications run from a Windows, Mac, or other computer
* These are non-video interactive applications made with Unity or Unreal. Examples can include applications that have a touch screen / interactive component (i.e. product selector)
👉 Learn more:
* [BrightSign digital signage player](/managing-content/brightsign-digital-signage-player)
* [Creating real-time apps](/content-pipelines/creating-real-time-apps)
## How this differs from Light Field workflows
HLDs are optimized to show content and make it feel like it's right there, floating in a holographic volume.
If you’re looking to render a full holographic light field or visualize complex 3D data structures that require depth perception, you’re likely looking for **Light Field Display documentation** instead.
👉 Go to[ Light Field Docs](https://docs.lookingglassfactory.com)
# Creating with video editors
With video editing tools, you can take chroma keyed (i.e. green screen) footage and adapt it to work in an HLD by adding shadows and other effects like reflections. Use our custom templates for [Adobe Premiere Pro](/content-pipelines/creating-with-video-editors/adobe-premiere-pro) or [Adobe After Effects](/content-pipelines/creating-with-video-editors/adobe-after-effects) or follow our content guidelines to implement a workflow in your video editing tool of choice.
## Templates
We've prepared a Motion Graphics Template for use in Adobe Premiere Pro, as well as a Project File for Adobe After Effects. This template provides a variety of options to easily import and adjust content for use in Hololuminescent Displays.
You can learn more about the templates here:
{% content-ref url="/pages/YhViMBsl4Q80QKTFYoue" %}
[Adobe Premiere Pro](/content-pipelines/creating-with-video-editors/adobe-premiere-pro)
{% endcontent-ref %}
{% content-ref url="/pages/HZr8RG22tRnDr7DPHGgq" %}
[Adobe After Effects](/content-pipelines/creating-with-video-editors/adobe-after-effects)
{% endcontent-ref %}
You can also download the templates directly here:
{% file src="/files/xF2rLgNNV4MTVpWnfMuF" %}
{% file src="/files/J26afhaYjPIphHMfLOmD" %}
## Exporting
Exporting content for the HLD requires content to be rotated 90 degrees counterclockwise. We've created an EPR profile that automatically adjusts your export settings to properly account for the encoding profiles and adjustments necessary.
{% file src="/files/QM7rwPY3khJPAMyfQB4b" %}
If you're exporting from a different software we don't have a template for please ensure the following:
* Content **MUST** **NOT** exceed 2160 x 3840 resolution.
* Content **MUST** be encoded in H265 (HEVC). Content not using H265 (HEVC) will not playback correctly.
* Content **MUST** be rotated 90 degrees counterclockwise relative to the HLD display.
The browser-based [HLD Author](/apps-and-tools/hld-author) web app can convert your video to the correct settings for the selected playback target.
## Previewing and exporting for HLD playback
Once you’ve exported your video, we recommend opening it in [**HLD Author**](/apps-and-tools/hld-author).
HLD Author lets you:
* Adjust framing, rotation, chroma key, and shadows
* Preview your content on a simulated Hololuminescent Display
* Export the correct MP4 for the included [HLD Demo Media Player](/managing-content/using-the-demo-media-player), BrightSign, or standard portrait-video playback
HLD Author can also create animated or depth-treated output from still images and render supported 3D media. It is the easiest way to confirm framing, depth, and orientation before deployment.
# Preparing content
Before editing content for the HLD you should best prepare it for editing.
Looking Glass Hololuminescent displays are composed of two parts — a static holographic embedding, and a high-resolution display.
### Aspect Ratio and Resolution
For the best results with our templates, we recommend first setting your content to be 9:16 aspect ratio, and 2160 x 3840 resolution. This will allow you to more easily drop the content into our Adobe Premiere Pro or After Effects templates.
### Handling Color
The content on the display effectively acts as a layer inside the hologram. Color wise, this is similar to a "multiply" blend mode. Pure white will act as effectively invisible since the existing color from the hologram would be multiplied by 1, resulting in the same value.
This multiply effect means that content should be setup in a few specific ways.
* Content should have a white or solid background.
* Content should stand out from the background color if one is present.
* In general, for use with the templates we provide, your content should be masked or chroma-keyed for best use with the shadow and reflection effects.
In this example, the video content was generated with a green screen background. This negatively affects the shadow effect, casting a rectangular shadow instead of a shadow that mimics our content.
In this example, the video content was chroma keyed, resulting in a "transparent" background. When exported, this will be pure white. This will allow shadow and reflection effects to work properly.
In this example, an extra tint was applied after chroma keying the content. This tinted color will show as a multiply blend on top of the hologram itself. Content should be properly chroma keyed before applying the tint.
Content should not include busy backgrounds like this one, this will effectively hide the holographic element of the HLD and severely weaken the 3D effect
### Applying Chroma Key effects
Video can be chroma keyed in a variety of ways using many programs. We've found that the `ultra key` effect in Adobe Premiere is a great "one click" solution for quickly applying a chroma key effect.\
\
Chroma effects can also be applied in other video editing tools like Adobe After Effects, Davinci Resolve or Final Cut Pro.
[**DaVinci Resolve Luma Key**](https://www.blackmagicdesign.com/products/davinciresolve/training)
[**Adobe Premiere Pro Ultra Key**](https://www.adobe.com/learn/premiere-pro/web/ultra-key-effect?locale=en\&learnIn=1)
[**Adobe After Effects KeyLight**](https://helpx.adobe.com/after-effects/using/keying.html)\
\
[**Apple Final Cut Pro Green Screen Keyer**](https://support.apple.com/guide/final-cut-pro/use-the-green-screen-keyer-effect-ver40b003bc/mac)
{% hint style="info" %}
If you don't have content that has already been green screened, you can use advanced AI tools like [RunwayML](https://help.runwayml.com/hc/en-us/articles/19112532638995-Remove-Background) to automatically cut out your subject and apply a green screen.
{% endhint %}
# Adobe Premiere Pro
This guide will get you setup for creating content for the HLD display with Adobe Premiere Pro.
## Requirements
* Adobe Premiere Pro 2025
## Downloads
You can download the latest Adobe Premiere Motion Graphics Template from our github repository here:
{% embed url="" %}
## Setting up your project
### Create a new sequence
In your project, create a new sequence. Adjust the Frame Size to match the requirements for the HLD. Your video should be **2160 pixels** wide and **3840 pixels** high.
### Open the graphics templates window
Once you've made the new sequence you can choose `Window` -> `Workspace` -> `Graphics and Captions` and then choose the `Graphics Templates` panel.
Alternatively, you can open the `Graphics Templates` panel directly from the Window Menu by choosing the `Graphics Templates` option.
### Install the Looking Glass motion graphics template
In the `Graphics Templates` panel choose the **Install Motion Graphics Template** option, and then select the ***Looking Glass HLD Template.mogrt*** file from your downloads folder, or wherever the template is saved.
Once you've imported the template you can drag it directly into your timeline.
## Using the motion graphics template
The Looking Glass motion graphics template has a few layers you can adjust.
* **Source** - allows you to replace and position the main content in the alcove.
* **Background** - allows you to apply a colored background to the alcove.
* **Alcove** - a representation of the Looking Glass HLD's embedded holographic volume.
* **Reflection** - an automatic setup that adds a reflection of your main content to your scene.
* **Shadow** - an automatic setup that adds a shadow created from the main content of your scene.
### Editing the template's properties
Next to `Graphics Templates`, switch your panel to show the `Properties` window, then select your template in the timeline. This will show you all the options you have to edit.
**Source**
You can replace the main content of the MOGRT by double clicking the `Source` content, this will allow you to drop in any media you've already imported to Premiere.
Once you've replaced the main content, you can double click it to apply effects like `ultraKey` to remove the background. We recommend using content that can be or already has been chroma keyed easily.
**Background -** we provide a simple linear gradient effect which allows you to tint the background of the holographic element of the HLD.
**Shadow -** we provide a few adjustment sliders to allow you to adjust the shadow to best fit your content. The shadow is automatically generated from your content. You can also adjust the tint of the shadow by changing the fill color. This is mostly helpful when you've also changed the `background` color.
**Reflection** - we provide a few adjustment sliders to allow you to adjust the reflection to best fit your content. The reflection is automatically generated from your content.
**Alcove** - a simple preview of the 3D volume of the HLD display. This should be turned off before exporting content.
## Previewing and exporting for HLD playback
Once you’ve exported your video, we recommend opening it in [**HLD Author**](/apps-and-tools/hld-author).
HLD Author lets you:
* Adjust framing, rotation, chroma key, and shadows
* Preview your content on a simulated Hololuminescent Display
* Export the correct MP4 for the included [HLD Demo Media Player](/managing-content/using-the-demo-media-player), BrightSign, or standard portrait-video playback
HLD Author can also create animated or depth-treated output from still images and render supported 3D media. It is the easiest way to confirm framing, depth, and orientation before deployment.
# Adobe After Effects
Our After Effects template provides a more advanced way to create content for HLD displays.
## Requirements
* Adobe After Effects 2025
### Downloads
You can download the latest Adobe After Effects Project from our github repository here:
{% embed url="" %}
Our After Effects template provides automated masking, safe areas, shadows, and reflections. All the effects will update automatically once you've replaced the main composition.
{% hint style="info" %}
In our experience, Adobe Premiere Pro's `UltraKey` effect can provide a cleaner chromakey than After Effect's built-in options. You may find a better workflow first importing content to Premiere, using `UltraKey` and then pulling it back into After Effects.
{% endhint %}
### Compositions and Layers
The After Effects template is based off of three key components.
* **Animation** - this will contain your content, and also be used for the shadow and reflection components.
* **Add Shadow** - builds off of the main composition and adds a shadow effect.
* **Add Reflection** - builds off the main composition and adds a reflection effect.
* Background - a background element you can use to tint the HLD's background color.
* **Alcove -** a preview of the HLD's 3D volume. **This should be turned off before exporting content.**
All of the preset values created for our Motion Graphics Template in Premiere are also available in our After Effects template in the `Essential Graphics` panel. This can be an easy way to adjust content values on the fly without going too deep into the stack.
The effect controls are as follows:
* **Alcove Preview** - A toggle for the alcove, **this should be disabled before exporting.**
* **Transform Controls -** Controls for adjusting the transform of the main content.
* **Reflection** - Adjustments that can control the position, opacity, and strength of the reflection effect.
* **Shadow** - Adjustments that can control the position, opacity, and strength of the shadow effect.
* **Background** - Controls for a tintable background layer that can apply color to the holographic element of the HLD.
## Previewing and exporting for HLD playback
Once you’ve exported your video, we recommend opening it in [**HLD Author**](/apps-and-tools/hld-author).
HLD Author lets you:
* Adjust framing, rotation, chroma key, and shadows
* Preview your content on a simulated Hololuminescent Display
* Export the correct MP4 for the included [HLD Demo Media Player](/managing-content/using-the-demo-media-player), BrightSign, or standard portrait-video playback
HLD Author can also create animated or depth-treated output from still images and render supported 3D media. It is the easiest way to confirm framing, depth, and orientation before deployment.
# Using other video editors
This guide will show you how to use your video editor of choice to create content for Looking Glass Hololuminescent displays
Looking Glass Hololuminescent displays work by overlaying traditional video content on top of a fixed holographic volume. This allows immense freedom in choice of the creative tools you can use to make content. In this guide we'll go over the basic operations that make content shine on Hololuminescent displays.
### The Hologram
Hololuminescent displays have a fixed holographic volume built into the display itself. The content you put on the display will be overlayed on top of this volume, allowing for a compelling 3D effect.
For most of our templates, we use the center view of the holographic volume as reference for the safe areas of our content. This can be imported into your video editor as an image backplate to be used as ***reference*** during the editing process.
{% hint style="info" %}
The holographic volume reference does **not** need to be exported as part of your video, the display itself will do all the magic there.
{% endhint %}
Download this image to use as a reference guide
Content on the Hololuminescent display will effectively blend over top the holographic volume, this is similar to the "multiply" blend mode in photo or video editing tools.
For the best preview of this, you can place the reference image on top of or under the main content and apply a `multiply` blend mode. This will replicate how the content will look in the actual HLD.
Your output video should look like this.
{% hint style="success" %}
The display itself handles blending of the video content with the holographic effect. Your content should have a solid color or gradient background. See our [Demo video content](/resources/demo-video-content) for more examples.
{% endhint %}
### Special Effects
We recommend adding drop shadows and reflections to content for the best effect in our Hololuminescent displays. There are a few ways to achieve these effects. For full guidance on creative constraints please see our [Characters](/creative-guidelines/characters) or [Products](/creative-guidelines/products) pages. For guidance on exporting and specific measurements for safe areas please see our Media specifications page.
{% content-ref url="/pages/SiXKwL24811wA27e21Da" %}
[Media specs and encoding](/resources/media-specs-and-encoding)
{% endcontent-ref %}
# Creating videos with 3D tools
You can render content for the Hololuminescent display directly from your 3D tool of choice.
Create Hololuminescent™ Display (HLD) content straight from 3D applications like Blender and Cinema4D. The idea is simple: place your subject inside the alcove, make sure it casts a grounded shadow (and optional subtle floor reflection), and render to a plain background (usually white or off-white). The HLD then combines your video with its fixed holographic volume to produce real depth on its display.
## Templates and guides
We provide templates for select tools that allow you to get up and running quickly to render your content. These templates include a camera with alcove reference, a shadow-catcher floor, and a compositor setup for the solid background.
Currently, we have specific guides and templates for the following tools:
{% content-ref url="/pages/RaGpAg7kHctqZ9Bo4r42" %}
[Blender](/content-pipelines/creating-videos-with-3d-tools/blender)
{% endcontent-ref %}
{% content-ref url="/pages/P2vzOsBO1g1d2UJJVPxu" %}
[Unreal Engine](/content-pipelines/creating-videos-with-3d-tools/unreal-engine)
{% endcontent-ref %}
## What you’ll make
A vertical (9:16) video where a person, character, or product sits inside the alcove:
* **Solid background** (white/off-white) so the display’s optical stack can layer your video into the hologram cleanly—no alpha channel needed. **Don't render the alcove**, it's just a reference.
* **Grounded shadows** to make the content feel like it lives within the holographic alcove. Avoid shadows on side walls and heavy back-wall shadows. See more [here](/creative-guidelines/products) and [here](/creative-guidelines/characters).
* **Subtle floor reflections (optional)** for content close to the ground to enhance presence.
* **Subject placement** within the [safe area](https://hlddocs.lookingglassfactory.com/content-pipelines/media-specs-and-encoding#safe-areas) of the alcove; do not overlap the roof or sit outside the box.
Example content:
{% columns %}
{% column %}
{% endcolumn %}
{% column %}
{% endcolumn %}
{% endcolumns %}
## Encoding settings
To get the most out of the resolution of our displays, we usually render our content at 4K resolution, at a 9:16 aspect ratio, resulting in a 2160x3840 video. You can find more information on our encoding settings [here](/resources/media-specs-and-encoding).
## Previewing and exporting for HLD playback
Once you’ve exported your video, we recommend opening it in [**HLD Author**](/apps-and-tools/hld-author).
HLD Author lets you:
* Import supported 3D media directly or adjust a video rendered from your 3D tool
* Tune framing, model transforms, lighting, shadows, animation, and export-camera motion
* Preview your content on a simulated Hololuminescent Display
* Export the correct MP4 for the included [HLD Demo Media Player](/managing-content/using-the-demo-media-player), BrightSign, or standard portrait-video playback
This is the easiest way to refine the result and confirm framing, depth, and orientation before deployment.
## Resources
* **Creative guidelines:** [Characters](/creative-guidelines/characters) and [Products](/creative-guidelines/products) for framing, motion, and lighting tips.
* **Preparing media for deployment**: Learn how to use [HLD Author](/apps-and-tools/hld-author) to prepare content to be loaded onto the included [HLD Demo Media Player](/managing-content/using-the-demo-media-player).
* **Video editor workflows:** [Premiere Pro](/content-pipelines/creating-with-video-editors/adobe-premiere-pro) / [After Effects](/content-pipelines/creating-with-video-editors/adobe-after-effects) templates (safe areas, shadows, reflections).
* **General information:** See more about Hololuminescent displays on our [main website](https://lookingglassfactory.com).
# Unreal Engine
Use Unreal Engine with Looking Glass Hololuminescent Displays for cinematic content and realtime applications.
Our Unreal Engine Template provides some basic constructs for catching shadows, reflections and framing content.
## Requirements
{% hint style="info" %}
**Our template requires Unreal Engine 5.6 or newer.**
{% endhint %}
{% embed url="" %}
## Opening the project
Our template is available as an Unreal Engine Project or as a Plugin, you can access the project from our Github here:
{% embed url="" %}
To open the project, make sure Unreal Engine 5.6 is installed and double click the .uproject file. From there, navigate to the **Plugins/Hololuminescent-Display-Template/** directory and open the **HLD\_Template** level.
The level contains a few components.
* **Alcove** - a visual preview of the holographic volume of our Hololuminescent Displays.
* **Shadow Catcher** - a plane to catch shadows from your main content and also add a subtle reflection.
* **CineCameraActor** - a camera setup to match the perspective to the holographic volume.
## Placing Content
In our template we've used the BP\_ThirdPersonCharacter asset as an example, you can replace this with your own content. For more guidance please see our [Products](/creative-guidelines/products) or [Characters](/creative-guidelines/characters)pages.
## Exporting Content
The **Alcove** element should be set to **`hidden in game`**, this means it will automatically disappear during a game session or capture session. This will also allow you to quickly toggle the alcove on and off by pressing `G` on your keyboard.
To export content, open the sequencer window and track the CineCamera Actor in the scene. This camera should remain static and should not be modified or moved. Your content should be placed relative to the camera.
{% hint style="success" %}
You can tweak the atmospheric fog and shadowing plane's base color to allow for a tinted alcove. This can be helpful for content where you're looking to have a more branded experience.
{% endhint %}
Once you're happy with your scene, make sure the Alcove is set to hidden, and then choose `Render Movie` — this will open the dialog to render your video out. You should change the preset resolution to ensure you're rendering at 4K, in a 9:16 aspect ratio.
We recommend exporting as an image sequence, but you can compile the image sequence into a video using your preferred video editor.
## Previewing and exporting for HLD playback
Once you’ve exported your video, we recommend opening it in [**HLD Author**](/apps-and-tools/hld-author).
HLD Author lets you:
* Import supported 3D media directly or adjust a video rendered from Unreal Engine
* Tune framing, model transforms, lighting, shadows, animation, and export-camera motion
* Preview your content on a simulated Hololuminescent Display
* Export the correct MP4 for the included [HLD Demo Media Player](/managing-content/using-the-demo-media-player), BrightSign, or standard portrait-video playback
This is the easiest way to refine the result and confirm framing, depth, and orientation before deployment.
# Blender
Our Blender template makes it simple to create content for Hololuminescent Displays using 3D models.
{% hint style="info" %}
Our Blender template is designed with Blender 4.5 in mind, if you use it with a prior version of Blender you will need to edit the shadow catcher and compositing effects.
{% endhint %}
## Downloads
Download our template for Blender:
{% embed url="" %}
## Requirements
* [Blender 4.5](https://blender.org/)
## Using the template
Once you've downloaded Blender 4.5 and our template file, open the template by either double clicking the file, or use the file menu in Blender itself. When opening the template you'll see the scene below.
Our Blender template has three main components: the camera, the shadow catcher, and the background composite.
### Camera
When creating content for HLD systems, the camera should remain static. We've applied a background image to the camera that represents the holographic volume of the HLD display. In general content should be placed as if it's *inside* this volume. See our [Products](/creative-guidelines/products) or [Characters](/creative-guidelines/characters) pages for more information about how to frame content.
If necessary, you can change the camera's focal length, however this would also require adjusting other portions of the template as well.
### Shadow Catcher
The shadow catcher is a plane setup to match the holographic volume of the HLD. The plane does not contribute any color data to the scene and only serves as a means to capture a shadow cast from the main 3D content. The shadow effect is crucial for the 3D effect in the HLD.
### Compositor
We use Blender's Compositor feature to composite a solid-colored background onto the scene. By default, this is white, however you can change this to effectively tint the content in the HLD. We recommend keeping the background a solid color or subtle gradient.
## Previewing and exporting for HLD playback
Once you’ve exported your video, we recommend opening it in [**HLD Author**](/apps-and-tools/hld-author).
HLD Author lets you:
* Import supported 3D media directly or adjust a video rendered from Blender
* Tune framing, model transforms, lighting, shadows, animation, and export-camera motion
* Preview your content on a simulated Hololuminescent Display
* Export the correct MP4 for the included [HLD Demo Media Player](/managing-content/using-the-demo-media-player), BrightSign, or standard portrait-video playback
This is the easiest way to refine the result and confirm framing, depth, and orientation before deployment.
# Filming real-world content
The HLD system can also be used to capture real-world footage. One of the ways you can achieve this is by filming an individual on a white background. There are a few techniques that help reinforce the HLD's impact .
## Camera Position and FOV
For the best effect, you should use a zoom lens — around 75mm or a 2.5x zoom level on an iPhone. Shooting on this lens length will make the person feel like they're standing on the floor of the holographic stage, though it does mean that the camera has to be quite far away from the subject.
Wide angle lenses like the standard lenses in smart phones will cause fish-eye effects which will need to be corrected in post.
## Solid Color Background
Pure white will render as transparent on the HLD, allowing the alcove to shine through. You can also have the background be a solid color — this will apply a tint effect to the alcove. To have a dynamic filming environment, using a white background and colored lighting can allow you to change the effect while you record.
## Shadows
When filming content you should use a soft light box to cast a shadow behind the individuals being filmed. The shadow cast by the individual should be soft and dispersed.
## Reflections
Reflections can also make a big impact in HLD displays. For filming content, we recommend placing a piece of reflective acrylic on the floor and have the individual stand on it. This will create real reflections, which will come through in the display.
Our filming setup consists of three main elements, a soft box light, reflective floor, and white backdrop. In this shot, the camera is behind us, it's further away from the subject because we're using a zoom lens to counteract any perspective distortion that you would normally get in a lens with a wider field of view.
## Previewing and exporting for HLD playback
Once you’ve recorded your video, we recommend opening it in [**HLD Author**](/apps-and-tools/hld-author).
HLD Author lets you:
* Adjust framing, rotation, chroma key, and shadows
* Preview your content on a simulated Hololuminescent Display
* Export the correct MP4 for the included [HLD Demo Media Player](/managing-content/using-the-demo-media-player), BrightSign, or standard portrait-video playback
HLD Author can also create animated or depth-treated output from still images and render supported 3D media. It is the easiest way to confirm framing, depth, and orientation before deployment.
# Creating videos with GenAI
Modern generative AI tools enable new forms of content creation for Hololuminescent displays.
Turn ideas or photos into cinematic, holographic-ready videos using [**Google AI Studio**](https://aistudio.google.com/) and Gemini’s **Nano-Banana** (AKA 2.5 Flash Image) and **Veo 3.1** models.\
This guide walks you through how to:
* Adapt a **photo** into an HLD-ready video
* Create a **new image entirely from text** then animate that image into a short, realistic video for the HLD.
While we'll be using [Google's AI Studio](https://aistudio.google.com/) for this tutorial, the same process is possible in a variety of other tools if you adapt the core logic.
## Overview
To create an HLD-style video, use **Gemini’s image and video generation tools** in [Google AI Studio](https://aistudio.google.com/) in this order:
1. Style or image generation (Nano-Banana)
* Upload a subject image *or* describe it in text
* Include our reference image to guide lighting and composition
2. Video generation (Veo 3.1)
* Animate your resulting image into an HLD-ready video
The output is:
* 1080×1920 (9:16 portrait)
* 24 fps with native audio
* MP4
## What you’ll need
* A **Google account**
* Access to **Google AI Studio**
* Either:
* A **subject image** (person or product)
* **or** a **text prompt** describing what you’d like generated
* Our **reference image** — defines the environment, lighting, or style you want the subject to match
{% columns %}
{% column %}
Reference image if you're making a product video for the HLD:
{% file src="/files/Qg3lIkf5rU4whuUCcx2M" %}
{% endcolumn %}
{% column %}
Reference image if you're making a person or character video for the HLD:
{% file src="/files/OgXqwJh4ftEY1hsWWtJV" %}
{% endcolumn %}
{% endcolumns %}
## Step 0: Set up Google AI Studio
Before you generate images or videos, make sure your Google account has access to **Google AI Studio** and (optionally) that billing is enabled for **pay-as-you-go** usage of the Gemini API.
1. Choose the account you’ll use
1. **Personal Google accounts**: You can open AI Studio and start prototyping immediately. No admin approval is required.
2. **Google Workspace (work/school) accounts**: AI Studio is **on by default**, but your Workspace admin can turn it on/off per OU or group. If you see an “access disabled” message, contact your admin.
{% hint style="info" %}
**Admin guidance (Workspace):** In the Admin console, go to **Apps → Additional Google services → AI Studio → Service status** to enable it for everyone, an OU, or an access group. (Domain verification is required to manage additional services.) See more on [Google Help](https://support.google.com/a/answer/15004095).
{% endhint %}
2. Check regional & age availability
1. AI Studio and the Gemini API are available [in most countries/regions](https://ai.google.dev/gemini-api/docs/available-regions); if you’re outside a supported region, use Vertex AI instead. Minimum age is 18.
3. Sign in to AI Studio & create an API key (optional but recommended)
1. To connect your projects and tasks to your billing setup, you need an API key. You can create one in the [Google AI Studio dashboard](https://aistudio.google.com/u/1/api-keys).
4. (Optional) Enable billing for pay-as-you-go & higher limits
1. You can build on the **free tier** or upgrade to **pay-as-you-go** for higher rate limits and different data-use terms.
2. Open **Settings → Plan information** and click **Set up Billing** for your project; you’ll be guided to link a **Google Cloud Billing** account.
## Step 1: Generate or adapt an image with Nano-Banana
Once you're signed in and set up in Google AI Studio, you can start creating content.
### Option A: Adapt an existing image
1. Open image generation
1. Go to AI Studio.
2. Select **`Try Nano Banana`**.
2. Upload your files
1. First image: your subject (person/character or product)
2. Second image: the reference image
1. Use the bear for a person/character
2. Use the headphones for a product
3. Add a prompt
1. For a person/character, use our default prompt:
**🧍** Person Flow
> Composite the person/character from the first image into the scene from the second image. The subject should replace the second image's subject, match their height and feet placement, and the shadow and reflections should be updated to match the new subject.
**📦** Product Flow
> Composite the object from the first image into the scene from the second image. The object should be replace the second image's object, and the shadow should be updated to match the new object.
4. Generate and download
1. Click **Run** and wait about 5–30 seconds.
2. Download your **style-adapted image** — this will be the base for your video.
### Option B: Generate a new image from text
You can also skip uploading a subject image and describe what you want instead.
1. Open image generation
1. Go to AI Studio.
2. Select **`Try Nano Banana`**.
2. Upload only the reference image
1. This sets the background, lighting, and style.
3. Enter a text prompt
1. Example:
> Replace the subject with a luxury handbag placed naturally in the reference scene. Match the shadows so they feel physically accurate.
4. Generate and download
1. Gemini will create a **new image** based on your description, blending it into the reference scene. Download this image — it’s now ready for video generation.
## Step 2: Animate with Veo 3.1
1. Open video generation
1. In AI Studio, select the "Home" button.
2. Choose the **`Veo 3.1`** from the home screen menu.
2. Select "Frames to Video" instead of the default "Text to Video"
3. Upload the style-adapted or generated image from Step 1
1. This is the image you just created with Nano-Banana.
2. If you're doing a video of a **product**, we recommend setting the image as the **start and end frame.**
3. If you're doing a video of a **person**, just upload the image as the start frame.
4. Select settings
1. Model: `veo-3.1-generate-preview` for highest quality results
2. Aspect Ratio: Portrait (9:16)
3. Resolution: 1080p for best results
5. Add your prompt
**🧍** Person flow
> A natural, engaging video of the person speaking directly to camera. Subtle movements and natural expressions, static camera, realistic lighting.
**📦** Product flow
> A smooth, professional 360-degree rotation of the product. The object slowly spins clockwise when viewed from the top, showcasing it from all angles. The product remains centered and in perfect focus throughout the rotation, and the camera doesn't move.
6. Generate and download
1. Click **Run**. Veo 3.1 will render the video in 1–5 minutes.
2. Download the **MP4** — it’s ready for playback on HLD displays.
## Previewing and exporting for HLD playback
Once you’ve exported your video, we recommend opening it in [**HLD Author**](/apps-and-tools/hld-author).
HLD Author lets you:
* Adjust framing, rotation, chroma key, and shadows
* Preview your content on a simulated Hololuminescent Display
* Export the correct MP4 for the included [HLD Demo Media Player](/managing-content/using-the-demo-media-player), BrightSign, or standard portrait-video playback
HLD Author can also create animated or depth-treated output from still images and render supported 3D media. It is the easiest way to confirm framing, depth, and orientation before deployment.
## Output specs
| Property | Value |
| ---------------- | ----------------------- |
| **Aspect Ratio** | 9:16 (portrait) |
| **Resolution** | 1080 × 1920 |
| **Duration** | 8 seconds |
| **Frame Rate** | 24 fps |
| **Audio** | Native (auto-generated) |
| **Format** | MP4 |
| **Watermark** | SynthID (automatic) |
## Tips for Best Results
* Use **bright, evenly lit** subject photos.
* Match the **lighting direction** between subject and reference, if possible.
* Use **9:16 images** whenever possible.
* Keep prompts **concise** but **specific** — mention the mood, camera behavior, and lighting style.
* **Avoid cluttered backgrounds** in the input image.
* Use images with **clear separation** between foreground and background.
# Creating real-time apps
Bring your application to life and add increased immersion with our Hololuminescent Displays
### General Setup
Create interactive applications and immersive experiences for the Hololuminescent™ Displays (HLD) using game engines like Unity or Unreal.
To run interactive applications on Hololuminescent Displays you'll need to use a Windows or Mac computer. To do so, you'll need to disconnect the HDMI connection from the HLD to the demo media player on the back of the device and connect your Windows or Mac computer via an HDMI cable or DisplayPort cable.
For the best performance we recommend using a computer with at least an RTX 3060 or an M1 processor.
### Connecting to a computer
While the HLD comes with a demo media player that can play video content, you can also connect it to a PC or Mac to run real-time apps. To do so, unplug the HDMI cable from the back of the HLD and demo media player, then connect it to your computer. The display will show up as a normal **`extended`** monitor, ensure that the correct resolution is set in display settings and that the display is set to **`portrait`** orientation.
Display
Resolution
Orientation
Looking Glass 16" Hololuminescent Display
1080 x 1920
Portrait
Looking Glass 27" Hololuminescent Display
2160 x 3840
Portrait
Looking Glass 86" Hololuminescent Display
2160 x 3840
Portrait
### Templates and guides
We have created templates for select tools that allow you to get up and running quickly to render your content. These templates include a camera with alcove reference, a shadow-catcher floor, and a compositor setup for the solid background.
We have specific guides and templates for the following tools:
{% content-ref url="/pages/WJj4KDo3QhllmEX4E5od" %}
[Unity](/content-pipelines/creating-real-time-apps/unity)
{% endcontent-ref %}
{% content-ref url="/pages/2cEKFrubjirNb2zBCIJz" %}
[Unreal](/content-pipelines/creating-real-time-apps/unreal)
{% endcontent-ref %}
## What you’ll make
An interactive application using Unity or Unreal where a person, character, or product sits inside the alcove:
* **Solid background** so the display’s optical stack can layer your application into the hologram cleanly—no alpha channel needed. **Don't render the alcove**, it's just a reference.
* **Grounded shadows** to make the content feel like it lives within the holographic alcove. Avoid shadows on side walls and heavy back-wall shadows. See more [here](/creative-guidelines/products) and [here](/creative-guidelines/characters).
* **Subtle floor reflections (optional)** for content close to the ground to enhance presence.
* **Subject placement** within the [safe area](https://hlddocs.lookingglassfactory.com/content-pipelines/media-specs-and-encoding#safe-areas) of the alcove; do not overlap the roof or sit outside the box.
Example Scenes:
{% columns %}
{% column width="50%" %}
{% endcolumn %}
{% endcolumns %}
## Resources
* **Creative guidelines:** framing, motion, and lighting tips for [characters](/creative-guidelines/characters) and [products](/creative-guidelines/products).
* **Media specs and encoding**: details on how to [encode video content](/resources/media-specs-and-encoding).
* **Video editor workflows:** [Premiere Pro](/content-pipelines/creating-with-video-editors/adobe-premiere-pro) / [After Effects](/content-pipelines/creating-with-video-editors/adobe-after-effects) templates (safe areas, shadows, reflections).
* **General information:** See more about Hololuminescent Displays on our [main website](https://lookingglassfactory.com).
## Feedback
Need help bringing your vision to life or have some template feedback? We're here to help! Send us an email at and we'll be happy to assist!
# Unity
Our Unity templates make it easy to use the latest tech from Unity for interactive apps and immersive video content.
Unity's flexibility allows you to make a variety of applications and immersive experiences for Hololuminescent™ Displays. You can choose between your preferred render pipeline (URP or HDRP) to create interactive applications or videos. Our templates make it easy to stage your own content for use in our Hololuminescent Displays.
## Requirements
* [Unity 6.3](https://unity.com/)
* [Template Projects](https://github.com/Looking-Glass/HLD-Templates/tree/feat/realtime)
* **Operating System:** Windows 11 or MacOS 15+
* **Graphics:** Nvidia RTX 3060, M1 mac or equivalent recommended for best performance
{% hint style="info" %}
### Render Pipelines
To best support your projects, we've provided two distinct Unity Projects to support both the **High-Definition Render Pipeline** and the **Universal Render Pipeline.**
{% endhint %}
## Scene Setup and Components
{% hint style="info" %}
All the files relevant for developing for Hololuminescent™ Displays are located in the `Hololuminescent` folder.
{% endhint %}
### Alcove/Stage
We recommend starting with our `Character` scene in our templates. This scene is setup with our `alcove` prefab and provides proper framing, environment and lighting characteristics that work great on the Hololuminescent Displays.
Our HDRP and URP templates have a few key components that make up the alcove prefab, a component designed to give you an easy-to-use stage for your content.
* **Camera:** a standard Unity camera framed to perfectly match the holographic volume of the HLD.
* **Mirror**: a planar reflection setup to have clean, soft reflections.
* **Backdrop**: an unlit backplane provides a clean canvas to allow your content to stand out.
* **Boundary Helper**: an editor gizmo designed to help you frame your content. Ideally your content should remain in the light blue region of the scene, this represents the safe area of your HLD.
* **Ceiling:** in tandem with the planar reflection, keeps the reflection clean and avoids extraneous distraction for light sources or the environment.
* **Ledge:** defines the front bottom ledge of the alcove, this can be used for creative shadow casting effects as seen [here](/resources/demo-video-content) on the **Magic Book** demo.
* **Lighting:** the `Alcove` prefab also includes a few lights. By default the scene is setup for soft lighting and soft shadows. You can tweak these to best fit your scene. We recommend taking a look at our creative guidelines for [characters](/creative-guidelines/characters) and [products](/creative-guidelines/products) when customizing lighting and shadows.
## Scripts
We include a few helpful scripts to make it easy to preview and get your content onto the HLD itself.
* **Alcove/ColorChanger.cs:** a small script to allow you to easily change the color of the alcove, this allows you to more easily theme the whole stage at once for branded experiences.
* **PlanarReflection (URP only):** a script that implements a simple planar reflection for Unity's Universal Render Pipeline.
### **Windowing**
We provide a collection of scripts to make the windowing process simple for HLD systems, whether you're in the editor or running a built version of your application.
* **MultiMonitor.cs:** a script to detect and spawn an in-editor game preview on a connected HLD.
* **MonitorSelectionUIBuilder.cs:** a script that builds a small UI when your application starts, which allows you to set the target monitor to the HLD.
* **MonitorSelectionDialog.cs:** contains the logic for monitor placement and display menu.
* **MonitorSelectionBootstrap.cs:** a script that should be assigned to an empty game object in your scene. This will orchestrate the monitor placement UI.
{% hint style="info" %}
**Keyboard shortcuts**
If necessary you can use Ctrl + E to re-open the monitor selection UI. This allows you to switch the monitor placement in the event a monitor is disconnected while the app is running.
{% endhint %}
## Working in the Unity Editor
**Preview Window**
{% columns %}
{% column %}
To open a preview window directly on your Hololuminescent™ Display, navigate to **`Window->Hololuminescent Display Settings`**
The script will search for connected displays in **`Portrait`** orientation, which in most situations should automatically find your Hololuminescent™ Display.\
\
You can also override this by changing the **`Target Monitor`** field.
{% endcolumn %}
{% column %}
{% endcolumn %}
{% endcolumns %}
## Building your application
Under the file menu in Unity, choose `Build and Run`. This will begin the build process for your app. Once complete, the app will launch, and you'll be greeted with a small UI menu that will list the available monitors.
Choosing `Portrait Displays Only` will filter the list to include only portrait-oriented displays, which can be helpful if you have a large number of displays connected.
Once you've located your HLD, select the display from the menu and your build will automatically move to the HLD. If necessary, you can re-open the dialog by hitting `Ctrl + E` on your keyboard.
{% columns %}
{% column %}
{% endcolumn %}
{% column %}
{% endcolumn %}
{% endcolumns %}
# Unreal
Our template makes it simple to create cinematic quality experiences using the latest technology from Unreal Engine.
Unreal's cinematic toolsets allow you to make high fidelity applications for Hololuminescent™ Displays. We've configured the product configurator template to show how simple it is to bring existing content into the HLD.
## Requirements
* [Unreal Engine 5.6](https://www.unrealengine.com/en-US)
* [Template Project](https://github.com/Looking-Glass/HLD-Templates)
* **Operating System:** Windows, MacOS
* **Graphics:** Nvidia RTX 3060, M4 Mac or equivalent
## Scene Setup and Components
{% hint style="info" %}
Our starting project builds off of Unreal's existing product configurator template, you can learn more about that template [here](https://dev.epicgames.com/documentation/en-us/unreal-engine/product-configurator-template-in-unreal-engine).
{% endhint %}
## Alcove / Stage
There are a few components that we've provided to make it straightforward to stage your content on the HLD.
* **Camera:** a standard cinematic camera framed to perfectly match the holographic volume of the HLD.
* **Backdrop:** a soft white backplane to allow your content to stand out.
* **Ledge:** defines the front bottom ledge of the alcove, this can be used for creative shadow casting effects as seen [here](https://hlddocs.lookingglassfactory.com/resources/demo-video-content) on the **Magic Book** demo.
* **Safe Area**: a simple gizmo to help you frame your content. Ideally your content should remain inside the volume, this represents the safe area of your HLD.
* **Lighting**: the starting scene includes a handful of spotlights placed to best illuminate your scene. You can tweak these to best fir your products. We recommend taking a look at our creative guidelines for [characters](https://hlddocs.lookingglassfactory.com/creative-guidelines/characters) and [products](https://hlddocs.lookingglassfactory.com/creative-guidelines/products) when customizing lighting and shadows.
#### **Working in the Editor**
While in the editor it can be useful to have a preview window on your HLD, to do this you can choose the `new PIE (play in editor) window` option under the `play mode and settings` menu. From there you can use the built in UI to change the monitor the application will run on.
#### **Windowing**
{% hint style="info" %}
**Keyboard shortcuts**
If necessary, you can use Ctrl + E to re-open the monitor selection UI. This allows you to switch the monitor placement in the event a monitor is disconnected while the app is running.
{% endhint %}
We provide a collection of scripts to make the windowing process simple for HLD systems, whether you're in the editor or running a built version of your application.
**MonitorUtils.cpp** - a simple CPP interface that exposes basic monitor placement functions to blueprints
**DataHandler** - a blueprint object for orchestrating the UI's list view for monitor selection
**ListItem** - a widget blueprint that represents a single monitor in the UI's listview.
**Window Manager** - a widget blueprint that contains a UI for selecting which monitor you'd like the application to run on.
The Window manager widget is spawned in the level blueprint. This is also where we set the target blend mode for the cineCameraActor we use for the HLD.
# Products
Content guidelines and recommendations for making high-quality product visualizations in Hololuminescent displays.
Viewing products on a HLD is a great way to get them to stand out. There are a few tips and tricks we've learned along the way to really make them pop.
## Safe Area
The area that's best for your main content. We recommend adhering to the safe area guidelines when possible — violating these guidelines can work for the right content but can also harm the 3D effect.
This product showcase places the headphones in the center of the alcove and adds a subtle drop shadow. With a bit of motion this will become an effective showcase of the product and also benefit from the 3D effect of the alcove.
This product showcase incorrectly places the holograms in front of the edges of the alcove. This will negatively impact the 3D effect and should be avoided.
## Text
Text looks great on HLD displays. You'll want to make sure that it stays within the borders of the alcove. Avoid having text cross the roof or walls of the alcove.
## Motion
Having products in motion can greatly improve the 3D effect of an HLD display. We find adding a 360 degree rotation or orbit effect leads to the best end result and captures audience attention.
## Shadows
Having your products cast shadows is a great way to increase realism. Our templates provide a few ways to modify shadows.
In general, shadows should remain on the floor of the alcove. In some cases, a soft shadow on the back wall can look good. You should avoid casting shadows on the side walls as it can disrupt the parallax of the display and distract the viewer.
## Reflections
Reflections are a great way to add a bit more realism to your content. Like shadows, reflections should also be limited to the floor of the alcove and remain subtle. Adding too much saturation can distract viewers from what you're really trying to show.
# Characters
HLD displays are great ways to enable new types of interactivity and connection. These guidelines will help you get the most of your display.
## Safe areas
Placing people in the alcove correctly is an important part of the 3D effect of the HLD displays. The diagrams below show some examples of correct and incorrect placement.
In the first example, you'll see the character has a proper shadow, correct reflection, and is placed properly in the alcove, while the other two examples place the character outside the alcove, resulting in a degradation of the 3D effect.
In general, the main rules we recommend are:
* Don't place the character outside the alcove.
* Don't place the character so that it overlaps the top of the alcove.
Harold is comfortable inside the alcove and has room to move around.
Harold isn't standing inside the alcove; this can break the 3D effect.
Harold is too tall and is intersecting with the top of the alcove.
## Movement
There's a lot of freedom to animate your character as you please. These are a few examples of the kinds of motion we recommend. Generally you'll want to keep your character standing and centered in the alcove. Having your character go off screen is not recommended as it can break the 3D effect.
Harold can dance! Though his moves may need a bit of work, in this example he's not moving too far from the center of the alcove.
Harold likes to talk; he's got enough space in the alcove to move around and wave without intersecting the alcove's edges.
## Shadows
Subtle shadows can increase the effect of realism in the HLD display. It's important to have the shadow be additive but not too harsh — it is meant to compliment the main content in the scene, not distract from it.
{% hint style="success" %}
Shadows should be on the floor of the alcove and should generally **not** be cast on the back wall of the alcove.
{% endhint %}
Harold has a subtle drop shadow, which helps lend realism to the 3D effect.
In this case, Harold has a heavily blurred shadow on the back wall, which can alleviate some of the distractions caused by a harsher sharp shadow.
Harold has a harsh, sharp shadow cast on the floor and back of the alcove. This should be avoided as it will distract from the parallax effect.
## Reflections
Reflections likewise should be subtle. In our work we've found there are two reliable ways to generate reflections depending on your content's origin. If you're working with content that is filmed, you can generate an effective reflection in video editing tools by translating the original content, adjusting the opacity, transform, and distortion to give a convincing reflection. For traditional content, this can require two reflection layers for each foot depending on how your character is posed.
For 3D content, placing a plane at the bottom of the scene and having it render as its own layer will allow you to properly compose the effect in Adobe After Effects, Adobe Premiere Pro, or your video editor of choice.
# Using the Demo Media Player
Every HLD comes with an included demo media player to make initial setup and demonstration easy.
The HLD ships with a **Demo Media Player** pre-attached to the back of the display. This player is designed to help you get up and running quickly to see holographic content on your display, test placement, and perform simple installations where a full digital signage system is not required.
The Demo Media Player is a **starter solution**. It is **not intended for long-term, production deployments** or environments that require reliability, remote management, scheduling, or fleet control.
For professional installations and long-term deployments, we recommend using a dedicated digital signage platform.
{% hint style="info" %}
For production deployments, see our guides on how to set up your HLD with [Yodeck](/managing-content/yodeck-digital-signage-player) or a [BrightSign player](/managing-content/brightsign-digital-signage-player).
{% endhint %}
## What is the Demo Media Player?
The Demo Media Player is a **Raspberry Pi 4–based computer** that ships mounted to the back of the HLD. It automatically plays compatible video content from a connected USB drive and provides basic, on-device playback controls.
It is intended for:
* First-time setup and testing
* Demos and short-term installations
* Simple, standalone use cases where manual content changes are acceptable
It is not intended for:
* Permanent installations
* Managed fleets of displays
* Environments requiring monitoring, scheduling, or remote updates
## Playback controls
The Demo Media Player includes **three physical buttons** for basic playback control:
* **Left button**\
Plays the **previous video** in the playlist.
* **Middle button**\
Toggles **single-video looping**.
* By default, all videos on the drive loop as a playlist while the player is on.
* Pressing the middle button switches playback to loop the **currently playing video only**.
* Visual feedback indicates when single-video looping is enabled.
* **Right button**\
Plays the **next video** in the playlist.
## Loading Content
### USB Playback
The Demo Media Player reads content from a USB thumb drive connected to its USB-A ports.
Each HLD shipment includes a USB thumb drive that is **already plugged into the Demo Media Player**.
To load content:
1. Copy your video files onto the USB thumb drive.
{% hint style="warning" %}
All loaded content must be processed with our software, [HLD Author](/apps-and-tools/hld-author), in order to play back correctly.
{% endhint %}
2. Insert the drive into the Demo Media Player.
3. The player will automatically detect the content and begin playback.
Hot-swapping USB drives is supported — you do not need to power off the display when changing content.
### Playback Order
* Videos are played in **alphanumeric filename order**.
* For example, `a.mp4` will play before `b.mp4`.
* Non-video files are ignored.
* For best results, we recommend keeping **only playback-ready video files** on the drive.
## Video Formatting Requirements
Videos must be formatted according to HLD’s Demo Media Player specifications in order to play correctly.
HLD Author chooses the resolution, orientation, and codec from the Demo Media Player target you select:
* **HLD 16"**: rotated 1080p HEVC
* **HLD 27"**: rotated 4K HEVC
* **HLD 86"**: rotated 4K HEVC
These files are intentionally rotated for playback through the included Demo Media Player. For BrightSign or another standard portrait-video workflow, use the **BrightSign** or **General** export target instead.
We strongly recommend using our software, [HLD Author](/apps-and-tools/hld-author) to process videos to prevent playback issues. See more details on our [media encoding specs here](/resources/media-specs-and-encoding).
## Preparing Content for the Demo Media Player
#### HLD Author (Recommended)
[**HLD Author**](/apps-and-tools/hld-author) is the primary, recommended way to prepare content for the Demo Media Player.
HLD Author allows you to:
* Preview content on a **simulated HLD**
* Export videos using the correct encoding and orientation
* Prepare content without needing to understand the underlying video settings
* Prepare content remotely without needing a physical HLD in your location
#### HLD Encoder (Advanced — Coming Soon)
**HLD Encoder** is a lightweight tool for advanced users who want direct control over the encoding process. It:
* Transcodes videos to the required format for the Demo Media Player
* Can be used via a simple GUI or from the command line
* Forces videos to:
* 4K resolution (2160 × 3840)
* HEVC encoding
* 90° counterclockwise rotation
HLD Encoder is best suited for power users, batch processing, or custom pipelines.
## When to move beyond the Demo Media Player
If you are planning:
* A permanent installation
* Multiple displays
* Remote content updates
* Scheduled playback
* Reliability in public or commercial environments
You should use a dedicated digital signage platform instead of the Demo Media Player.
See:
* [Using BrightSign with HLD](/managing-content/brightsign-digital-signage-player)
* [Using Yodeck with HLD](/managing-content/yodeck-digital-signage-player)
## Removing the Demo Media Player (Optional)
If you plan to install the HLD as a long-term deployment using a different computer or a dedicated signage device, we recommend removing the Demo Media Player **before** final installation.
The player is attached using **thumb screws**, which can be removed by hand.
To detach the Demo Media Player:
1. Power off the HLD.
2. Locate the Demo Media Player on the back of the display.
3. Disconnect the HDMI and USB connections.
4. Unscrew the thumb screws by hand.
5. Carefully remove the player from the mounting points.
Once removed, you can replace it with your preferred hardware solution (for example, a BrightSign player) as part of your permanent setup.
## Support
If you have any questions or hit any issues using your Demo Media Player or HLD, please contact us at .
# BrightSign digital signage player
Deploying HLD content to your BrightSign player with "brightAuthor connected"
Hololuminescent Displays include a built-in demo media player that’s useful for product demos and basic playback. However, for professional digital-signage deployments — especially where reliability, scheduling, and fleet management matter — we recommend using a dedicated signage platform.
[BrightSign players](https://www.brightsign.biz/brightsign-players/series-6/) are a common choice for production deployments with HLDs. They are widely used in museums, retail, corporate environments, and other always-on installations.
This guide walks through a **basic Standalone deployment** using **brightAuthor connected** and an SD card. It is intended as a practical starting point, not a comprehensive BrightSign manual. BrightSign supports multiple deployment modes (Standalone, Local Network, BSN.Cloud, etc.) and many advanced features.
For full setup instructions and alternative workflows, refer to [BrightSign’s official documentation](https://docs.brightsign.biz/start-here).
## What this tutorial covers
* Creating a simple BrightAuthor presentation for an HLD
* Configuring video output settings correctly for playback
* Publishing content to a BrightSign player via SD card (Standalone mode)
## What this tutorial does *not* cover
* Detailed BrightSign player provisioning
* Networked or cloud-managed deployments
* Advanced scheduling, interactivity, or scripting
For instructions on what this tutorial does *not* cover, refer to [BrightSign’s official documentation](https://docs.brightsign.biz/start-here).
## Requirements
Before you begin, you’ll need:
* A **BrightSign player** compatible with 4K60 output
* An **HLD** connected to the BrightSign player
* An **SD card** (inserted into your computer for Standalone deployment)
* A **BrightSign account** (BSN.Cloud)
* **brightAuthor connected** installed on your computer
For initial hardware setup, see [BrightSign’s Quickstart Guide](https://docs.brightsign.biz/player-quickstart).
## Step-by-step guide
{% hint style="warning" %}
This guide assumes you are setting up your BrightSign player in **Standalone mode**. If you are using another deployment method, the below steps may be inaccurate. Refer to [BrightSign’s documentation](https://docs.brightsign.biz/player-quickstart) for the correct setup steps.
{% endhint %}
### Step 1: Setup your BrightSign player
1. Follow [BrightSign's documentation](https://docs.brightsign.biz/standalone-setup) to set up your player as a Standalone device.
### Step 2: Install brightAuthor connected
1. Create or sign in to your [**BSN.Cloud**](https://bsn.cloud/) account.
2. Download and install **brightAuthor connected** from BrightSign — link [here](https://www.brightsign.biz/resources/software-downloads/).
3. Login to your BSN.Cloud account in the brightAuthor connected app.
4. Connect your BrightSign player to the HLD via HDMI or DisplayPort.
### Step 3: Create a new presentation
In brightAuthor connected:
1. Create a **new presentation**.
2. Select "Single Zone" → "Playlist" (this should be the default).
3. Set the following presentation settings:
* **Orientation:** Portrait – Bottom Left
* **Destination:** SD Card
* **Resolution:** 4K
* **Frame Rate:** 60 fps
* **Connector:** HDMI (unless you are explicitly using DisplayPort)
4. Give the presentation a clear, descriptive name.
These settings ensure the video output aligns correctly with the HLD’s expected input.
### Step 4: Add your content
1. Prepare a folder containing **portrait-oriented video files**.
{% hint style="warning" %}
BrightSign should receive standard portrait-oriented video files, not rotated Demo Media Player exports. In the current HLD Author web app, use the **BrightSign** or **General** export target for BrightSign playback. Do **not** send BrightSign an HLD Demo Media Player export, HLD Encoder output, or older HLD Author export. Those files are rotated 90 degrees counterclockwise for the included Demo Media Player and will play back incorrectly on BrightSign.
{% endhint %}
2. In brightAuthor, add this content to **Zone 1** of your presentation.
3. Arrange the playlist as desired.
4. Select "Publish" to go to the publish view for the presentation.
### Step 5: Publish and schedule the presentation
1. Under "Destination", make sure "Type" is set to "Standalone (Player Storage)" unless you are using an alternate deployment mode.
2. Under "Destination", set "Local Directory" to be the location of your inserted SD card.
3. Review the **Schedule** view.
1. You can keep the default schedule to have content **loop continuously**, or adjust timing as needed.
4. Press **Publish** again to apply the schedule.
Once complete, eject the SD card safely and insert it into the BrightSign player. When powered on, the player should automatically begin playback on the HLD.
## Conclusion
And that's it! You're now ready to deploy your HLD with your BrightSign player. This is great for long-term digital signage deployments where stability and content management are paramount.
This tutorial covers only one possible deployment configuration and only scratches the surface of what you can do your BrightSign player. For further information and advanced features, refer to [BrightSign’s official documentation](https://docs.brightsign.biz/start-here).
# Yodeck digital signage player
Yodeck is a digital signage service provider offering a robust fleet and content management service, fully compatible with Hololuminescent displays.
Every Hololuminescent display (HLD) comes with a demo media player (a Raspberry Pi 4) that runs our own software. This software is built to run videos on an inserted USB thumb drive, and it runs entirely offline. It is not intended to be a fully managed digital signage solution.
[Yodeck](https://www.yodeck.com/) provides a digital signage solution that can handle fleet deployment and content management. You can set up Yodeck on the computer that comes with the HLD to create a full digital signage solution. This guide will walk you through that process.
## Step 1: Flash your SD Card with Yodeck OS
1. Take the SD card out of the included Raspberry Pi 4 — it is located on the left side of the device, and you may need tweezers to remove it
2. Insert it into your computer (directly or via a USB adapter) — ensure it is unlocked
3. Download the [Yodeck OS Image](https://player-image.yodeck.com/RaspberryPi_Yodeck.zip?_gl=1*1ngrum7*_gcl_aw*R0NMLjE3NjA2Mzk1MzMuQ2p3S0NBandyOExIQmhCS0Vpd0F5NDd1VWhiZkFQcWo2cTRIdlp0WVNIVEp5Vi1fMTNZMjRKSmxDOGE4WlJWTmdEV0hNeXJkSHBzSEN4b0NWb3dRQXZEX0J3RQ)
4. Unzip the compressed archive
5. Download and install [Balena Etcher](https://etcher.balena.io/#download-etcher)
6. Open Balena Etcher
7. Select “Flash from File”
8. Select the Yodeck .img file
9. Under “Target” select the SD card
10. Click “Flash”
11. Ignore or dismiss any OS warnings about the drive
12. Even if it says there was an error during validation, the flashing process is typically complete
## Step 2: Set Up Yodeck Player
1. Insert the SD card into the included Raspberry Pi 4
2. Connect the player to the internet using an Ethernet cable — the port is on the right side of the device
3. Power on the device — you should see the Yodeck logo appear, rotated on the screen
4. Let the Yodeck player update
5. Once the player has updated, it will show a registration number
6. Go to the Yodeck web app on your browser:
7. Sign in or create an account
8. Under “Screens” select “Add Screen” — if you’re adding a screen through the Yodeck “Welcome” page, you must first select “Connect your player”
9. Select “Yodeck Player” and add it
10. Enter the registration number
11. Your screen should now be active and ready to receive content
## Step 3: Create a Playlist
1. Under “Media” select “Videos”
2. Select “Add Videos”
3. Upload your HLD videos
4. IMPORTANT! In the video settings, toggle on “Rotate Video” and select 270°
5. Select “Save” and let the videos process
6. Once this is finished, you can create a playlist by selecting “Playlists”
7. Select “Add Playlist”
8. Select “Classic” and click “Add”
9. Give your playlist a name
10. Add content from your media library into the playlist timeline
11. Select “Save”
## Step 4: Push a Playlist to your HLD
1. Go to “Screens”
2. Select the HLD you want to send your playlist to
3. Under “Screen Content” select “Playlist”
4. Select the playlist you want to deploy and click “Ok”
5. Select “Save”
6. Select “Push to Screens” on the top right of the screen
7. Select “Push Now”
8. After some processing, your new playlist will start playing on your HLD
## Additional Resources
For the latest up-to-date guide on setting up Yodeck Player on your Raspberry Pi, see [the official Yodeck documentation](https://www.yodeck.com/docs/creating-a-yodeck-player/player/).
For guides on how to use Yodeck’s features and services, [see their user guides](https://www.yodeck.com/docs/user-manual/user/).
# Demo video content
The latest demo reel content for Hololuminescent displays.
## Included demo playlist
This is the playlist included in the Demo Media Player with every HLD. This playlist is accurate as of December 19th, 2025.
Below are links to download sample videos. Pre-processed videos have been processed by HLD Author and are ready to be loaded directly onto the [Demo Media Player](/managing-content/using-the-demo-media-player) that came with your HLD via a USB thumb drive. Portrait videos can be used for viewing for third-party players and when running videos from a PC or Mac.
{% hint style="warning" %}
Pre-processed videos are intended for use on the included [Demo Media Player](/managing-content/using-the-demo-media-player) **only**. Do not use pre-processed videos with third-party digital signage players or with your PC/Mac.
{% endhint %}
Download full playlist (portrait)Download full playlist (pre-processed)
# Hardware specs
Specifications for you Hololuminescent Display.
This page lists external-facing hardware specifications for the Hololuminescent™ Display (HLD) product line.
This page currently covers the [musubi](https://look.glass/musubi), 16" and 27" systems only.
{% hint style="info" %}
The technical specifications for musubi are mostly finalized however they may change as we finalize the production manufacturing process.
{% endhint %}
## General
| Spec | musubi\* | HLD 16" | HLD 27" |
| ---------------------------------------------------- | -------------------------------------------------------------------------------------- | ----------------------------------------------------------------------------------------- | --------------------------------------------------------------------------------------------- |
| Power supply |
Built-In 2000mah battery, External power adapter. Input: TBC Output: None
|
| Outputs | 1x USB-C, power and data transfer only. |
1x USB 2.0 (5Vdc 3A) (power only)
|
1x USB 2.0 (5Vdc 3A) (power only)
|
| Audio | 5w speaker, 1x 3.5mm AUX out | 1x 3.5mm AUX out | 1x 3.5mm AUX out |
| Weight without stand | 620g / 1.37lbs\* | 2.2kg / 4.9lbs | 7.6kg / 16.8lbs |
| Weight with stand | 620g / 1.37lbs\* | 3.6kg / 7.9lbs | 11.3kg / 24.9lbs |
| Display thickness | 22mm / 0.87" | 1.7cm / 0.67" | 2.2cm / 0.87" |
| Dimensions without stand or media player (W x H x D) | 210 x 144 x 22 mm |
24cm x 39.1cm x 3.6cm 9.4" x 15.4" x 1.4"
|
38.8cm x 65cm x 5cm 15.3" x 25.6" x 2"
|
| Dimensions with stand and media player (W x H x D) | 210 x 144 x 22 mm |
24cm x 44.3cm x 19cm 9.4" x 17.4" x 7.5"
|
38.8cm x 73.8cm x 25.4cm 15.3" x 29.1" x 10"
|
| Indicators | None |
Dim Red LED: Off Red LED: Standby Green LED: Display ON
|
No LED: Off Red LED: Standby Green LED: Display ON
Power button Menu / Enter button Up button Down button Exit button
|
Power button Menu / Enter button Up button Down button Exit button
|
## Demo Media Player
| Spec | musubi | HLD 16" | HLD 27" |
| ---------- | ---------------------- | ---------------------- | ---------------------- |
| Computer | Custom Arm SoC | Raspberry Pi 4 | Raspberry Pi 4 |
| Storage | 8GB (planned) | 16GB (USB drive) | 16GB (USB drive) |
| RAM | TBC | 4GB | 4GB |
| Ethernet | No | Yes | Yes |
| Wi-Fi | No | No | No |
| Bluetooth | No | No | No |
| USB ports | 1x USB 2.0 (USB-C) | 2x USB 2.0, 2x USB 3.0 | 2x USB 2.0, 2x USB 3.0 |
| HDMI ports | None | 2x Micro HDMI ports | 2x Micro HDMI ports |
| Power | 5Vdc, 3A input (USB-C) | 5Vdc, 3A input (USB-C) | 5Vdc, 3A input (USB-C) |
## Installation
| Spec | musubi | HLD 16" | HLD 27" |
| -------------- | --------------- | ------------- | ------------- |
| VESA mount | None | 75 x 75mm | 100 x 100mm |
| Orientation | Portrait only | Portrait only | Portrait only |
| Stand included | Yes (kickstand) | Yes | Yes |
## Safety and lifespan
| Spec | musubi | HLD 16" | HLD 27" |
| ------------------------- | -------- | --------------------- | --------------------- |
| Certification | TBC | FCC, CE (EMC and LVD) | FCC, CE (EMC and LVD) |
| EMC class | TBC | A | A |
| Environmental certificate | TBC | RoHS 2.0 | RoHS 2.0 |
| Device warranty | 1 year | 1 year | 1 year |
| Expected device life span | 10 years | 10 years | 10 years |
## What comes in the box
### musubi
* 1x HLD 7" Display with built in media player
* 1x USB-C cable for power and data transfer
* 1x power adapter with swappable AC input blades (US,EU,UK,AU)
### 16" HLD
* 1x HLD 16" Display
* 1x Demo Media Player
* 1x Micro HDMI to HDMI Cable, 15cm
* 1x USB-A to USB-C Cable, 15cm
* 1x USB-A to USB-C Adapter
* 1x Power Adapter with swappable AC input blades (US, EU, UK, AU)
* 1x HDMI Cable (79" / 2m)
* 1x Microfiber Cleaning Cloth
* 1x HLD 16" Installation, Safety & Wall Mount Guide
* 1x Desktop stand and screws
### 27" HLD
* 1x HLD 27" Display
* 1x Demo Media Player
* 1x Micro HDMI to HDMI Cable, 15cm
* 1x USB-A to USB-C Cable, 15cm
* 1x USB-A to USB-C Adapter
* 1x Power Adapter (power cord varies by country)
* 1x HDMI Cable (79" / 2m)
* 2x Microfiber Cleaning Cloth
* 1x HLD 27" Installation, Safety & Wall Mount Guide
* 1x Desktop stand and screws
## Documents
### Safety guides
{% file src="/files/x1458WYzHIa1SZPcIq9X" %}
{% file src="/files/L1eG4UANd0vmUwC92LF3" %}
# Media specs and encoding
Looking Glass Hololuminescent Displays ship with an included [Demo Media Player](/managing-content/using-the-demo-media-player). This media player is intended to allow customers to quickly preview content on the HLD displays and is not meant for full large-scale installations. To encode content on your Demo Media Player, please see the following instructions.
| Demo Media Player target | Resolution | Source aspect ratio | Codec | Output orientation |
| ------------------------ | ---------- | ------------------- | ---------- | ----------------------------------- |
| HLD 16" | 1080p | 9:16 | HEVC/H.265 | Rotated 90 degrees counterclockwise |
| HLD 27" | 4K | 9:16 | HEVC/H.265 | Rotated 90 degrees counterclockwise |
| HLD 86" | 4K | 9:16 | HEVC/H.265 | Rotated 90 degrees counterclockwise |
Use a frame rate of 30 fps or 60 fps and the `bt709` color space. HLD Author selects the target resolution, orientation, and codec automatically.
#### Safe Areas
For a 4K video (2160x3840) we recommend leaving 100 pixels on the top and bottom, and 108 pixels on either side (\~3% on the top and bottom, and \~3% on either side). This makes the final active area 1944x3640. You can preview this safe area in our templates and in [HLD Author](https://hldauthor.lookingglassfactory.com).
#### Masking
Content for HLD systems does not need an alpha channel. The display itself handles the blending between the video and the holographic volume built into the display. The effect is similar to a *multiply* blend mode like you'd see in photo or video editing tools. Content should be "pre-matted" with the desired background color.
### Encoding
Looking Glass provides [HLD Author](/apps-and-tools/hld-author), a browser-based tool for importing videos, images, and 3D media; adjusting and previewing the content; and exporting an MP4 for the selected playback destination. When exporting for the [HLD Demo Media Player](/managing-content/using-the-demo-media-player), choose the exact HLD target and HLD Author will apply its required resolution, rotation, and HEVC codec. BrightSign and General exports use standard portrait H.264 instead. If you use a custom encoding pipeline, follow the specifications for your playback target.\
\
If you're unable to use [HLD Author](/apps-and-tools/hld-author), Demo Media Player content must be rotated counterclockwise by 90 degrees (via an FFmpeg command like `-vf transpose=2`) and encoded to the resolution and HEVC profile required by the target HLD. This means the video will appear sideways if viewed normally. Do not apply this rotation to BrightSign or General playback files.
For an HLD 27" or HLD 86" 4K source, the standard FFmpeg command is:
`ffmpeg -i input.mp4 -vf transpose=2 -c:v libkvazaar -crf 18 -pix_fmt yuv420p -tag:v hvc1 -c:a aac -ar 48000 output.mp4`
Or, if you're using a GPL version of FFmpeg, you can run the following command:
`ffmpeg -i input.mp4 -vf transpose=2 -c:v libx265 -crf 18 -pix_fmt yuv420p -tag:v hvc1 -c:a aac -ar 48000 output.mp4`
Note that this includes the transpose step, which means it's assuming we're starting with a portrait-oriented video.